How to Organize a Small Pantry: A Simple System That Works
A small pantry doesn’t need to hold everything perfectly. It needs to make the food you actually use easy to see, reach, use, and put away.
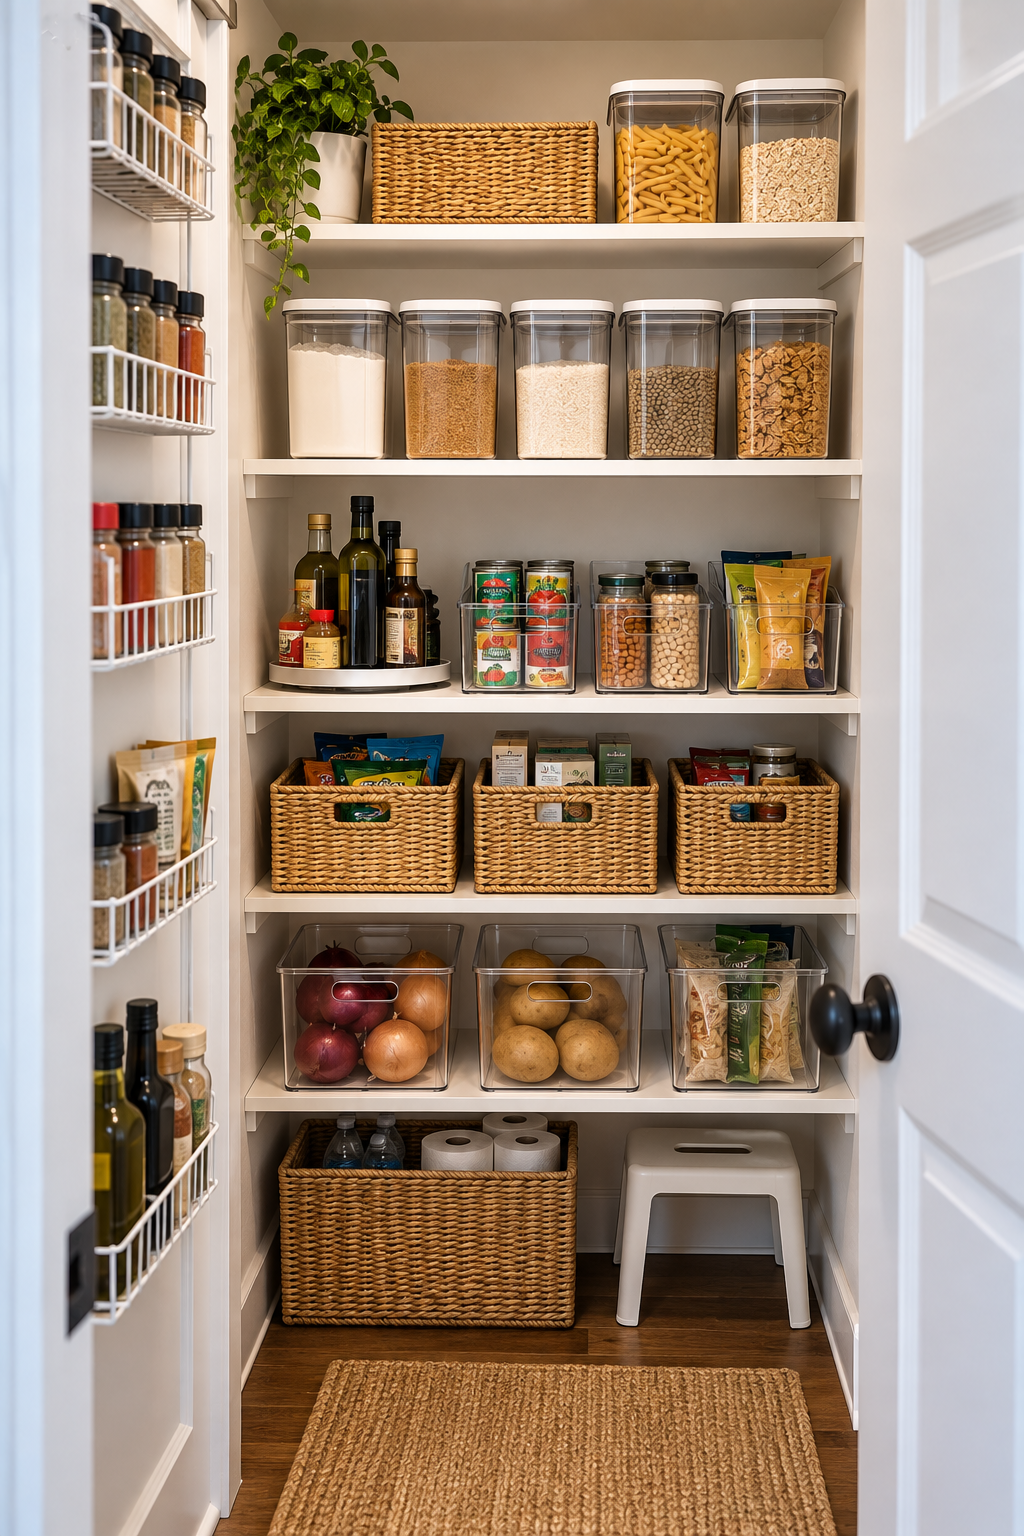
The biggest mistake is buying organizers before figuring out why the pantry feels difficult. Start with the space itself. Measure it. Find the constraint. Create simple zones. Then choose storage that solves the problem.
Our system is simple:
MEASURE → DIAGNOSE → ZONE → MATCH → RESET
Key Takeaways
- Measure the pantry before buying storage.
- Find the biggest access or space constraint first.
- Zone food around frequency of use, then category.
- Choose the smallest organizer that solves the actual problem.
- Test the system through a normal grocery cycle before expanding it.
If you want the broader pantry system first, see our pantry organization ideas guide. This article focuses specifically on adapting that thinking to limited pantry space.
The 5-Step Small Pantry System
Instead of trying to make every inch look full, work through these five steps in order.
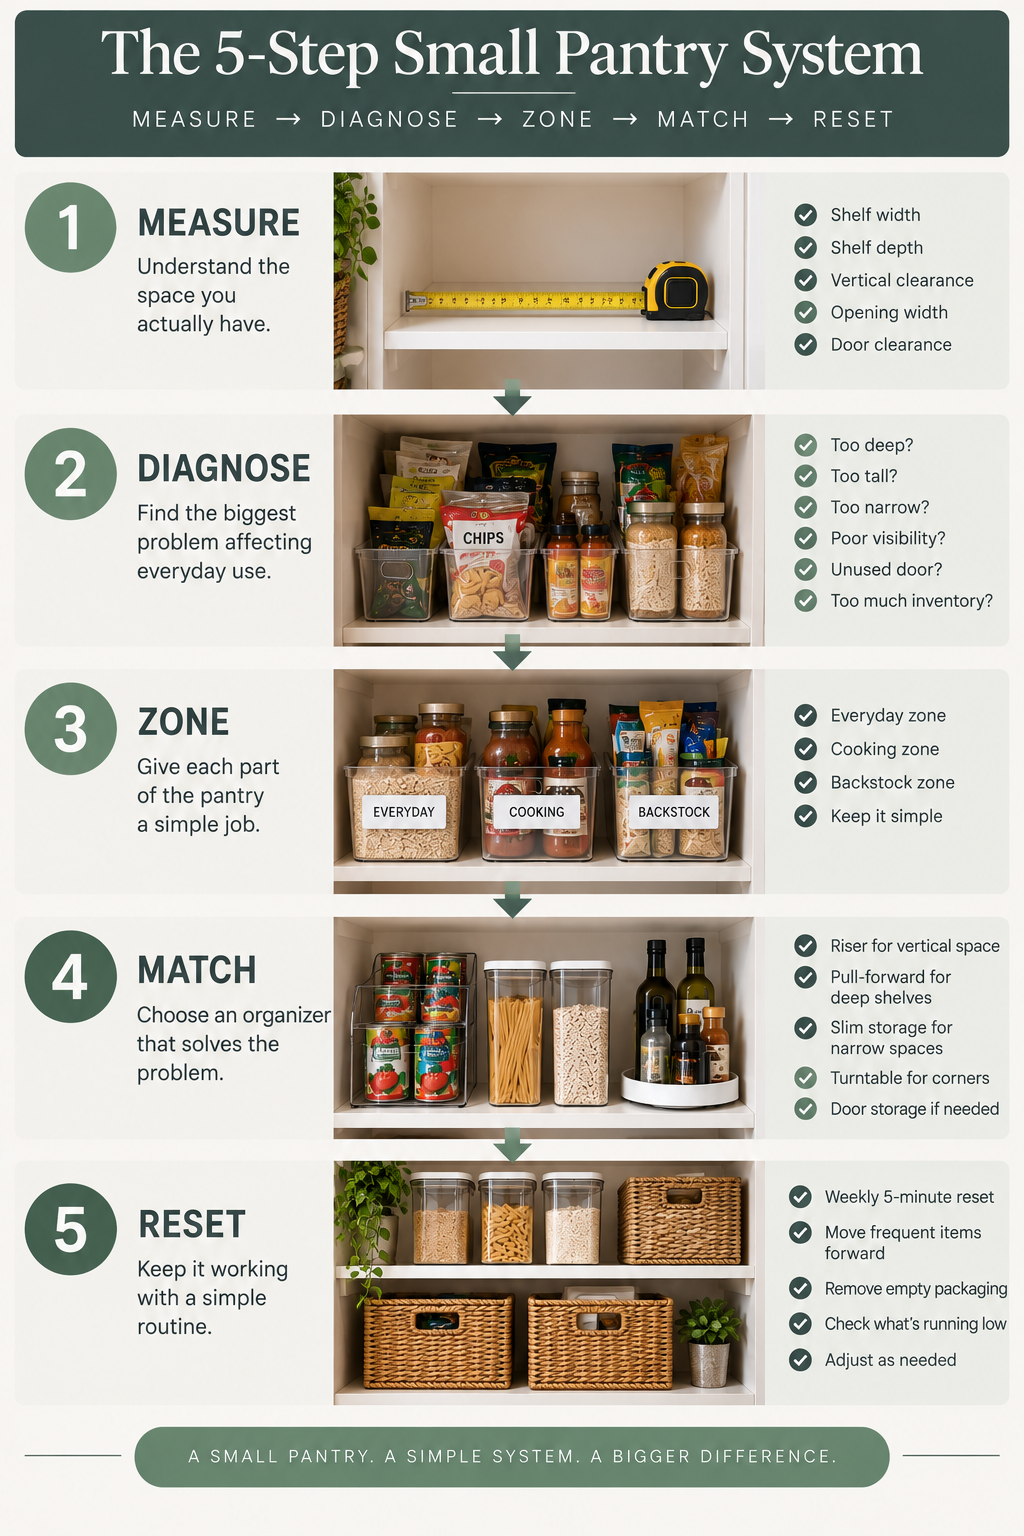
Measure
Measure the shelves, clearance, opening, and obstacles before buying storage.
Diagnose
Find the biggest problem making the pantry difficult to use.
Zone
Group food around how often and how easily you need to access it.
Match
Choose the smallest organizer or storage change that solves the actual problem.
Reset
Use simple routines to keep the system working through normal grocery cycles.
Step 1: Measure the Space You Actually Have
Before buying a bin, riser, turntable, or container, measure the pantry.
Small spaces are especially unforgiving when an organizer is even slightly too large. A product that looks useful online can make the pantry harder to access once it is inside.
- Shelf width: measure the usable space from side to side.
- Shelf depth: measure from the front edge to the back wall.
- Vertical clearance: measure the space between shelves.
- Opening width: check the actual opening if the pantry has a narrow door.
- Door clearance: make sure a door organizer will not collide with shelves or stored food.
- Fixed obstacles: note hinges, trim, pipes, brackets, or other features that reduce usable space.
Don’t measure only the shelf. Measure the space an organizer must occupy and the space needed to use it.
A pull-forward bin needs room to come forward. A turntable needs room to rotate. A tall riser needs enough clearance above it.
Step 2: Find Your Pantry’s Biggest Constraint
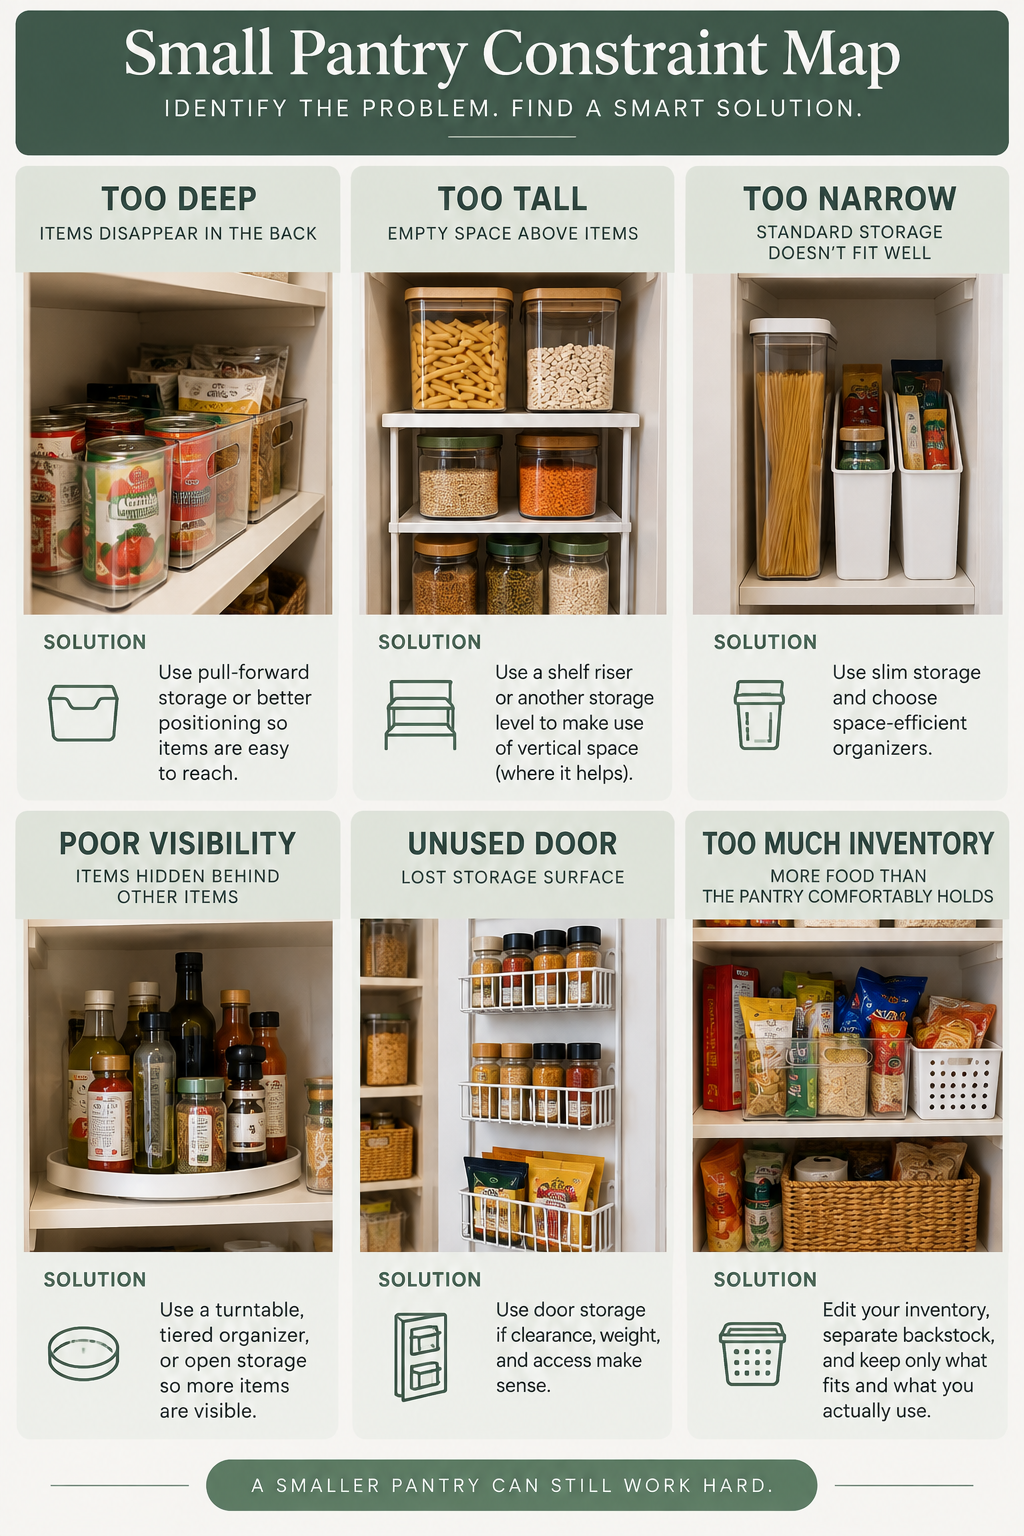
Once you know the dimensions, diagnose the problem.
Don’t start by asking, “What organizer should I buy?”
Ask: “What is making this pantry difficult to use?”
| What you notice | Likely constraint | Possible direction |
|---|---|---|
| Lots of empty space above items | Wasted vertical space | Add another accessible storage level |
| Food disappears in the back | Excess depth | Use pull-forward storage or improve positioning |
| Shelves are very narrow | Limited footprint | Use slim storage and reduce bulky items |
| Items are hidden behind other items | Poor visibility | Elevate, separate, or reposition items |
| The pantry door is unused | Lost storage surface | Consider slim door storage if clearance allows |
| More food arrives than the pantry comfortably holds | Excess inventory | Edit duplicates and control backstock |
Don’t Fix Everything at Once
A small pantry can have several problems at the same time. Trying to solve all of them immediately usually creates a collection of organizers that compete for the same limited space.
Start with the problem that causes the most daily friction.
If you can’t reach food in the back, fix access first. If the shelves have large empty gaps above the food, fix vertical space first. If the pantry is simply overloaded, edit the inventory before adding storage.
Step 3: Create Zones Around How You Use the Pantry
Once you’ve identified the space constraint, decide where things belong.
In a small pantry, organizing by category alone isn’t always enough. Frequency matters too.
A better starting point is: frequency first, category second.
Everyday Zone
Keep the foods you reach for most often in the easiest-to-see and easiest-to-reach area.
Think breakfast staples, snacks, frequently used grains, or other foods that are part of your normal routine.
Cooking Zone
Group ingredients that are commonly used while preparing meals.
This can include canned ingredients, cooking staples, sauces, and baking items depending on how your household uses the pantry.
Backstock & Occasional Zone
Less frequently used or extra inventory can go higher, farther back, or into less convenient areas.
The goal is to protect the prime-access space for things you actually use every day.
The goal is to reduce the number of decisions you make when putting groceries away or looking for something.
Step 4: Match the Organizer to the Problem
Now you can choose storage.
The organizer should solve a diagnosed constraint. It should not simply fill an empty space because the product looks useful.
| Problem | Possible solution | Watch out for |
|---|---|---|
| Empty vertical space | Shelf riser | Don’t make the lower items harder to reach |
| Deep shelves | Pull-forward bin | Don’t hide the contents inside an oversized bin |
| Bottles or jars in awkward corners | Turntable | Don’t sacrifice too much shelf footprint |
| Cans disappearing | Tiered organizer | Match the width to your actual inventory |
| Small loose packages | Open bin | Don’t overfill it |
| Narrow shelf | Slim organizer | Measure the footprint first |
| Unused pantry door | Slim door storage | Check door and shelf clearance |
| Awkward dry-food packaging | Appropriate container | Don’t decant just for appearance |
If hidden cans are your main problem, our guide to Best Can Organizers for Pantry goes deeper into tiered racks, FIFO systems, and fit checks.
As an Amazon Associate I earn from qualifying purchases. Some links below are paid links, which means Simply Tidy Home may earn a commission if you purchase through them, at no additional cost to you.
For Unused Vertical Space
A shelf riser can create another accessible level when there is useful clearance above the food already sitting on the shelf.
One example is the SONGMICS Cabinet Organizer Shelf, Set of 2. The two separate shelves can be useful when you need another storage level without committing the entire shelf to one large organizer.
Best fit if: your pantry has noticeable vertical gaps and the existing shelf arrangement leaves useful space above your food.
For Deep Shelves and Poor Access
A turntable can make small bottles, jars, spices, and condiments easier to reach when they would otherwise become difficult to grab.
The Kitchen Spaces Two-Tier Lazy Susan has two levels and rotates so you can bring items toward you instead of reaching blindly into the back.
Best fit if: the shelf has enough width and height for a rotating organizer and the items stored there are suitable for circular storage.
For Deep Shelves and Loose Packages
A handled bin can turn several loose items into one movable group. Instead of reaching around individual packages, you pull the category forward.
The clear mDesign Deep Plastic Kitchen Storage Organizer Bin is a 2-pack with built-in handles. Its larger footprint makes measuring especially important before buying.
Best fit if: your shelf is deep enough to benefit from pull-forward storage and the items you store together make sense as one category.
How to Fix a Small Pantry With Deep Shelves
Deep shelves can create one of the most frustrating small-pantry problems: you have plenty of shelf depth, but the back portion becomes difficult to use.
Start with the Reach Test:
Can I reach the item in the back without moving something in front of it?
If the answer is no, the problem isn’t necessarily that you need more storage. The problem may be that your current storage arrangement makes the available depth difficult to use.
Depending on the items, you can:
- Move everyday items toward the front.
- Use a pull-forward bin for a group of smaller items.
- Use a turntable for bottles and jars.
- Reduce the number of layers of loose food stacked in front of one another.
- Move backstock to less accessible areas.
Don’t automatically fill the entire depth. A little unused space can be better than a shelf that requires constant rearranging.
How to Use Vertical Space Without Making the Pantry Harder to Use
Small pantries often have another problem: the shelves are too far apart for the food sitting on them.
That unused vertical clearance looks like wasted space, but adding another level only helps if both levels remain accessible.
After adding another level, can you still comfortably see and remove the items underneath it?
A shelf riser can work well when the answer is yes. But don’t add a second level simply because there is room for one.
Heavy items are also better kept where they can be lifted safely and easily. The highest shelf should not automatically become the place for the heaviest pantry stock.
How to Use a Pantry Door Without Creating a New Problem
The pantry door can provide useful storage, but it is not automatically free space.
Before adding a door organizer, check:
- How far the door opens.
- Whether the shelves interfere with the organizer.
- Whether stored items will collide with pantry shelves.
- How much weight the door can comfortably carry.
- Whether the added storage makes the pantry opening narrower or harder to use.
For a dedicated guide to this problem, see our pantry door organization ideas. If you are ready to compare specific products, see our Best Pantry Door Organizers guide.
Small Pantry Organization by Pantry Type
Narrow Pantry
In a narrow pantry, width becomes the main constraint. Avoid bulky organizers that consume the little usable footprint you have.
Prioritize slim storage, clear access paths, and keeping everyday items where they can be reached without moving several other things.
Deep Pantry
A deep pantry needs an access strategy more than it needs maximum storage.
Use the front for frequent-use items and consider pull-forward storage or rotating storage where it genuinely improves access.
Small Pantry Closet
A pantry closet often has more vertical room than shelf width.
Measure every shelf independently. Don’t assume all shelves have the same usable clearance or depth.
Pantry Cabinet
Pantry cabinets can look spacious until you account for doors, hinges, shelf depth, and limited vertical clearance.
Treat each shelf like its own small storage zone and make sure organizers don’t interfere with the cabinet doors.
Small Pantry With a Door
A door can become useful storage, but only after clearance has been checked.
If you want to explore this option further, see our pantry door organization guide.
No Dedicated Pantry
You don’t need a traditional pantry to create a pantry system.
A combination of cabinet shelves, a designated food-storage zone, and consistent categories can create the same basic system.
The principle remains the same: measure the space, diagnose the constraint, create zones, and match storage to the actual problem.
How to Organize a Small Pantry Without Buying Anything
You can often improve a small pantry before buying a single organizer.
- Remove empty packaging and obvious trash.
- Consolidate duplicate items where practical.
- Group similar foods together.
- Move rarely used foods away from prime-access areas.
- Put everyday foods where they are easiest to see and reach.
- Adjust shelves if the pantry allows it.
- Create an “eat first” area for food that should be used soon.
- Live with the new arrangement before buying storage.
This step shows you what the pantry actually needs.
If the pantry becomes easier to use after editing and repositioning, you may need fewer organizers than you expected.
The One-Shelf Starting Point
If the entire pantry feels overwhelming, don’t organize the whole thing at once.
Pick one shelf.
Empty It
Remove everything from one shelf so you can see the actual space.
Measure It
Record width, depth, and vertical clearance.
Group It
Put similar foods together and separate everyday items from backstock.
Diagnose It
Find the main constraint: depth, height, visibility, footprint, or inventory.
Choose the Smallest Fix
Use repositioning first, then add storage only if the problem remains.
Put everything back and use the shelf through at least one normal grocery cycle.
If it works, repeat the process on the next shelf.
This prevents you from buying a complete collection of organizers before knowing what your pantry actually needs.
Small Pantry Mistakes That Waste Space
Buying Organizers Before Measuring
A product that is slightly too wide, deep, or tall can create more frustration than storage.
Filling Every Empty Inch
Empty space is not automatically wasted space. Some clearance is necessary to see, reach, remove, and return food.
Using Oversized Containers
Large containers can make a pantry look uniform while consuming valuable shelf footprint.
If containers are part of your system, choose them around the food you actually store and the space you actually have.
For a deeper guide to choosing pantry containers, see our guide to the best pantry storage containers.
Creating Too Many Categories
A small pantry doesn’t need a separate category for every type of food.
Too many categories can make putting groceries away harder because every item needs a more precise destination.
Making Daily Items Hard to Reach
If something you use every day requires moving three other things first, the system is working against you.
Putting Heavy Items Too High
The highest shelf is usually better for lighter and less frequently accessed items.
Using Deep Bins That Hide Their Contents
A bin is only helpful when it improves access. If you have to pull out a large bin every time you need one item, it may be solving the wrong problem.
Ignoring Door Clearance
Added door storage is useful only when the door can still open and close without interfering with the shelves.
Decanting Everything
Clear containers can improve visibility and consistency, but you don’t need to transfer every food into a container.
Use containers where they solve a real problem: awkward packaging, poor visibility, inconsistent stacking, or easier access.
Trying to Solve an Inventory Problem With Storage
If the pantry contains more food than the space can comfortably hold, another organizer may only delay the problem.
Edit duplicates and backstock first.
How to Keep a Small Pantry Organized
A small pantry doesn’t need a complicated maintenance routine.
The system should make the reset almost automatic.
- Return items to their zones.
- Move misplaced items back to their normal locations.
- Bring frequently used items forward.
- Check for empty packaging.
- Group duplicates together.
- Keep an “eat first” area visible when needed.
If the answer is no, the pantry may need less inventory, better zoning, or a small change to the storage system.
Don’t immediately buy another organizer. Diagnose the new friction first.
Frequently Asked Questions
How do I organize a very small pantry?
Start by measuring the space and identifying its biggest constraint. Then create simple zones based on frequency of use and choose storage only where it solves a specific problem. Don’t try to fill every inch.
How can I maximize space in a small pantry?
Maximize usable space rather than simply adding more storage. Use vertical clearance when it remains accessible, improve deep-shelf access, reduce unnecessary inventory, and keep everyday items easy to reach.
How do I organize a small pantry with deep shelves?
Start with the Reach Test: can you reach items in the back without moving things in front? If not, reposition everyday items, use pull-forward bins for appropriate categories, or consider rotating storage for bottles and jars.
Should I use the pantry door for extra storage?
You can if the door has enough clearance and the added weight and depth don’t interfere with the shelves. Measure the door area and check how the organizer will interact with the pantry before installing it.
Can I organize a small pantry without buying containers?
Yes. Start by removing empty packaging, consolidating duplicates, grouping similar foods, changing shelf placement, and moving rarely used items away from prime-access areas. Live with the arrangement before buying storage.
Are bins good for a small pantry?
Bins can be useful when they solve a specific access or grouping problem. Avoid oversized bins that hide their contents or consume more shelf space than the food they organize.
What should I put on the top shelf of a small pantry?
The top shelf is generally better for lighter and less frequently used items. Keep everyday and heavier items in locations where they are easier and safer to reach.
A small pantry doesn’t need more stuff to become easier to use.
It needs a system that matches the space.
MEASURE → DIAGNOSE → ZONE → MATCH → RESET
Find the constraint first. Then fix that problem—and only that problem.
The goal isn’t to make every inch look full. It’s to make every important inch useful.