
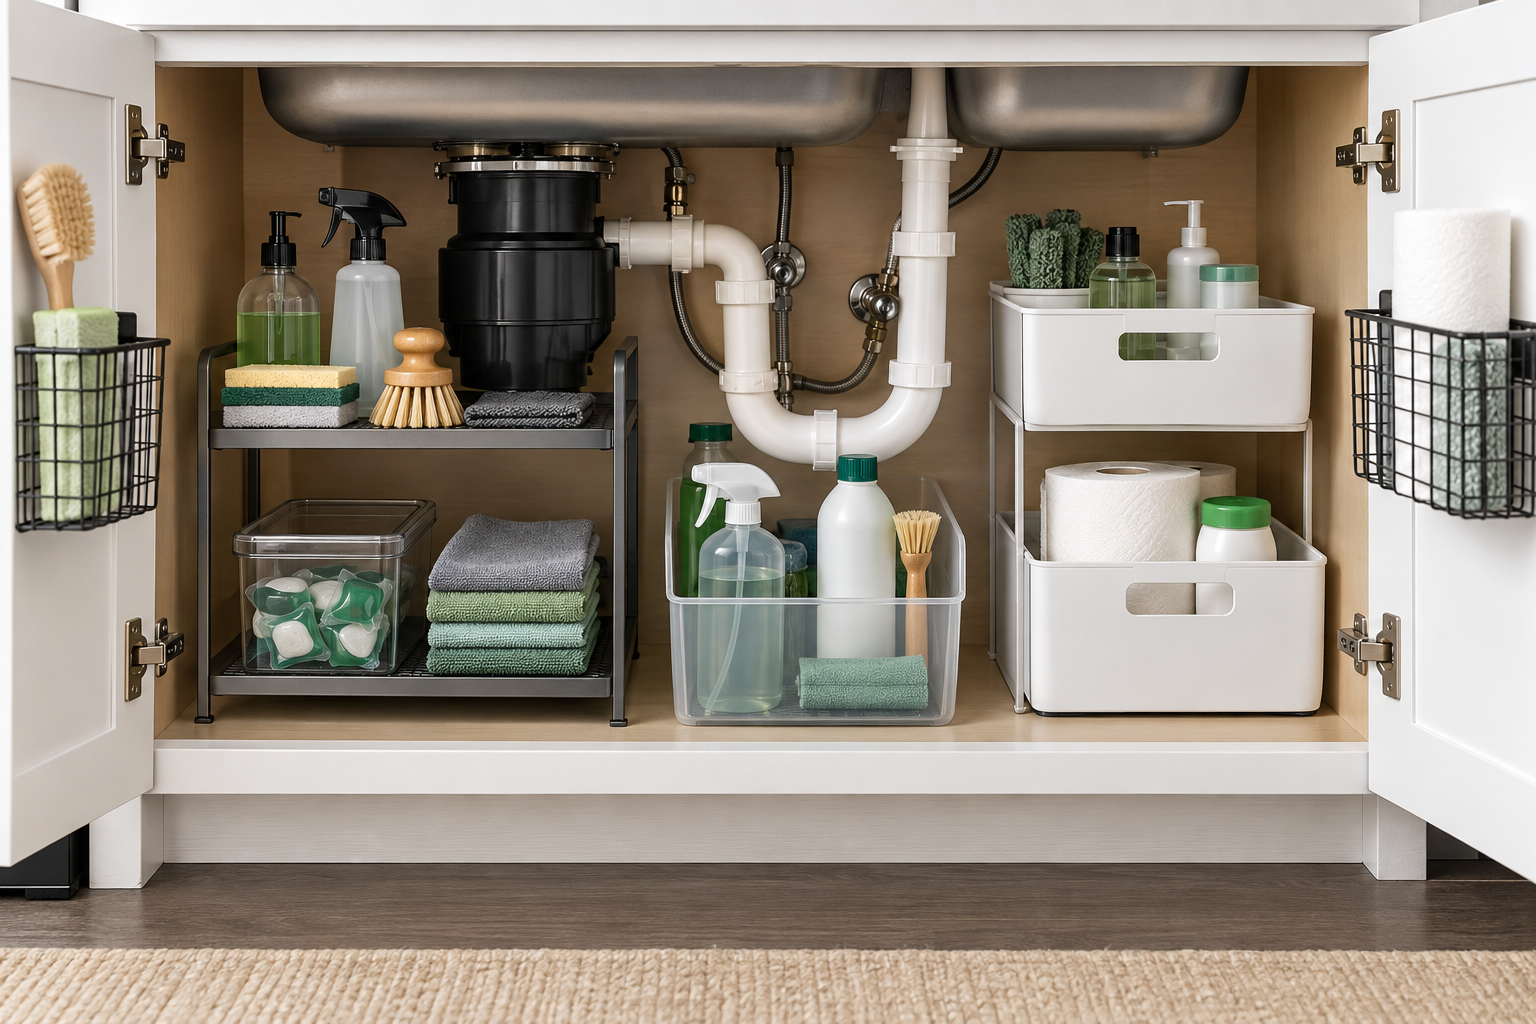
Under the kitchen sink is one of the easiest places to lose useful storage. The cabinet may look roomy when it is empty, but pipes, plumbing connections, equipment, cabinet hinges, and limited visibility can quickly make the space awkward to use.
The solution isn’t to fill every inch with organizers. It is to build a system around the space you actually have.
MEASURE → CLEAR → INSPECT → CATEGORIZE → MAP → ZONE → CHOOSE → TEST → MAINTAIN
Start with the cabinet itself, then decide what belongs there, where it should go, and which storage—if any—will genuinely make the space easier to use.
Why Under-Sink Storage Gets Difficult
The cabinet under a sink has an unusual combination of obstacles and storage needs.
- Supply pipes running through the cabinet
- A drainpipe taking up central space
- A garbage disposal or other equipment
- Shutoff valves that need to remain accessible
- Cabinet hinges that limit usable door space
- A deep area that is difficult to see
- Cleaning supplies of different sizes and shapes
This makes a standard shelf or storage bin less useful than it might be somewhere else.
The goal is not simply to make the cabinet look full and tidy. It should be easy to see what you have, easy to reach what you use, and easy to inspect when something needs attention.
1. Measure the Cabinet Before Organizing
Before removing everything or buying an organizer, measure the space.
Record:
- Interior width
- Interior depth
- Usable height
- Door opening
- Position of pipes
- Location of valves and other plumbing components
- Any equipment occupying the cabinet
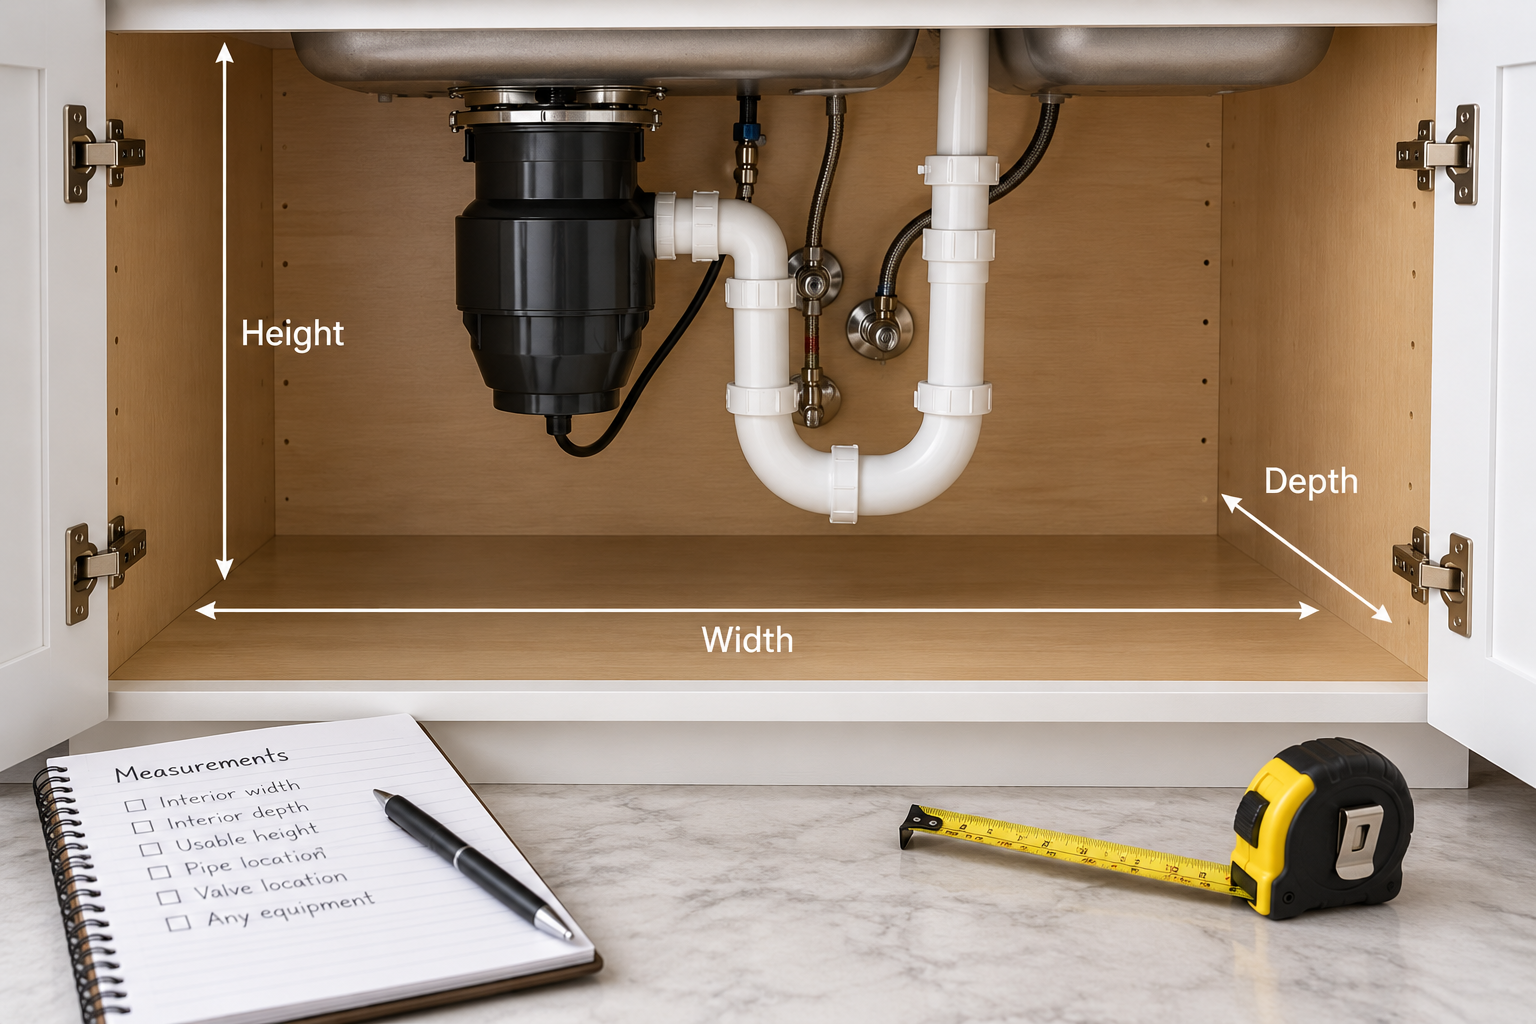
Don’t assume the usable dimensions are the same as the outside dimensions of the cabinet.
A pipe running through the middle can divide one apparently large cabinet into several smaller usable areas.
Instead of asking, “How big is my cabinet?”, ask, “Where can I actually place something without interfering with the plumbing?”
If your kitchen has several storage problems at once, you may also find it useful to start with our simple kitchen cabinet organization system before deciding where individual supplies should live.
2. Clear Everything Out
Take everything out of the cabinet. This gives you a clean view of the actual space and makes it easier to decide what deserves to go back.
As you remove items, group similar things together:
- Dishwashing supplies
- Cleaning products
- Sponges and scrubbers
- Trash and recycling supplies
- Extra household supplies
- Items that belong somewhere else
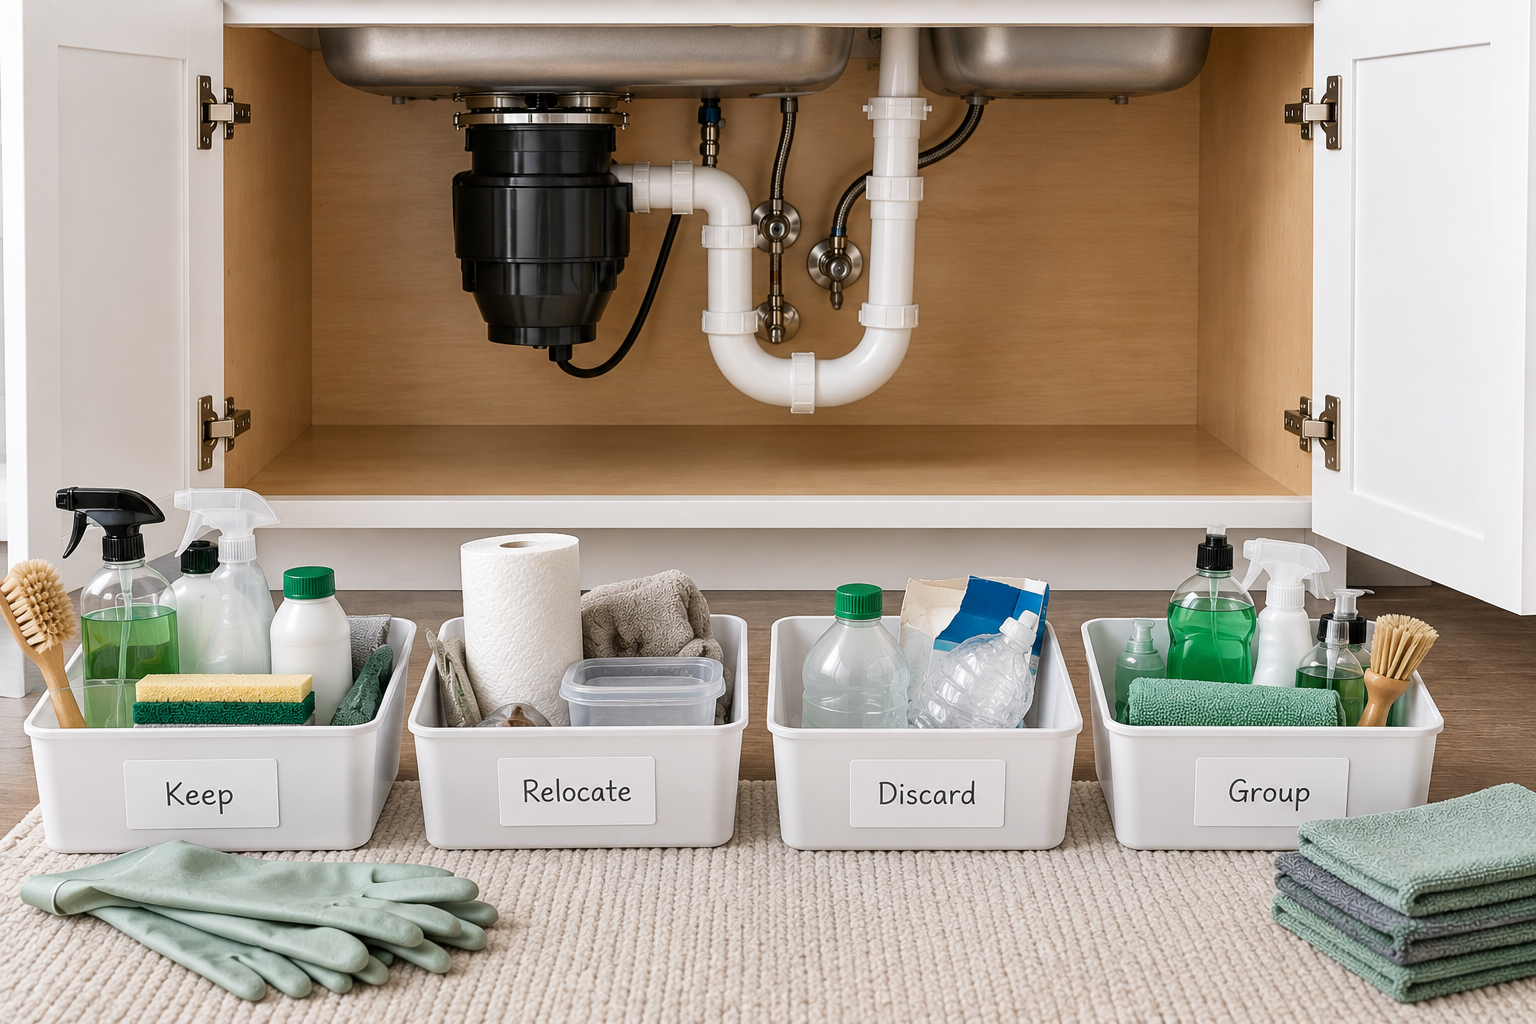
Don’t organize items you don’t need. If something is empty, unnecessarily duplicated, belongs somewhere else, or no longer earns its space, deal with it before designing the storage system.
3. Inspect the Space Before Adding Storage
Once the cabinet is empty, look carefully at the space.
Check for:
- Plumbing connections
- Shutoff valves
- Leaks or moisture
- Areas that are difficult to reach
- Door hinges
- Equipment that needs service access
- Surfaces that could make cleaning difficult
Inspect before you organize
An organizer that blocks access can make the cabinet less functional, even if it looks tidier. If you notice moisture, a leak, damaged plumbing, or another maintenance problem, deal with that issue before reorganizing the cabinet.
4. Decide What Actually Belongs Under the Sink
Not everything that happens in the kitchen needs to live under the sink.
Think about the cabinet’s job. Items commonly suited to this area are things you use around the sink or for kitchen cleaning, such as:
- Dishwashing supplies
- Sponges and scrubbers
- Cleaning cloths
- Dishwasher-related supplies
- Kitchen cleaning products
- Trash or recycling supplies, when the cabinet is designed for them
The exact mix depends on your kitchen and available storage.
Store items according to where you use them, not simply where you happen to have empty space.
If an item is small and used more naturally in another part of the kitchen, it may work better in a drawer, cabinet, or another nearby zone rather than competing for under-sink space.
5. Map the Space Around the Plumbing
Now look at the cabinet as a collection of usable zones rather than one large box.
You might have an everyday-supplies area on one side, open clearance around the plumbing, and a backup-supplies area elsewhere. But don’t copy a layout literally. Your pipes may run differently.
The useful idea is to identify the open areas around the plumbing and assign each one a purpose.
Keep the plumbing area clear
Don’t build storage around the assumption that pipes will never need attention. Anything placed near plumbing should be easy to move or remove when necessary.
6. Create Practical Under-Sink Zones
Once you’ve mapped the cabinet, create a few simple zones.
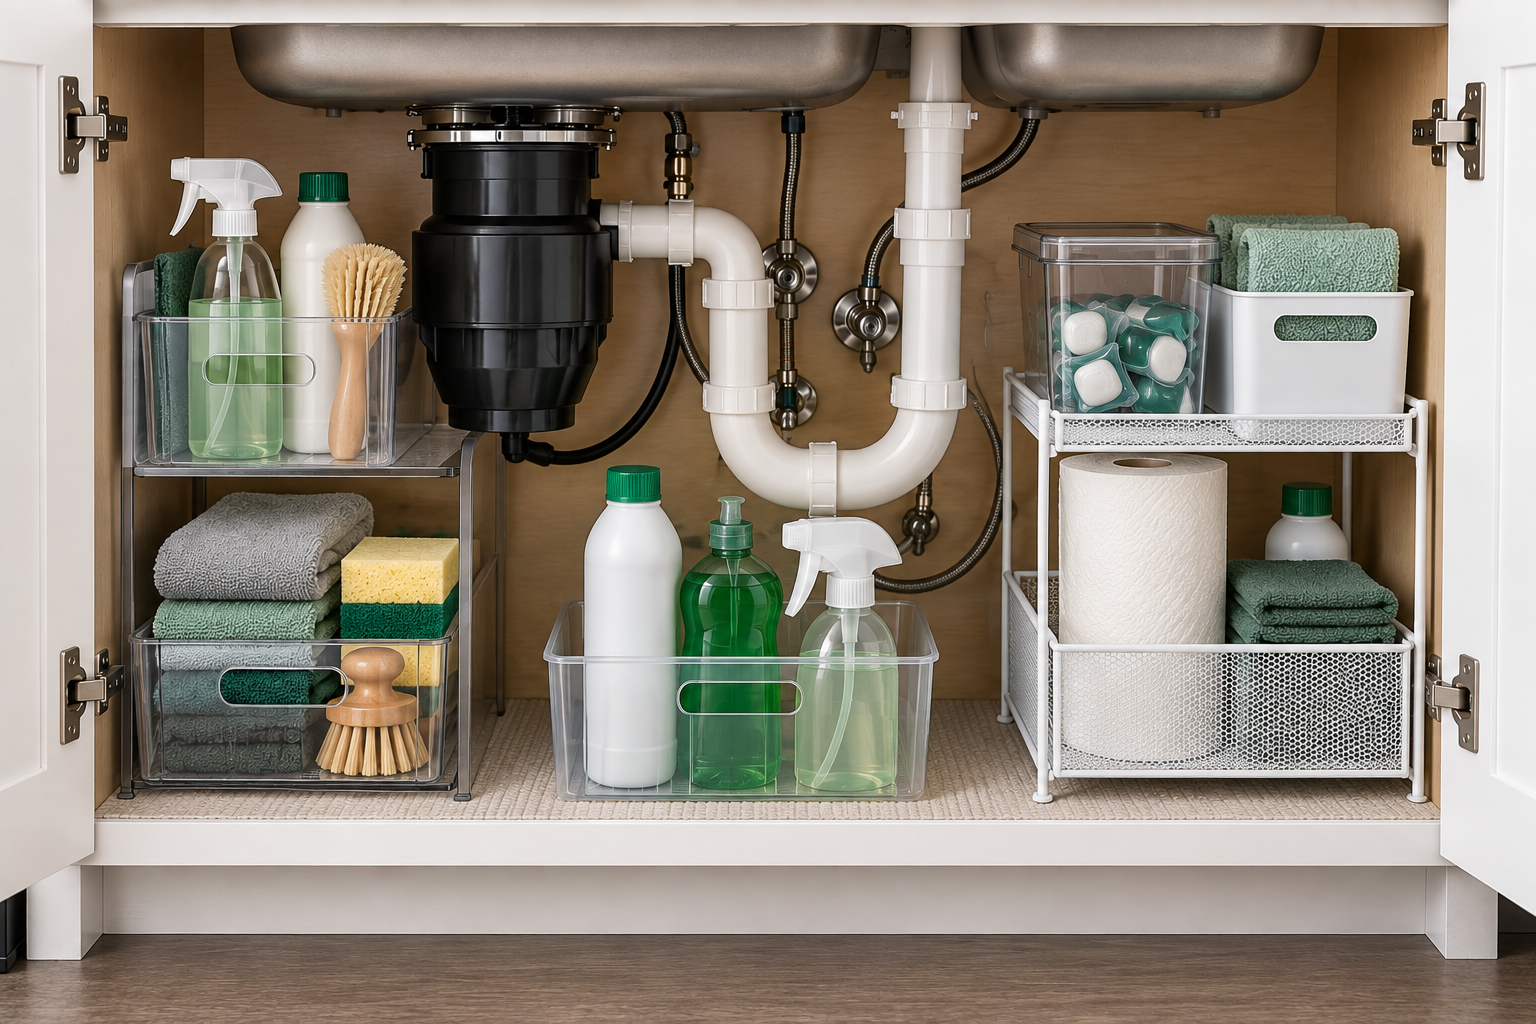
Everyday zone
Keep frequently used items where you can reach them without moving several other things.
Backup zone
Store less frequently used extras farther back or higher up where appropriate.
Equipment-clearance zone
Leave the area around pipes, valves, disposal equipment, or other components open enough for inspection and access.
Grab-and-go zone
Group small items that tend to disappear into the back so they can be removed as one unit.
The exact zones should follow your cabinet rather than forcing your cabinet to follow a predetermined layout.
7. Use Vertical Space Without Blocking Access
Under-sink cabinets often have unused vertical space. You may be able to use a compact shelf, narrow tiered organizer, removable basket, or small stackable container.
But height isn’t useful if the added storage blocks pipes or makes the back of the cabinet impossible to reach.
Can I still reach the items underneath it?
If the answer is no, you’ve probably created more storage than you can conveniently use.
8. Use the Cabinet Door Carefully
The inside of the door can provide useful storage for small, lightweight items.
It can work particularly well for things that are used frequently, relatively flat, and unlikely to interfere with the cabinet’s opening or closing.
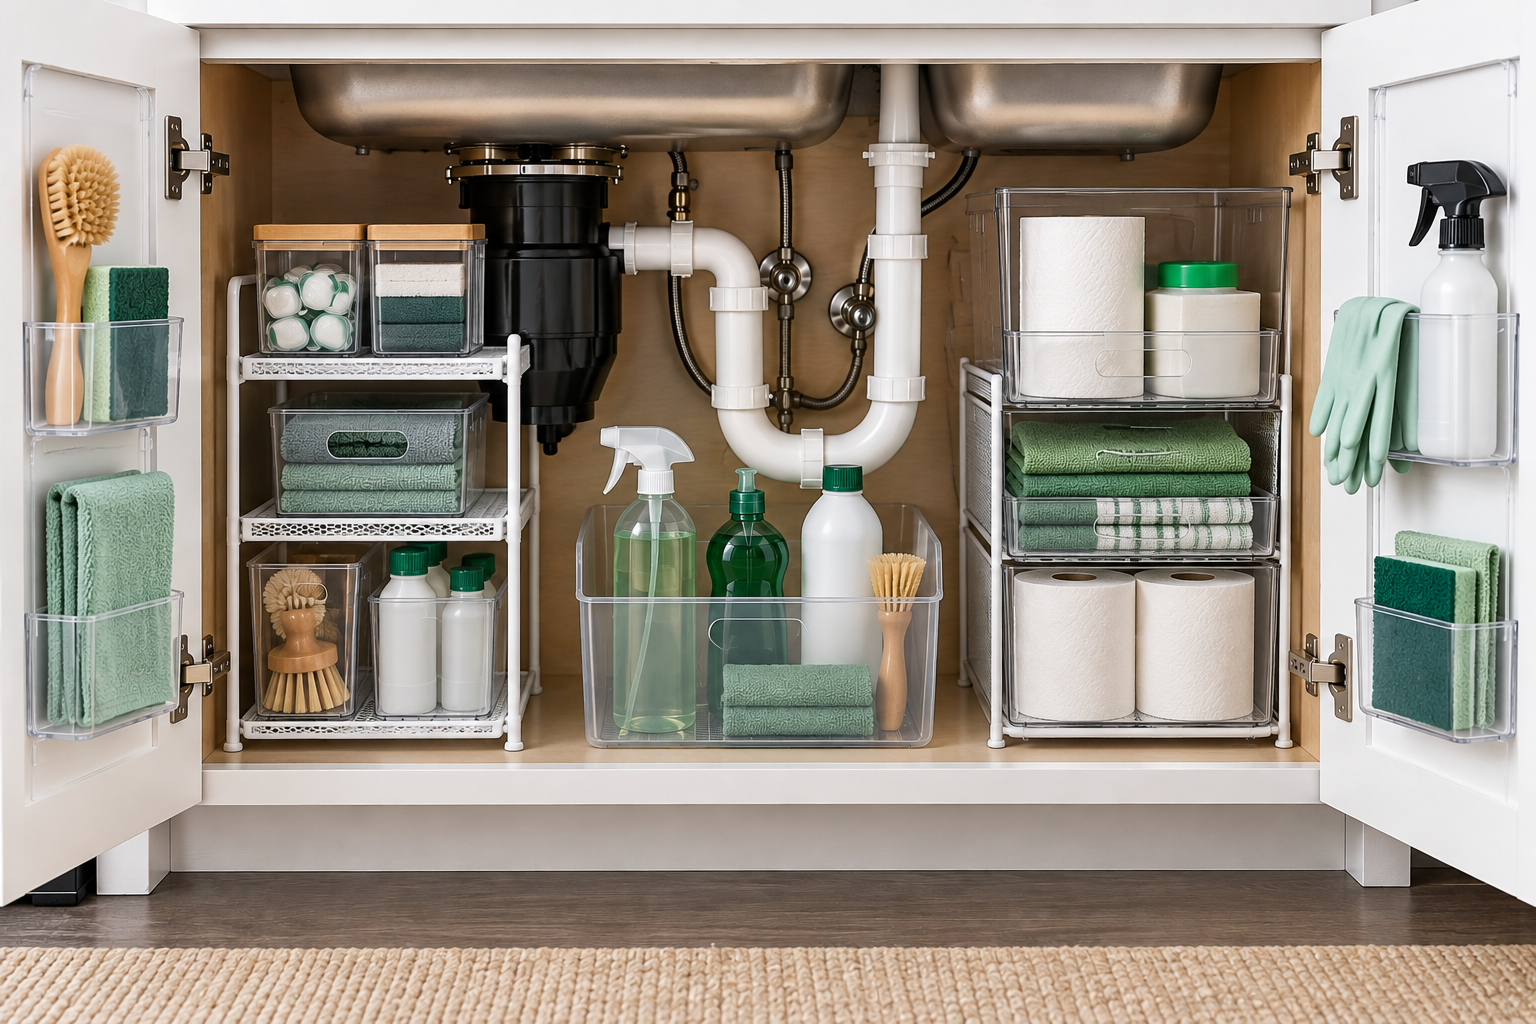
But don’t automatically attach storage to the door. Check the door clearance first. A door-mounted organizer that hits bottles, pipes, shelves, or equipment can make the entire cabinet harder to use.
9. Choose Organizers Only After Measuring
This is where many under-sink organization projects go wrong. The organizer comes first, and the cabinet has to somehow accommodate it.
Reverse that process:
Measure → map → identify the problem → choose storage.
For example:
- If small items disappear in the back, a removable bin may help.
- If vertical space is unused, a compact shelf may help.
- If frequently used supplies are difficult to reach, a pull-out solution may help.
- If the plumbing divides the cabinet, separate smaller zones may work better than one large organizer.
Match the organizer to the problem
If visibility is the problem, prioritize open or removable storage. If reach is the problem, consider easier-access storage. If height is the problem, look upward. If plumbing limits the width, use smaller independent zones.
The best organizer is not necessarily the one with the most compartments. It is the one that solves a specific problem without creating another one.
10. Test the System Before You Commit
Before permanently arranging everything, put the main items into their proposed zones.
Then test the cabinet:
- Open and close the door.
- Reach for your most-used supplies.
- Check whether you can see the back.
- Make sure plumbing and service components remain accessible.
- Try removing the storage containers you expect to move for cleaning or maintenance.
If something is difficult to reach now, it will probably become even more annoying after the cabinet gets busy.
11. Keep the Cabinet Easy to Inspect
A good under-sink system should make problems easier to notice, not hide them.
Avoid creating a dense wall of containers that makes the cabinet difficult to inspect. Leave enough visibility around important plumbing components.
It should be reasonably easy to answer:
- Is anything leaking?
- Is there moisture?
- Can I reach the shutoff valves?
- Can I see the plumbing connections?
- Can I remove this container if necessary?
A tidy cabinet that hides everything isn’t necessarily a well-organized cabinet.
Common Under-Sink Organization Mistakes
Filling every inch
Unused space isn’t automatically wasted space. Some empty space is necessary for access and flexibility.
Buying organizers before measuring
This often results in products that don’t fit around pipes or door hardware.
Blocking plumbing
Storage should work around the plumbing, not trap it behind a permanent wall of containers.
Keeping too many backups
Extra supplies can quickly consume the space needed for everyday items.
Putting frequently used items in the back
If you have to remove several things to reach the item you use every day, the system isn’t working.
Using containers that are too deep
Deep bins can hide small supplies and make the back of the cabinet difficult to reach.
Organizing by appearance instead of use
A cabinet can look beautifully uniform while still being frustrating to use. The better test is accessibility.
Create a Simple Reset Routine
Under-sink storage doesn’t need a complicated maintenance schedule. A quick reset can be enough.
- Return everyday items to their zones.
- Move supplies that need to be used sooner toward the front when appropriate.
- Remove empty containers.
- Return misplaced items to their proper rooms.
- Check for moisture or anything unusual.
- Make sure the plumbing area remains accessible.
You don’t need to reorganize the entire cabinet every time. The goal is to make the system easy enough that a small reset keeps it working.
Under-Sink Organization FAQ
What should I store under my kitchen sink?
Store items that make sense for the space and are used around the sink, such as cleaning and dishwashing supplies. The exact contents depend on your household and available storage.
How do I organize around the pipes under my sink?
First identify where the pipes and other fixed components are located. Then use the open areas around them as separate storage zones rather than trying to fit one large organizer across the entire cabinet.
Should I use a pull-out organizer under the sink?
A pull-out can be useful when items are difficult to reach in a deep cabinet, but it should only be used if it fits the cabinet’s actual dimensions and works around the plumbing and other obstacles.
How do I keep an under-sink cabinet from getting messy?
Give frequently used items consistent zones, avoid unnecessary backups, and use a short reset routine to return things to their places. Keeping the system simple makes it easier to maintain.
Should I use the cabinet door for storage?
You can if the door has enough clearance and the added storage doesn’t interfere with pipes, equipment, hinges, or the cabinet’s operation. Keep door storage limited to items that genuinely benefit from being there.
A Simple System Makes the Space Easier to Use
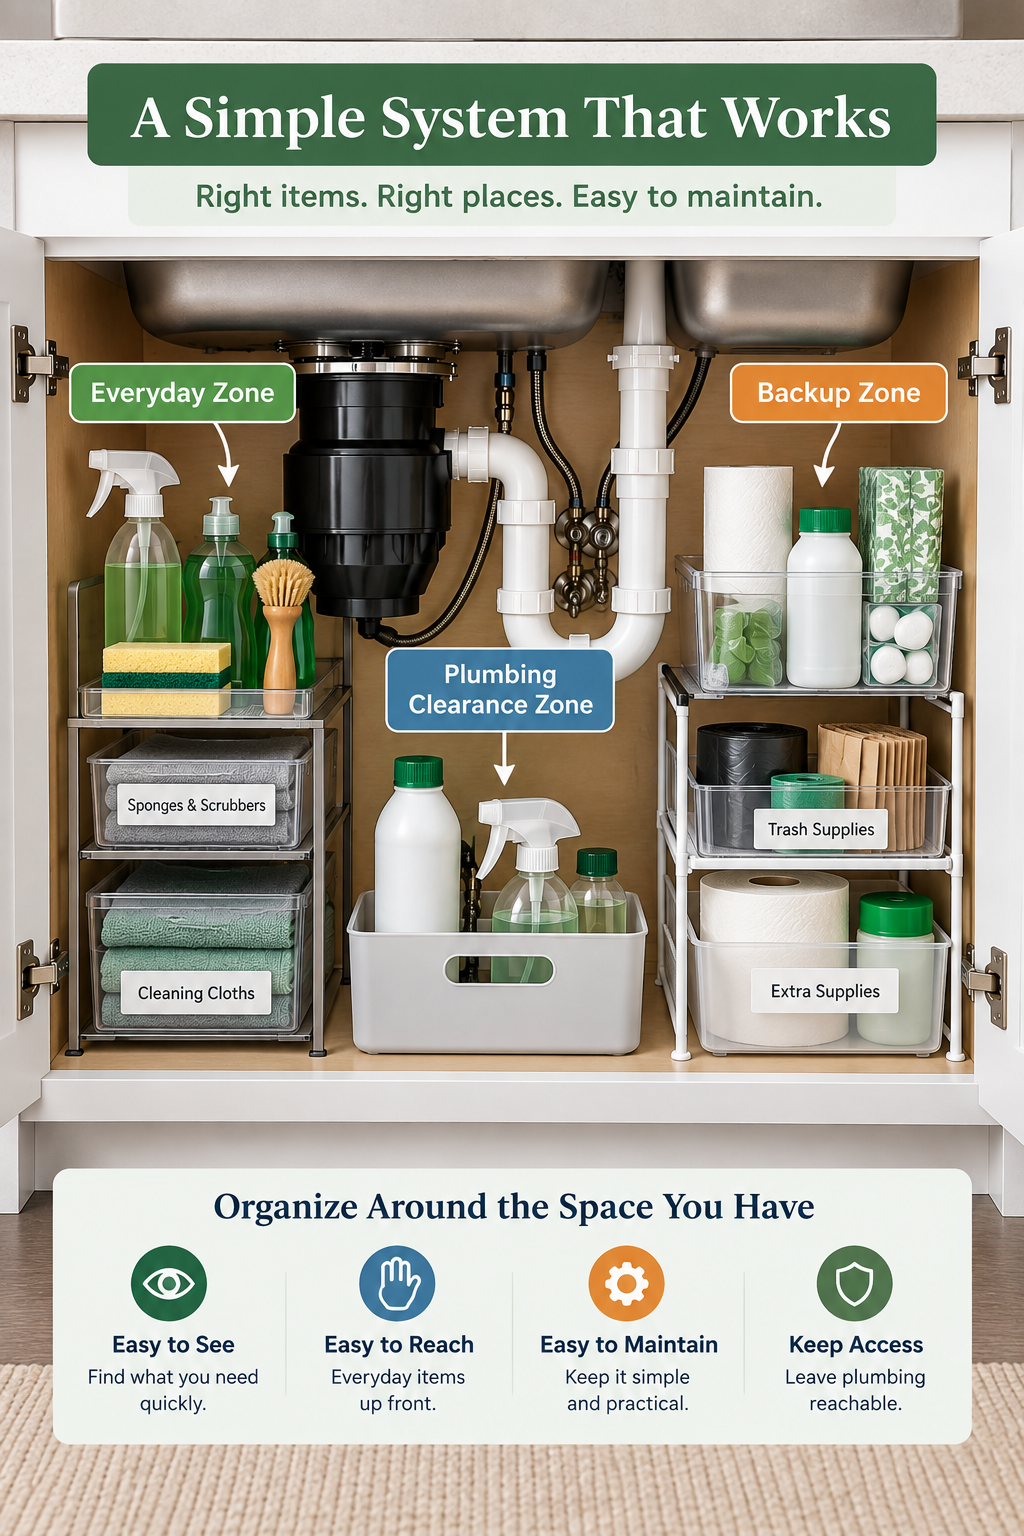
The cabinet under your kitchen sink doesn’t need to hold everything. It needs to hold the right things in the right places while leaving the plumbing and important access points workable.
Start by measuring the cabinet. Clear out what you don’t need. Inspect the space. Map the areas around the pipes, then create simple zones based on how you actually use your kitchen.
Only after that should you decide whether an organizer is necessary.
The result doesn’t have to look perfect. It simply needs to make everyday items easier to find, leave the important components accessible, and stay manageable when the cabinet gets used.
The best under-sink organization isn’t about fitting more into the cabinet. It’s about making the space work better with what is already there.