
UTILITY CLOSET ORGANIZATION
A utility closet works best when each category has a defined place based on how often it is used, how much space it needs, and how easily it must be accessed. The goal is not to fill every inch. It is to create a system that makes everyday items easy to reach while keeping bulky equipment, backups, and less-used supplies from taking over.
Quick Answer
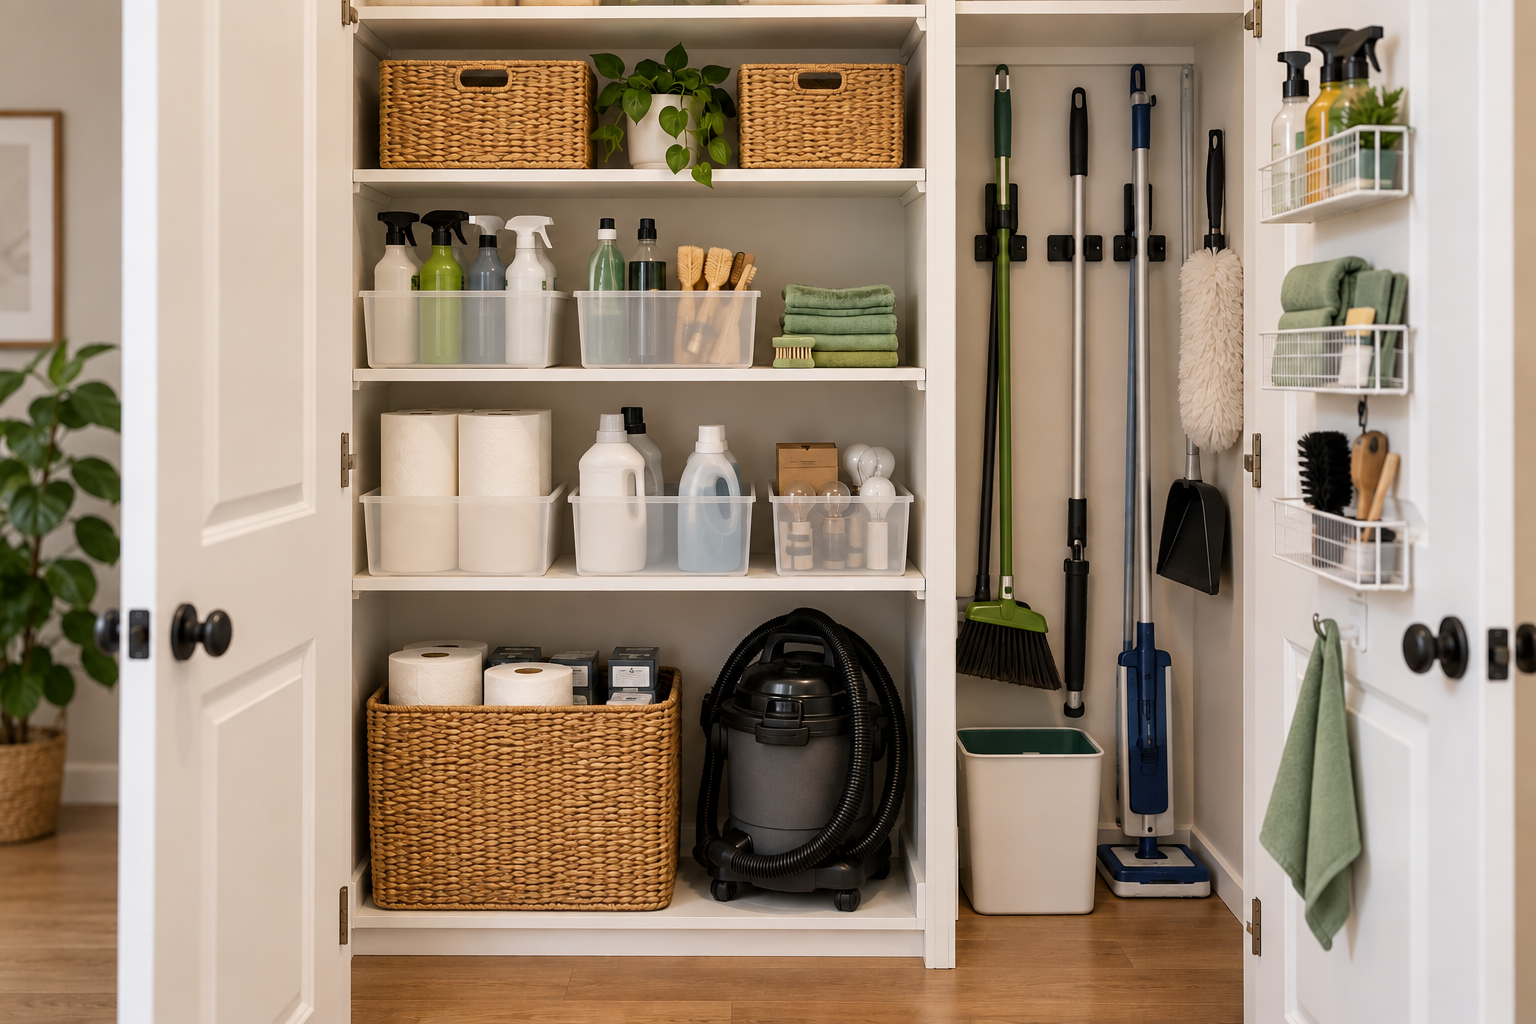
To organize a utility closet, first remove anything that does not belong there and group the remaining items by function, frequency of use, and physical requirements. Then measure the usable space, create functional zones, place frequently used items where they are easiest to reach, give tall tools and bulky equipment appropriate space, and control backup inventory. Choose storage only when it solves a specific problem, then test the closet during normal use and adjust anything that repeatedly becomes difficult to access.
THE KEY PRINCIPLE
Organize the utility closet around function and access, not maximum capacity.
A utility closet may contain cleaning supplies, long-handled tools, household maintenance items, equipment, and backups. These categories do not all need the same type of storage or the same level of access.
Why Utility Closets Become Difficult to Use
Utility closets often have to perform several jobs at once. That makes them different from a closet dedicated to one category.
Bottles may sit beside tools. A vacuum may compete with a broom for floor space. Backup supplies may gradually move into the easiest-to-reach area. Small household items can disappear behind larger equipment.
The result is often not simply a lack of storage. It is a lack of storage logic.
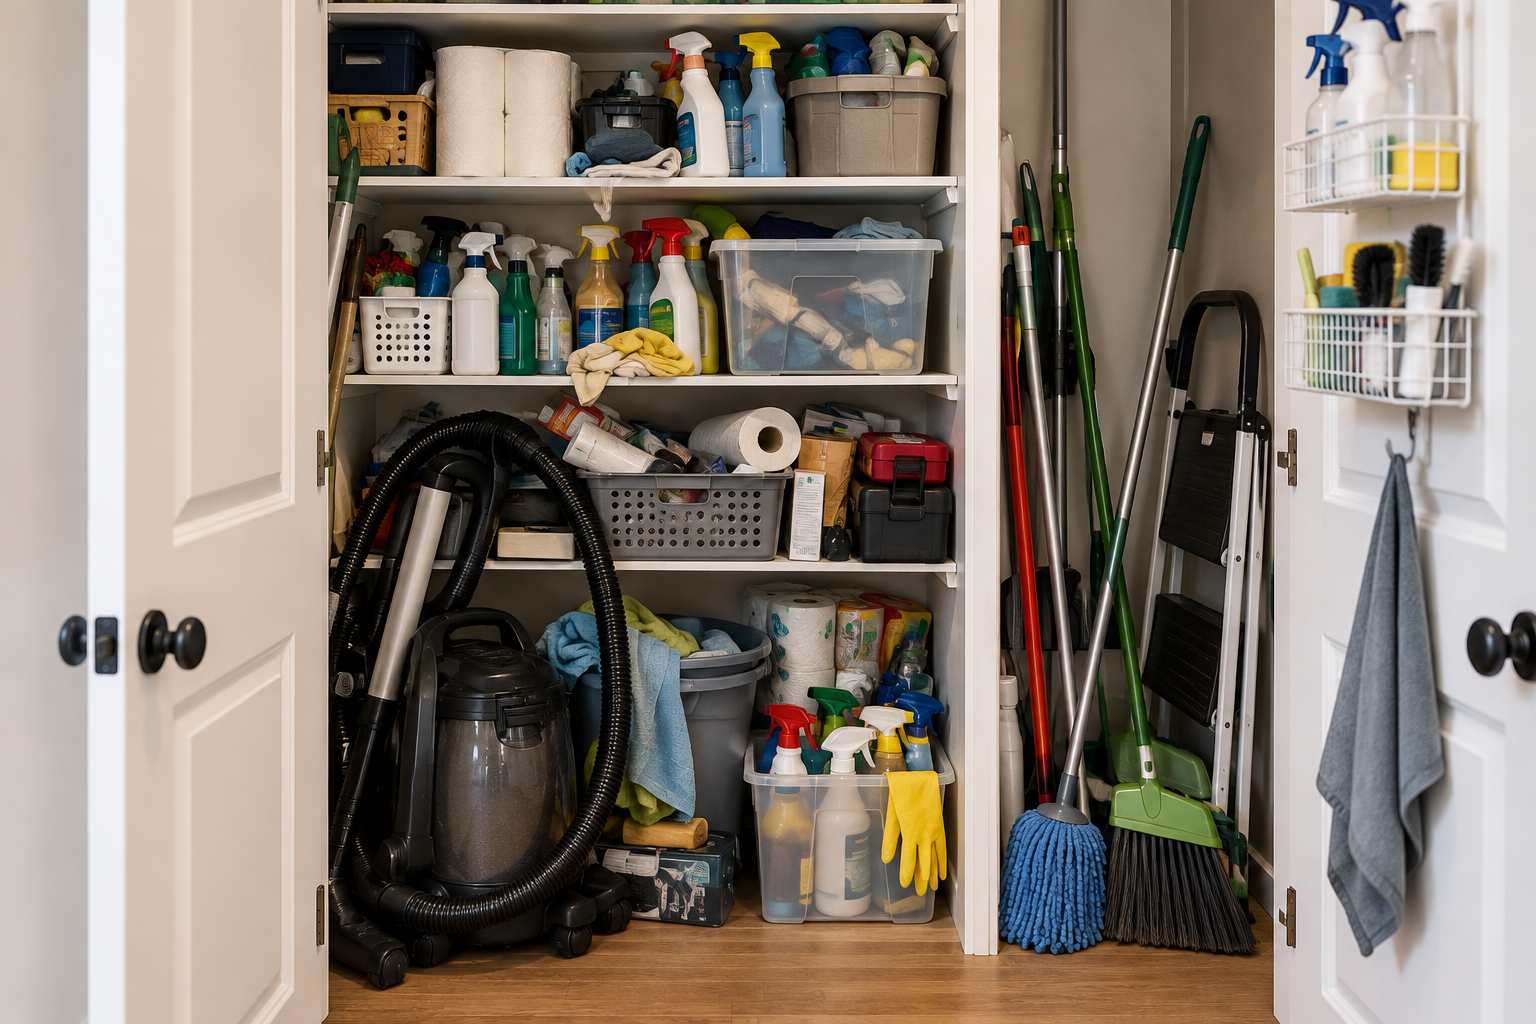
A useful utility closet should answer three questions quickly:
- Where does this category belong?
- Can I reach what I use regularly?
- Can I return it without disrupting the rest of the closet?
Step 1: Audit What You Actually Have
Start by removing enough from the closet to see the full inventory. Do not begin by buying containers.
Sort the contents into broad functional groups:
- Daily cleaning supplies
- Small cleaning tools
- Floor-care tools
- Vacuum or other bulky equipment
- Household maintenance supplies
- Backups and refills
- Occasional-use items
- Items that belong somewhere else
The exact categories will depend on the home. The purpose of the audit is to understand what the closet actually needs to support before deciding how it should be arranged.
Step 2: Define What Actually Belongs in the Utility Closet
A utility closet can easily become a household overflow closet.
A Simple Question
Would I normally look in this closet for this item?
An item may belong elsewhere because it is rarely used, too bulky, needed in another room, or better stored according to its specific requirements.
The goal is not to create a rule that every household must follow. The goal is to make this particular closet responsible for a clear set of functions.
Step 3: Measure the Usable Space
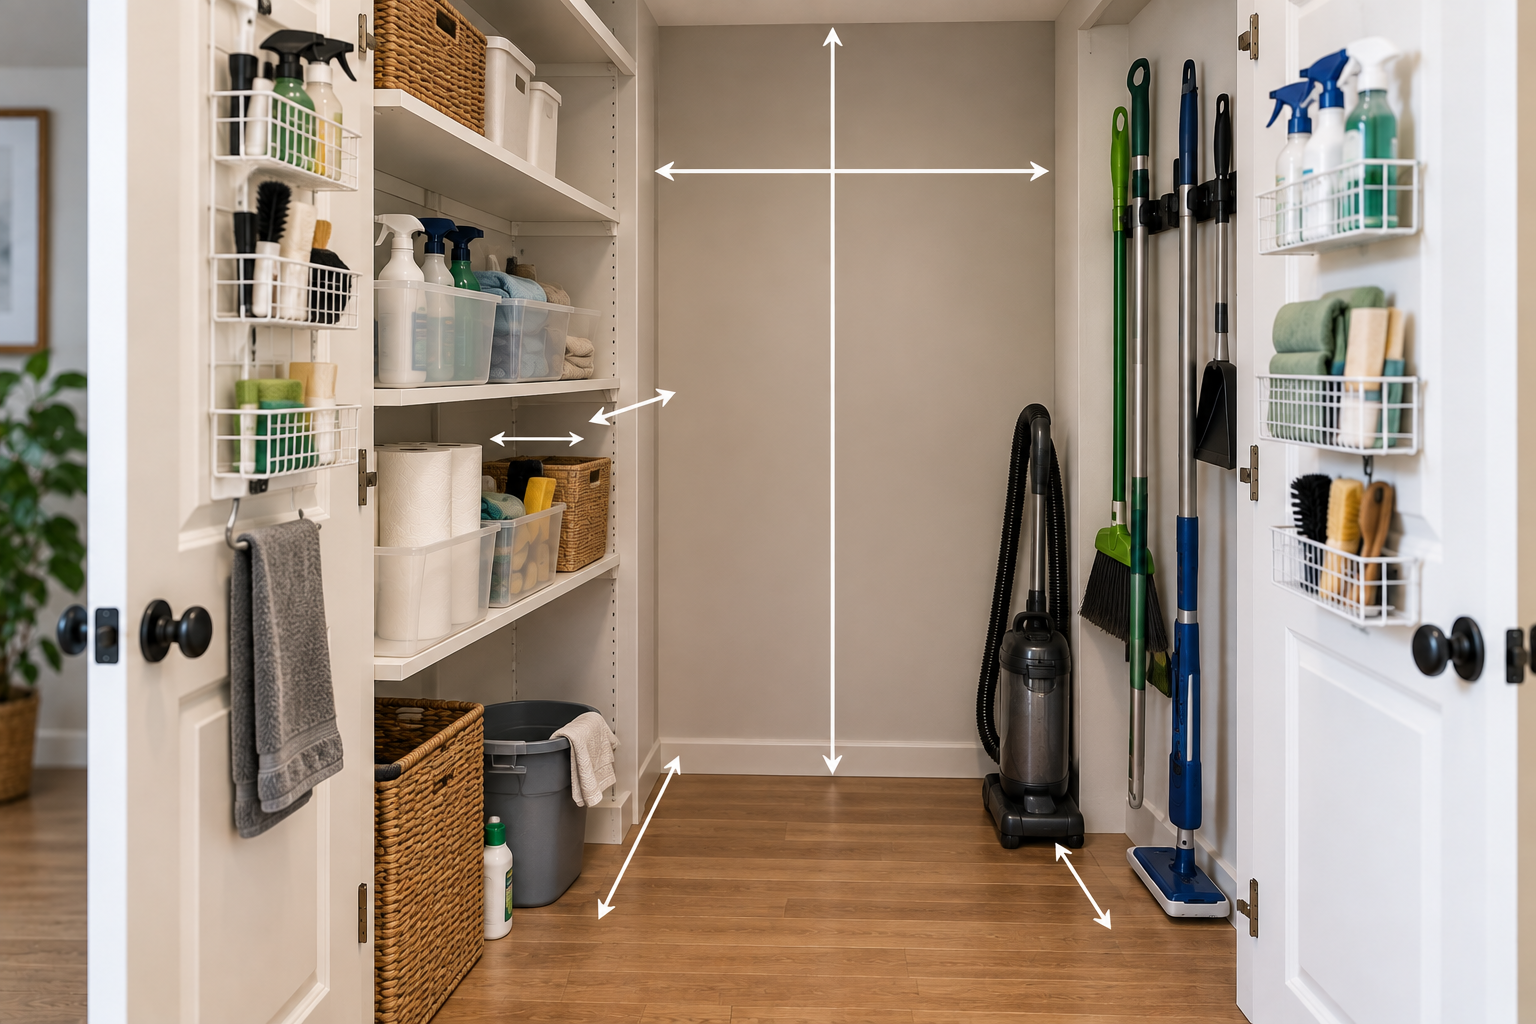
Measure the space that can actually operate as storage, not simply the overall dimensions of the closet.
Check:
- Usable width
- Usable depth
- Total height
- Shelf spacing
- Shelf depth
- Usable floor area
- Vertical clearance for long-handled tools
- Door storage space
- Door swing and closing clearance
- Space needed to remove larger equipment
- Fixed equipment, access panels, outlets, or other obstacles
Measure Storage in Use
An empty closet can make a storage solution look like it fits when the loaded system will not work.
A basket may make a shelf too crowded. A door organizer may interfere with shelf access. A vacuum may fit on the floor but prevent other items from being removed.
Think about the space required to retrieve, use, and return an item, not just the space it occupies while sitting still.
Find the Operating Space
If the closet contains equipment or fixed systems, identify the areas that must remain accessible for normal operation, inspection, or service.
Do not treat required equipment access as available storage space.
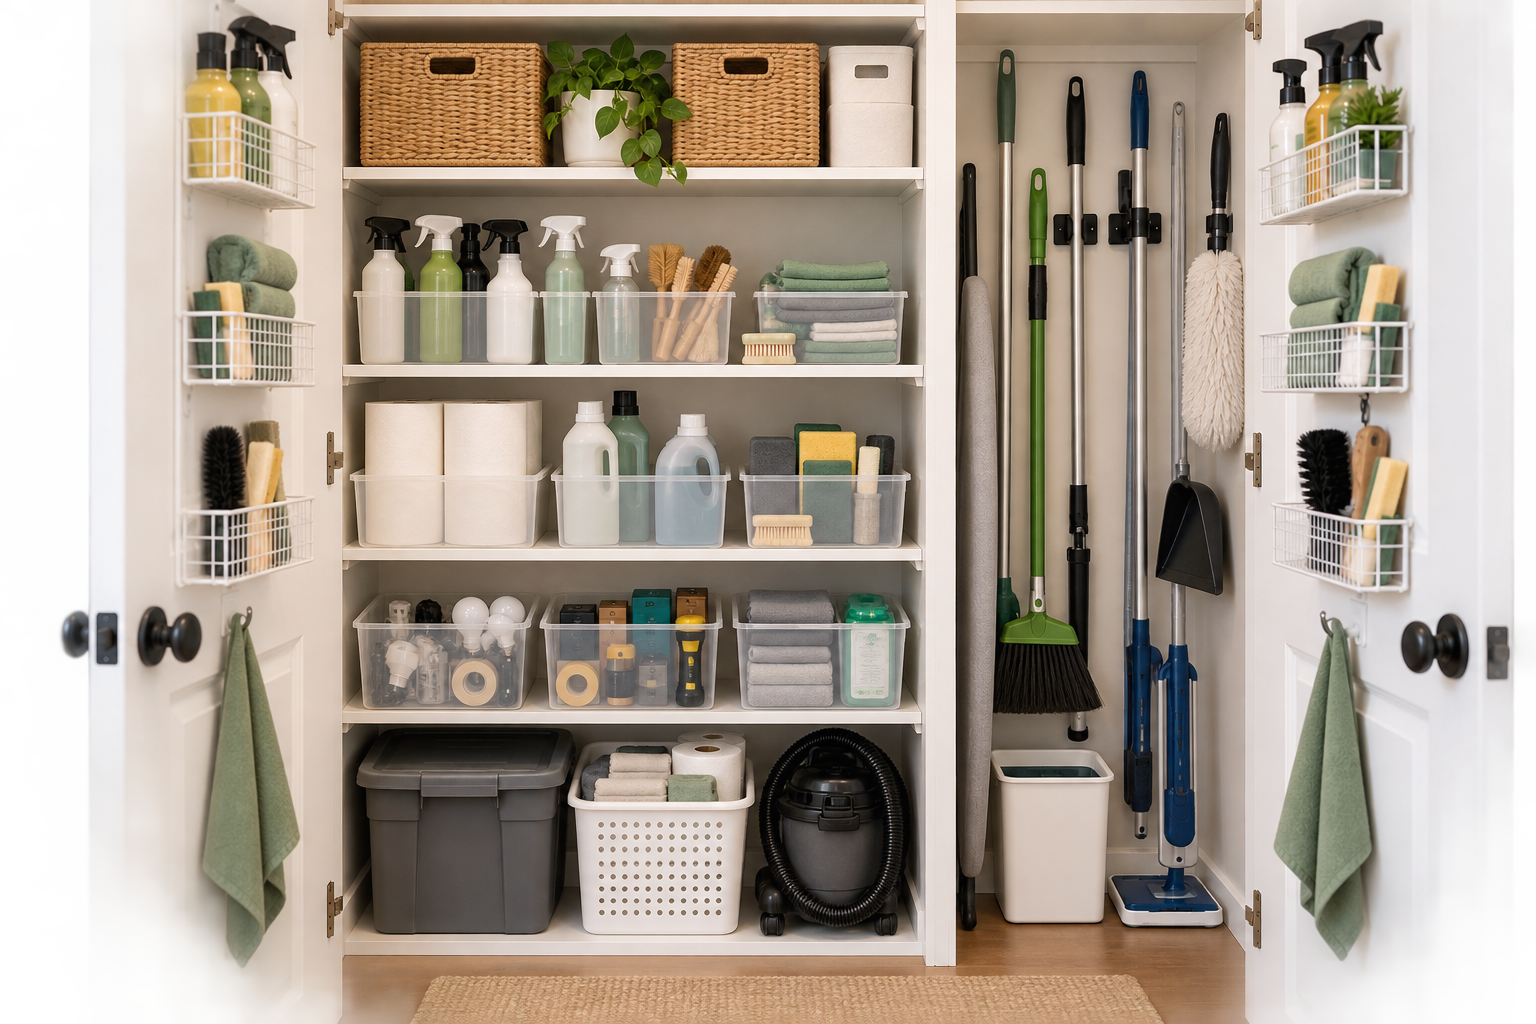
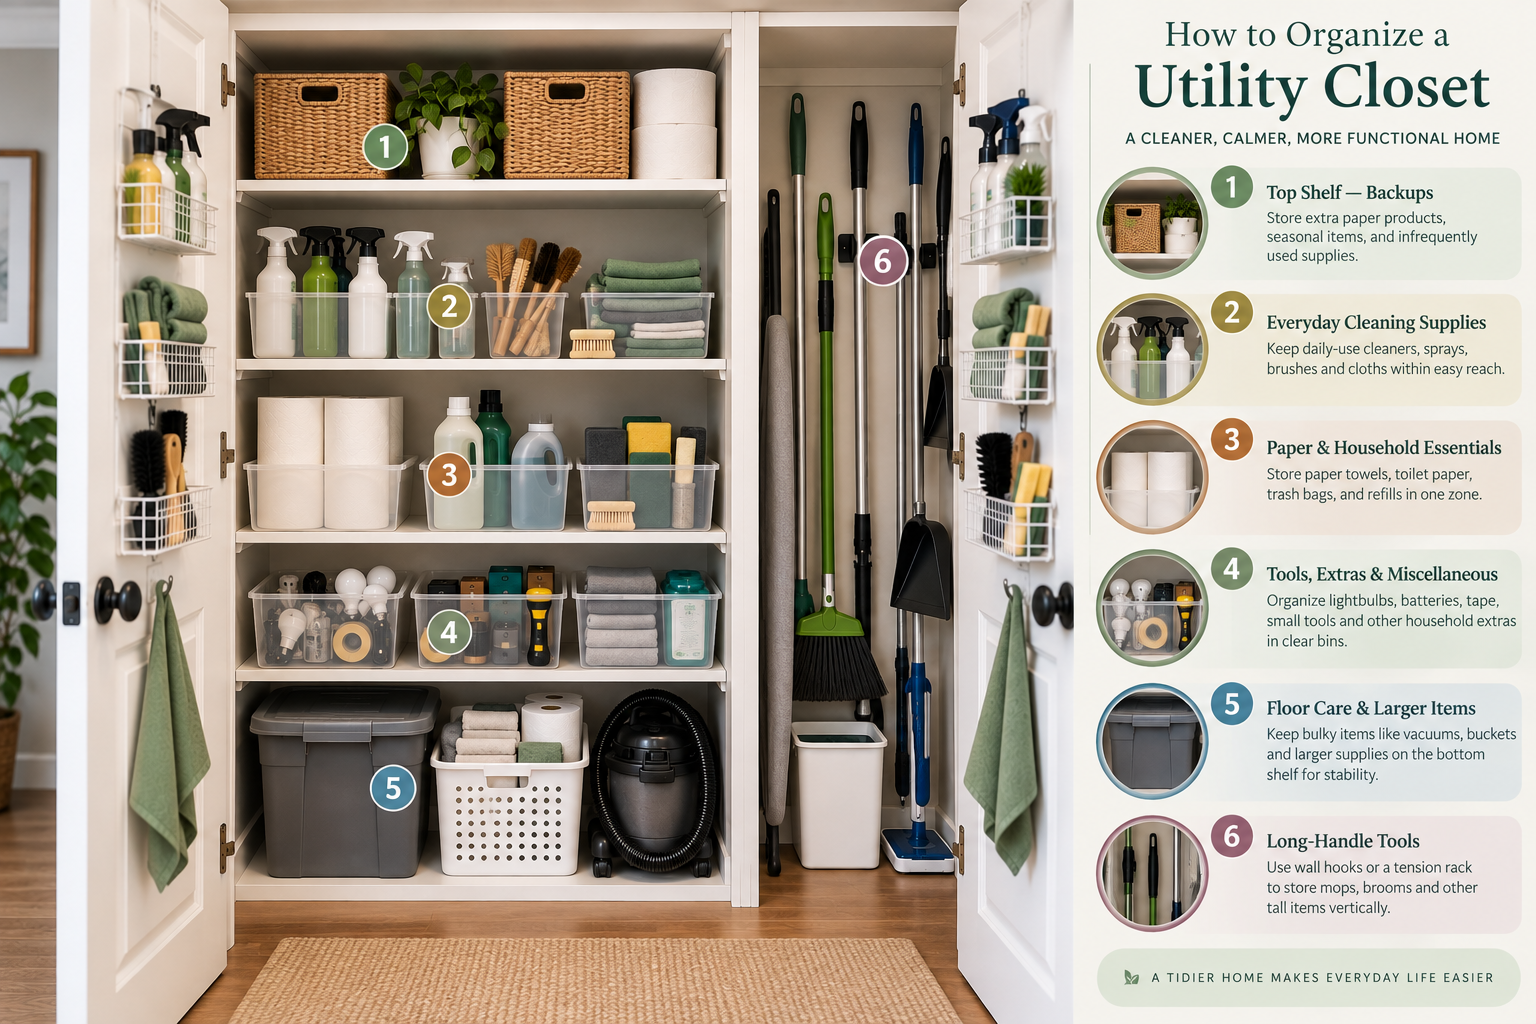
Step 4: Create Functional Zones
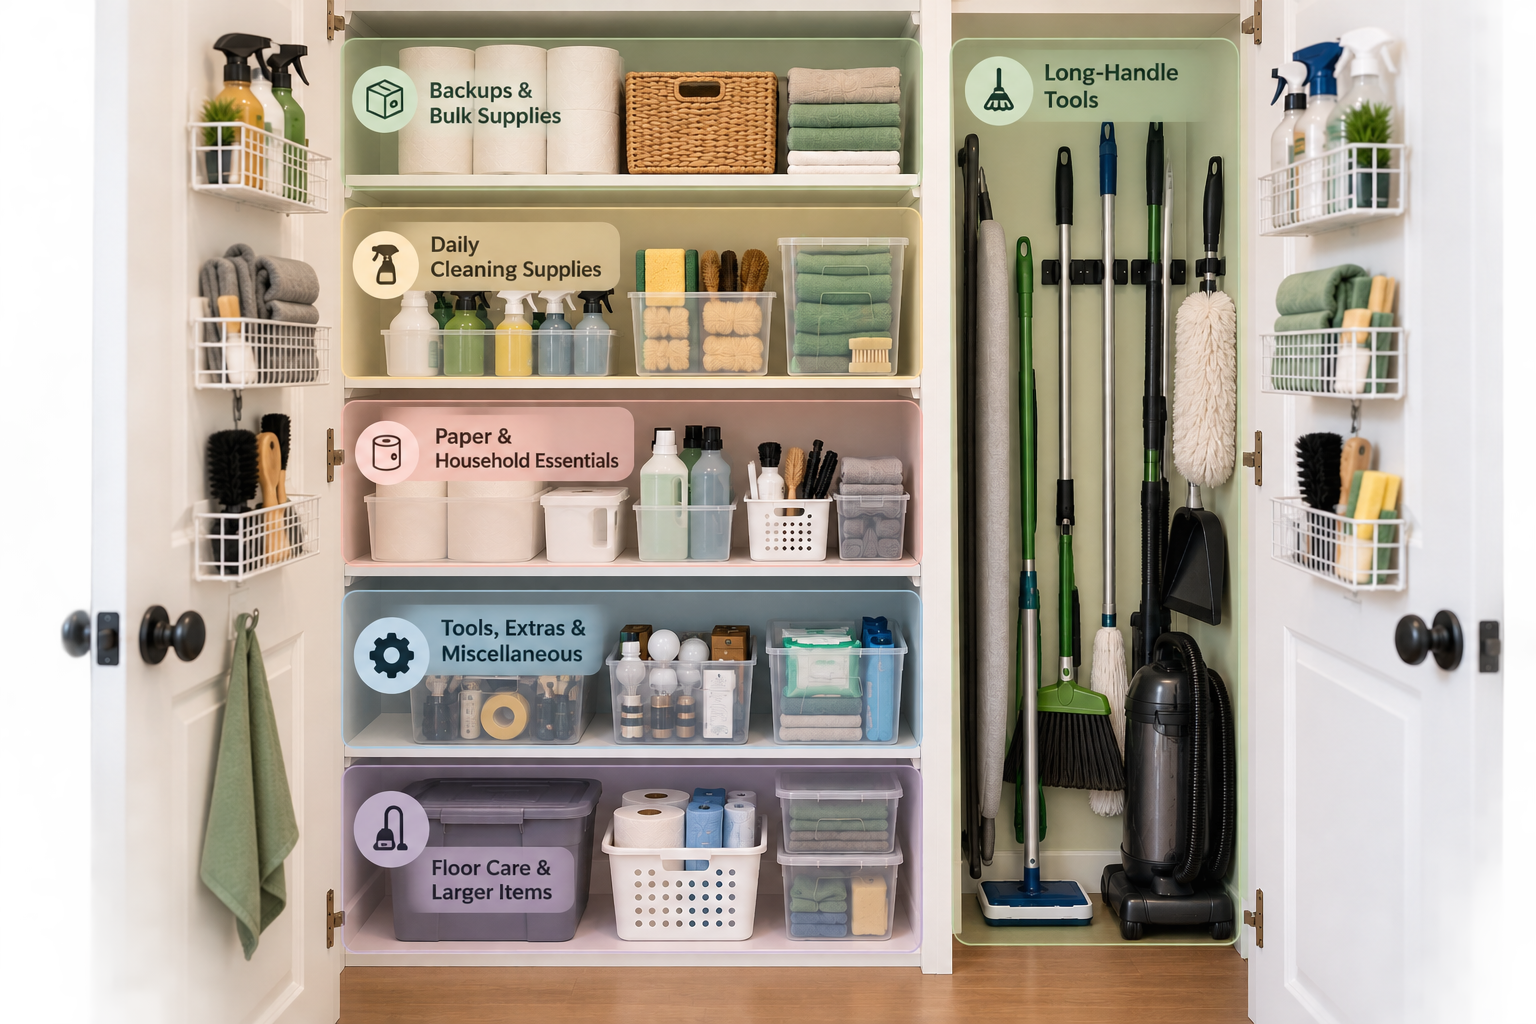
Once the inventory and physical constraints are clear, give each major function a defined zone.
The exact arrangement will change from one closet to another, but the functions can remain clear.
Daily Cleaning
Keep frequently used cleaners, cloths, brushes, and similar supplies in an easy-access area.
Floor Care
Give brooms, mops, dustpans, and similar tools a defined vertical area where practical.
Equipment
Reserve the required footprint for a vacuum or other bulky equipment before organizing smaller items around it.
Other zones may include household maintenance supplies, paper or household backups, seasonal items, or occasional-use equipment when those functions genuinely belong in the closet.
Step 5: Prioritize by Frequency of Use
Not everything in the closet deserves the same level of access.
| Use frequency | Storage priority |
|---|---|
| Used frequently | Easiest-to-reach area |
| Used occasionally | Secondary access area |
| Backup or refill | Separate contained zone |
| Seasonal or rarely used | Less convenient area when appropriate |
This simple hierarchy prevents a common problem: backup supplies occupying the space you need for everyday items.
The easiest-to-reach area should generally support the closet’s normal working routine, not the largest possible inventory.
Step 6: Match Storage to the Actual Constraint
Storage should solve a demonstrated problem. Do not begin with a container and then search for something to put inside it.
| Actual problem | Storage direction | Check first |
|---|---|---|
| Small supplies become mixed together | Simple grouping or suitable contained storage | Whether grouping improves access without wasting shelf space |
| Long tools fall across the closet | Dedicated vertical storage | Available height and clearance |
| Backups crowd everyday supplies | Separate backup zone | How much backup inventory is actually needed |
| Door space is unused | Lightweight door storage where suitable | Door clearance, depth, mounting, and weight |
| Deep shelves hide items | Better grouping or accessible secondary storage | Whether retrieval actually becomes easier |
| Heavy equipment dominates floor space | Dedicated equipment zone | Required footprint and access path |
| Frequently used items get buried | Prime-access zone | Whether the current layout reflects actual use |
Clear Storage for Small Supplies and Backups
If small supplies, refills, or backup items are becoming mixed together, a clear storage bin can help create a defined contained zone without hiding what is inside.
Use this type of storage only after measuring the shelf and deciding what category it needs to hold. The goal is easier access and better grouping, not simply adding another container.
View the storage option on Amazon
Affiliate link. Simply Tidy Home may earn a commission if you make a qualifying purchase, at no additional cost to you.
Step 7: Organize Tall Tools and Bulky Equipment Separately
Brooms, mops, dusters, vacuum equipment, buckets, and other bulky items should not compete with small supplies for the same storage area.
Give Long-Handled Tools a Defined Zone
When the closet has suitable vertical clearance, keep long-handled tools together in a dedicated area.
The goal is to prevent handles from falling across shelves or blocking smaller supplies.
Tools that need to dry should be stored in a way that supports appropriate drying and follows the manufacturer’s instructions.
Reserve Space for Bulky Equipment First
If a vacuum or other large item genuinely belongs in the utility closet, establish its footprint before filling the surrounding shelves.
This prevents small containers from gradually taking the space needed for the equipment that the closet actually has to hold.
Step 8: Control Backup Inventory
Backups are useful, but unlimited backup storage can overwhelm a utility closet.
Give refills and unopened supplies a defined zone and a practical capacity limit.
When that area is full, adding another container is not automatically the answer. The better question is whether the household actually needs that much inventory in this closet.
Capacity Rule
Keep enough backup inventory for normal household needs without allowing backups to displace the supplies you use every day.
Safety First: Organize Cleaning Products Responsibly
Organization should never override product-storage requirements.
Keep household cleaning products in their original labeled containers when appropriate, follow the storage directions on their labels, and keep potentially hazardous products away from children and pets.
Do not transfer household chemicals into food or drink containers simply to make the closet look more organized.
Different products can have different storage requirements, so a visually neat arrangement is not automatically a safe arrangement.
How to Use the Back of the Utility-Closet Door
The back of the door can provide useful secondary storage when the closet itself is short on shelf or wall space.
It should not be treated as automatic extra storage.
Before adding door storage, check:
- Whether the door closes fully
- Whether the added depth blocks shelves
- Whether stored items remain easy to reach
- Whether the mounting method suits the door
- Whether the added weight is appropriate for the door and hardware
Door storage is usually most useful for relatively small, lightweight items rather than anything that makes the closet harder to operate.
How to Organize a Small or Deep Utility Closet
The physical shape of the closet should influence the system.
For a Small Utility Closet
Prioritize the highest-frequency functions. Keep the active inventory limited and use vertical space where it genuinely improves access.
Do not try to give every possible household category a permanent home if the closet cannot support it.
For a Deep Utility Closet
Think in access layers.
Frequently used items should remain in the easiest operating area. Less-used supplies can occupy deeper or higher areas when they can still be retrieved safely.
Avoid creating a second row of everyday items that forces you to unload the front row every time you need something.
The goal is not to use every cubic inch. It is to use the available space without creating a retrieval problem.
Before Buying an Organizer
Ask these questions first:
1. What exact problem am I trying to solve?
2. Have I measured the space where the organizer will go?
3. Will it make the stored items easier to reach?
4. Will it reduce usable shelf or floor space?
5. Does it work with the shape and weight of the items?
6. Can I return the items to it quickly?
7. Does the installation method suit the closet?
If you cannot identify the problem, you probably do not need the organizer yet.
Step 9: Test the System During Real Use
A utility closet should be tested during the routine it is designed to support.
Take the supplies you normally use. Open the closet. Remove what you need. Put everything back. Then notice where the system slows you down.
Reach
Can you reach frequent-use items without moving several other things?
Identify
Can you tell where each category belongs without thinking about it?
Return
Can you put items back quickly after using them?
Reset
Can you see when a supply is running low or a zone is becoming crowded?
The Real Test
If you have to move several things every time you retrieve one everyday item, the system still needs adjustment.
Failure Signals: When the System Needs to Change
Your organization system needs adjustment when the same problem keeps returning.
- Frequently used supplies keep getting buried.
- Long-handled tools fall into the access path.
- Backups repeatedly move into the daily-use zone.
- You have to remove several items to reach one item.
- The door becomes difficult to close after the closet is loaded.
- You avoid putting items away because the assigned location is inconvenient.
- New purchases have nowhere clearly defined to go.
These are signals to change the system, not reasons to keep adding storage.
Common Utility Closet Organization Mistakes
Buying Containers Before Diagnosing the Problem
A container cannot fix poor zoning, overcrowding, unsuitable placement, or inadequate access.
Trying to Use Every Inch
Maximum capacity is not the same as useful capacity. A packed closet can make every item harder to retrieve.
Mixing Daily Supplies With Backups
Backups can gradually occupy the easiest-access areas if they are not given a separate zone.
Letting Tall Tools Become a Pile
Long-handled tools need their own storage logic. They should not repeatedly fall across shelves or block smaller items.
Putting Heavy Equipment Wherever There Is Room
Bulky equipment should have a defined footprint and access path rather than becoming an obstacle that the rest of the closet has to work around.
Ignoring the Door
Door storage can help, but only when the added depth, weight, and mounting method work with the closet.
Organizing for Appearance Instead of Use
A closet can look excellent and still be frustrating if everyday items are difficult to reach or return.
Ignoring Safety Requirements
Cleaning products and fixed equipment have requirements that can override a purely visual storage arrangement.
How to Maintain a Utility Closet
A utility closet stays functional when the system is easy to reset and the inventory is periodically reviewed.
Daily
Return frequently used supplies and tools to their assigned zones.
Weekly
Reset misplaced items and check whether any zone is becoming difficult to access.
Monthly
Review backup supplies, duplicates, and items that no longer belong in the closet.
Seasonally
Adjust the inventory and zones when household needs or equipment change.
Quick Takeaways
- Start by deciding what genuinely belongs in the utility closet.
- Measure usable space rather than relying only on overall closet dimensions.
- Organize by function, frequency of use, physical requirements, and access.
- Keep frequently used items in the easiest-to-reach areas.
- Give long-handled tools and bulky equipment dedicated space.
- Keep backups separate from the active supply.
- Use door storage only when the added depth and weight work with the closet.
- Do not use every available inch if doing so makes retrieval harder.
- Choose organizers only after identifying the specific problem they need to solve.
- Test the system during normal use rather than judging it only when the closet is freshly organized.
- Keep cleaning products appropriately labeled and stored according to their instructions.
- Use a simple daily, weekly, monthly, and seasonal reset to maintain the system.
Utility Closet FAQ
What should go in a utility closet?
A utility closet can hold the household supplies and equipment it is specifically intended to support, such as cleaning supplies, floor-care tools, selected household maintenance items, equipment, and appropriate backups. The exact contents depend on the home’s overall storage system.
How do you organize a utility closet?
Start by auditing the contents and removing items that do not belong. Measure the usable space, create functional zones, prioritize frequently used items, give tall tools and bulky equipment appropriate space, control backup inventory, and choose storage only where a specific problem remains.
How do you organize a small utility closet?
Keep the active inventory limited, prioritize the most frequently used functions, use vertical space where it improves access, and avoid filling the closet with items that can be stored elsewhere.
Where should brooms and mops go in a utility closet?
Give long-handled tools a defined vertical zone where the available height and clearance allow it. Keeping them together prevents their handles from falling across shelves and blocking smaller supplies.
How should cleaning supplies be stored in a utility closet?
Keep frequently used supplies easy to reach while separating backups and following the storage instructions on each product. Keep potentially hazardous products appropriately labeled and away from children and pets.
How do you organize a deep utility closet?
Treat the closet as access layers. Keep frequently used items in the easiest operating area and use deeper or higher areas for less-used items when they can still be retrieved safely. Avoid creating a second row of everyday items that blocks the front row.
Can you use the back of a utility closet door for storage?
Yes, when the door has suitable clearance and the added storage does not interfere with closing the door, accessing shelves, or removing larger equipment. Check the depth, mounting method, and weight before installing it.
How do you organize utility closet backups?
Give backups a separate, contained zone and keep only an appropriate amount for normal household needs. Backups should not displace the supplies that need to be accessed every day.
Do you need special organizers for a utility closet?
Not necessarily. Start with editing, measurement, grouping, zoning, and access. Add an organizer only when a specific problem remains and the organizer clearly improves the system.
How do you keep a utility closet organized?
Give each major category a defined home, return items after use, review crowded zones regularly, control backup inventory, and adjust the system when the same access problem keeps returning.
What is the biggest mistake when organizing a utility closet?
Adding storage before understanding the problem. A new container cannot fix overcrowding, poor access, unsuitable placement, or an unclear system.
The Simplest Way to Organize a Utility Closet
AUDIT → DEFINE → MEASURE → ZONE → PRIORITIZE → MATCH → TEST → MAINTAIN
A utility closet does not need to hold everything. It needs to support the functions it is actually responsible for.
Start with what belongs there. Measure the usable space. Give each function a clear zone. Put everyday items where they are easiest to reach. Keep backups and bulky equipment under control. Then test the system during real use.
When every category has a logical home and the closet is easy to reset, the system can stay practical without needing more storage every time the closet becomes crowded.