A small cleaning closet works best when you organize it around frequency, safety, access, and the physical shape of what you store—not simply by adding more containers. The goal is to make the things you use easy to reach while keeping backups, bulky tools, and less-used supplies from taking over the space.
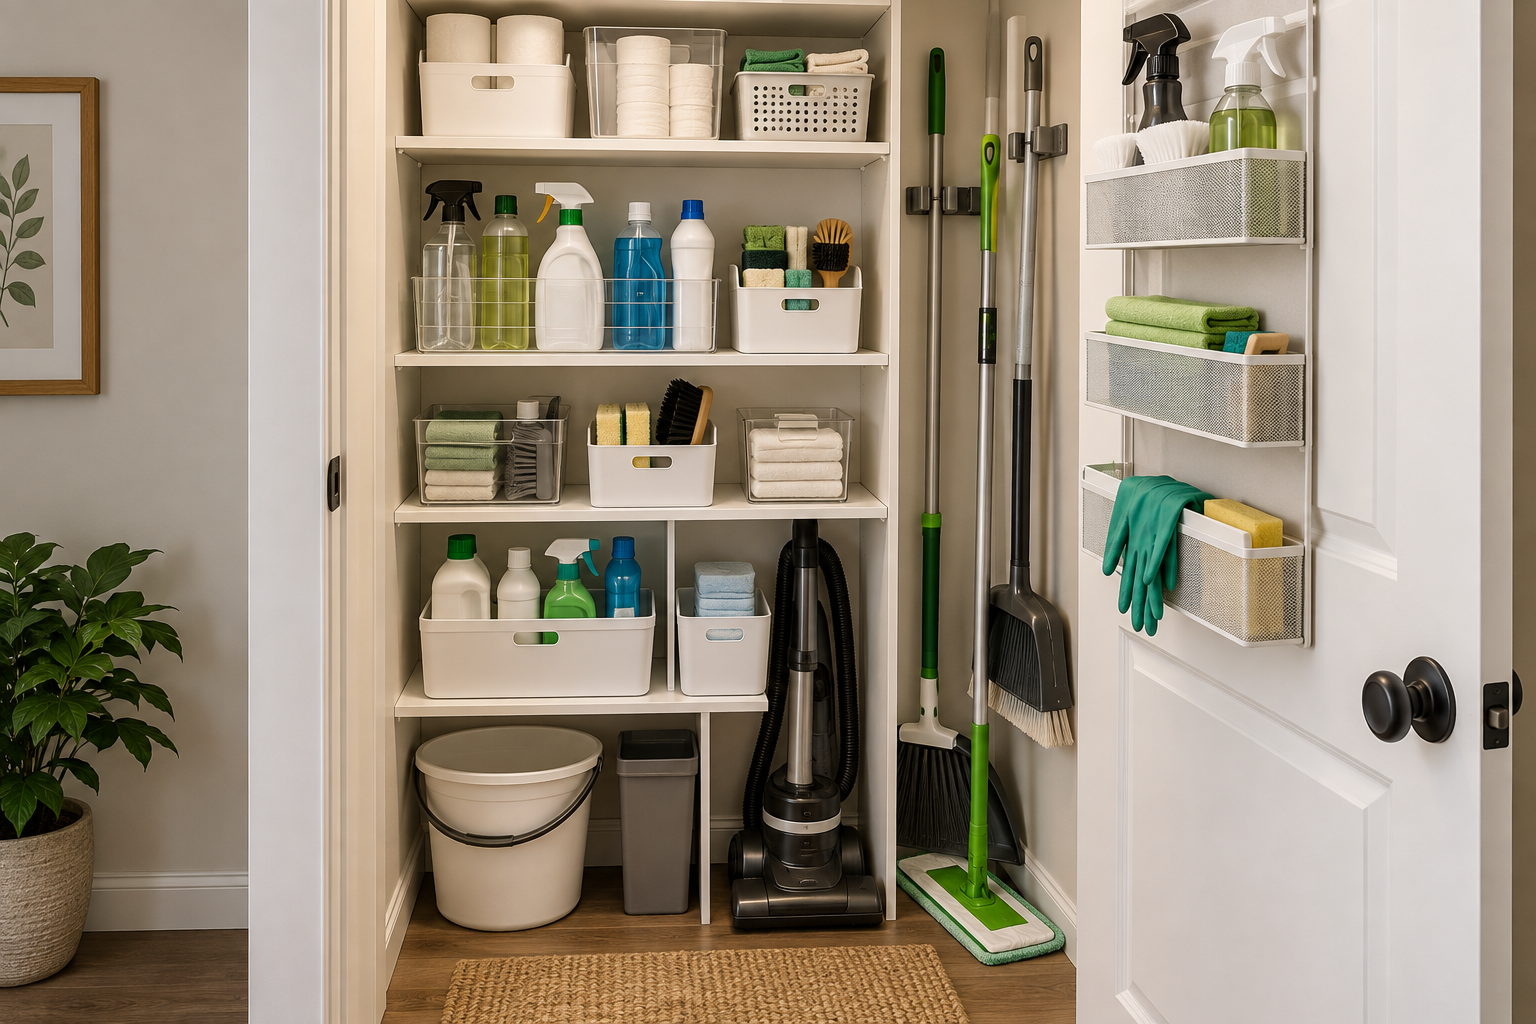
Start by removing anything you do not need in the cleaning closet, then group the remaining items by frequency of use, storage requirements, and physical shape. Measure the usable shelves, door space, vertical clearance, and floor area before choosing storage. Keep frequently used supplies easy to reach, give long-handled tools their own space, store backups separately from daily supplies, and follow product-label and household safety requirements. Then test the closet during a real cleaning routine and adjust anything that is difficult to access or return.
See what is actually there
Remove what does not belong
Map usable space
Daily use from backups
Give each category a home
Choose storage for the problem
Use it in real life
Keep the system working
Why Small Cleaning Closets Become Difficult to Use
Cleaning closets often become difficult for a simple reason: many different shapes and frequencies of use are being forced into one small space.
Bottles may sit beside sprays. Cloths may be mixed with refills. A broom or mop may need vertical clearance while smaller supplies occupy the shelves around it. Backups can gradually push everyday items toward the front.
The result is usually not a lack of storage alone. It is a lack of storage logic.
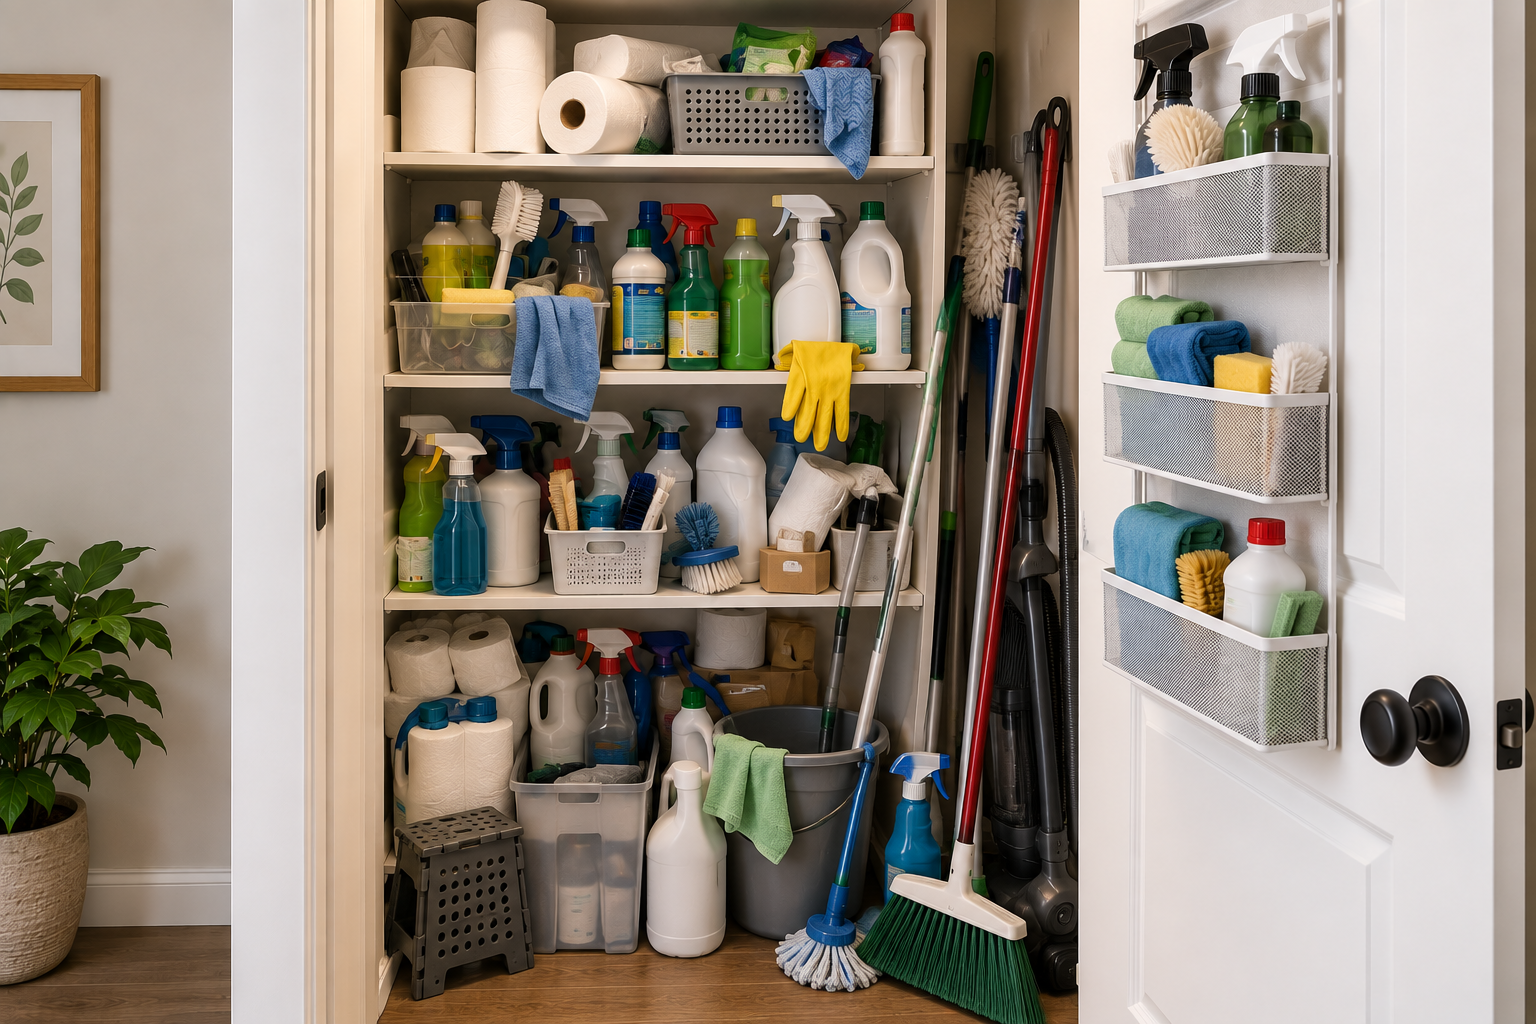
Start With What Actually Belongs in the Closet
Before buying storage or moving shelves around, empty enough of the closet to see the full inventory.
Separate the contents into four simple groups:
- Daily or frequent-use supplies: items you reach for during normal cleaning.
- Small cleaning tools: brushes, cloths, dusters, gloves, and similar tools.
- Backups and refills: unopened replacements and extra consumables.
- Bulky or awkward equipment: larger tools or equipment that genuinely needs this closet.
Then question anything that does not clearly fit.
A cleaning closet is not automatically the right place for every household item related to cleaning. Something may belong elsewhere because it is rarely used, too bulky, needed in another room, or better stored according to its specific instructions.
Measure the Cleaning Closet Before Adding Storage
Small spaces punish approximate measurements. A storage item can technically fit and still make the closet harder to use.
Measure the space that can actually operate as storage, not simply the overall dimensions of the closet.
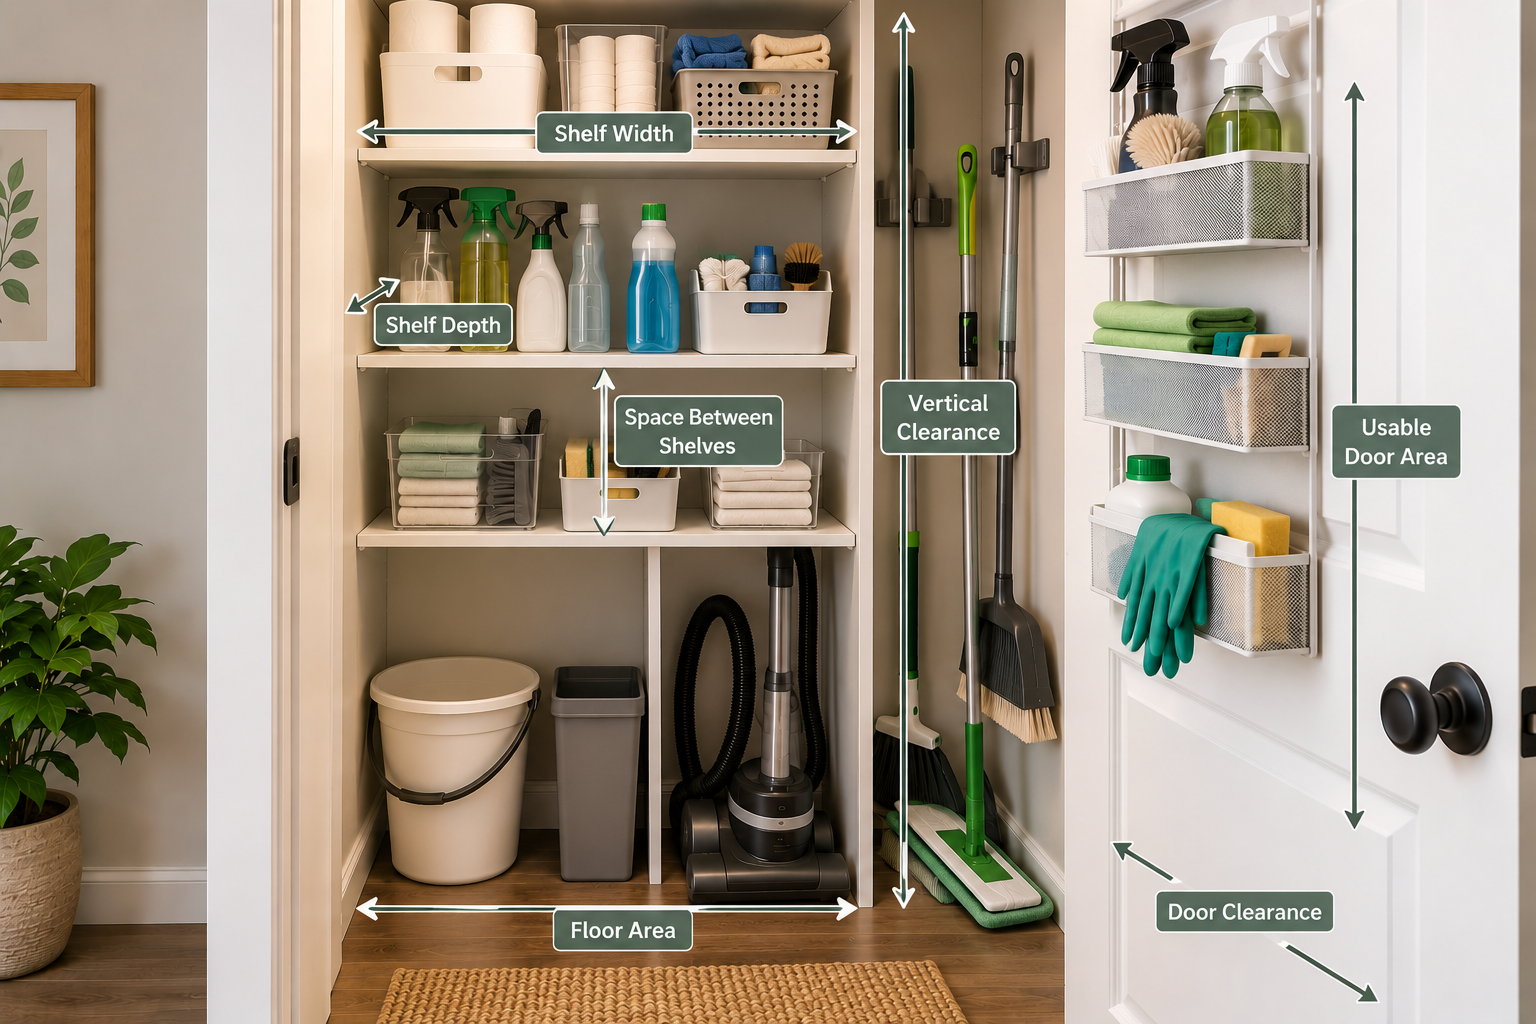
- Shelf width
- Shelf depth
- Vertical clearance between shelves
- Usable floor width and depth
- Vertical clearance for brooms, mops, or other long tools
- Usable door or wall space
- Clearance needed to open the door and remove stored items
Also measure the largest objects that need to remain accessible. A shelf is only useful if the items on it can be removed without first moving several other things.
Separate Daily Supplies From Backups
One of the easiest ways to make a small cleaning closet feel crowded is to treat a backup bottle exactly like the item you use every week.
Daily supplies deserve the easiest access. Backups can usually occupy a less convenient but still safe location.
Keep it in the easiest-to-reach zone.
Place it in a secondary access zone.
Keep it separate from the active supply.
This separation also makes restocking easier. When the active supply is low, you can see whether a replacement already exists without digging through the everyday zone.
Build Functional Zones
Once the contents and measurements are clear, give each category a defined area. The exact arrangement will depend on the closet, but the functions should remain clear.
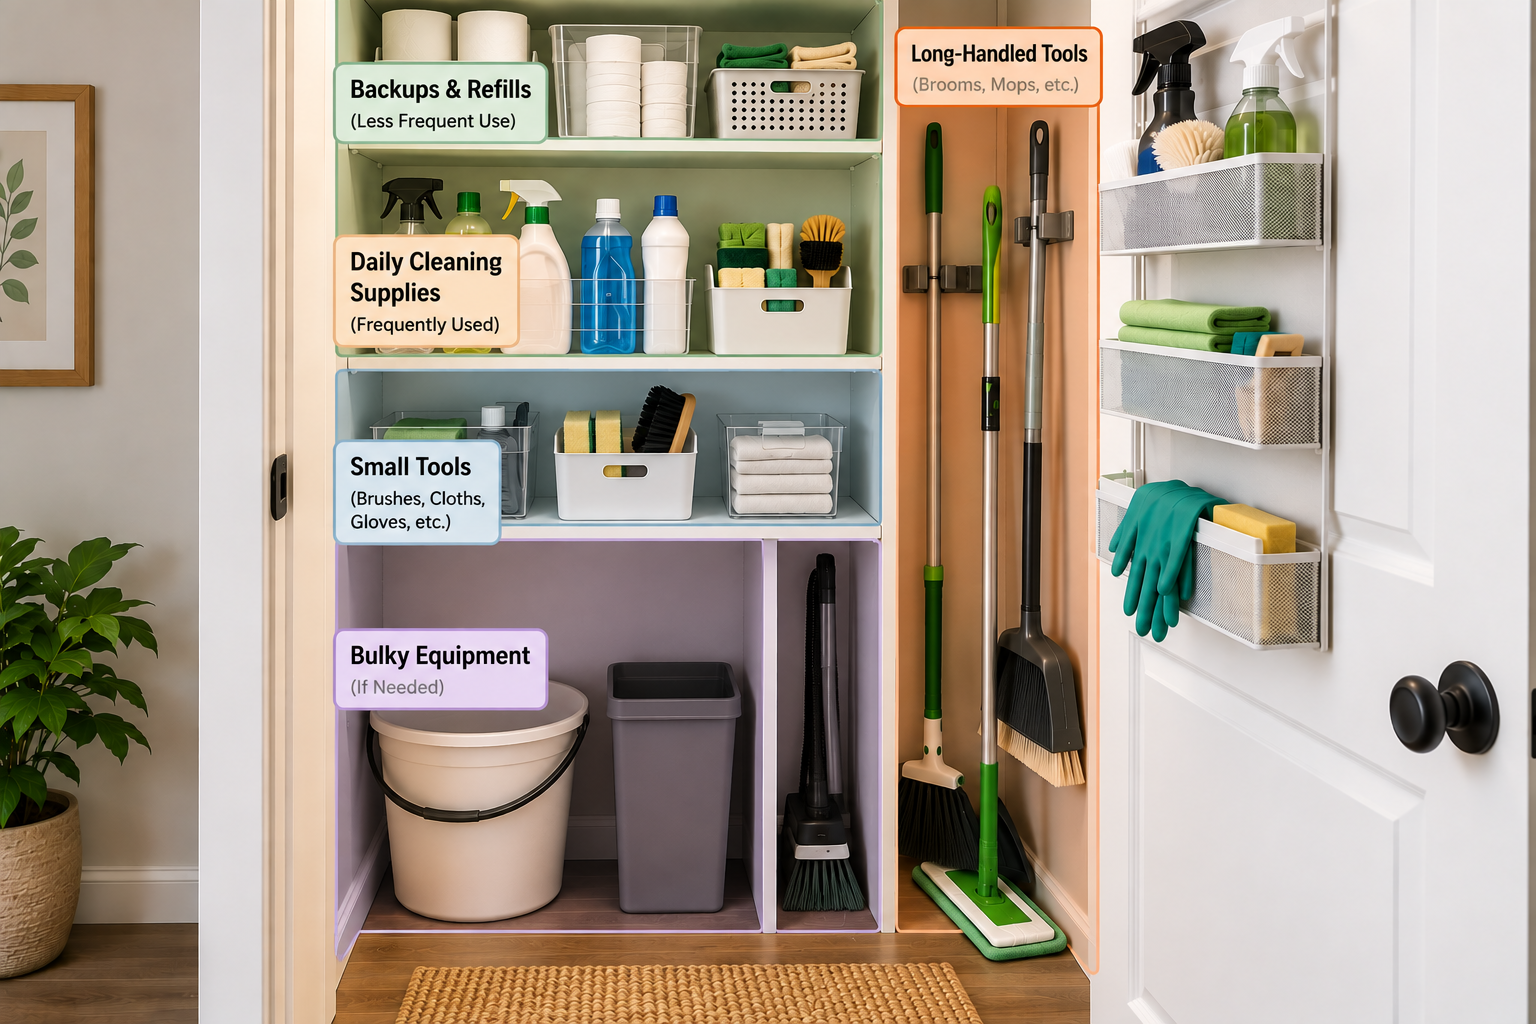
Daily Cleaning Supplies
Place the supplies used most often where they can be reached without moving other items. Keep the most frequent items together rather than scattering them across several shelves.
Small Cleaning Tools
Brushes, cloths, dusters, gloves, and similar small tools need a system that prevents them from becoming a loose pile. The storage method should let you see or quickly identify the item you need.
Long-Handled Tools
Brooms, mops, dusters, and similar tools usually need vertical storage. Give them a defined location so they do not fall across shelves or block smaller supplies.
Backups and Refills
Keep unopened backups together and separate from the active supply. This reduces visual clutter and makes inventory easier to understand.
Bulky Equipment, Where Applicable
Not every cleaning closet needs to hold bulky equipment. If it does, decide first whether the equipment genuinely belongs there. Then reserve the required footprint before organizing the smaller items around it.
Where Should Brooms and Mops Go?
Start with the vertical space rather than trying to fit long-handled tools onto shelves.
If the closet has suitable vertical clearance, keep brooms and mops together in a defined section. This prevents their handles from crossing into the main storage area.
Cleaning tools that need to dry should be stored in a way that supports appropriate drying and follows the manufacturer’s instructions. Do not create a tightly sealed storage arrangement for an item that needs airflow or drying.
How to Use the Back of the Cleaning-Closet Door
The back of the door can provide useful storage when the closet itself is short on wall or shelf space. But door storage is only useful when it does not interfere with the shelves, door movement, or removal of larger items.
Think of the door as an optional secondary zone for relatively small, lightweight items. Measure the available clearance before installing anything.
- Whether the door closes fully
- Whether the added depth blocks shelves
- Whether stored items remain accessible
- Whether the mounting method is appropriate for the door
- Whether the added weight is suitable for the door and hardware
How to Organize a Narrow or Deep Cleaning Closet
A narrow closet should prioritize access from front to back. Avoid creating a second row of items that requires you to remove the first row every time.
In a deep closet, think in terms of access layers. The items used most often should remain in the easiest operating area. Less-used supplies can occupy deeper or higher locations only when they can still be retrieved safely.
The goal is not to use every cubic inch. It is to use the available space without creating a retrieval problem.
Cleaning Products: Organize for Access and Safety
Cleaning products need more than a visual organization system. Follow the label directions and household safety requirements for each product.
Keep products in their original containers when appropriate, follow any required storage conditions, and do not transfer products into unlabeled containers.
Pay particular attention to products that should be kept away from children or pets. Store them according to their labels and the safety requirements that apply to your household.
Do not organize different cleaning chemicals together simply because their bottles are similar. Their storage requirements may differ.
Because the most convenient location is not automatically the correct location. Safety, label instructions, household access, and product requirements can override a purely space-saving arrangement.
Match the Storage Method to the Actual Problem
Storage should solve a demonstrated problem. Do not begin with a container and then search for something to put inside it.
| Actual problem | Possible storage response | What to check first |
|---|---|---|
| Small supplies become mixed together | Simple grouping or a suitable open container | Whether grouping improves access without wasting shelf height |
| Long tools fall across the closet | Dedicated vertical storage | Available height and clearance |
| Backups crowd everyday supplies | Separate backup zone | How often backups are actually needed |
| Door space is unused | Lightweight door storage, where suitable | Door clearance, depth, mounting, and weight |
| Deep shelves hide items | Better grouping or accessible secondary storage | Whether the solution makes removal easier |
Before Buying an Organizer
- What exact problem am I trying to solve?
- Have I measured the space where it will go?
- Will it make the stored items easier to reach?
- Will it reduce usable shelf or floor space?
- Does it work with the shape and weight of the items?
- Can I return the items to it quickly after cleaning?
- Does the installation method suit the closet?
If you cannot identify the problem, you probably do not need the organizer yet.
Test the System During Real Cleaning
A cleaning closet should be tested during the routine it is designed to support.
Take the supplies you normally use. Open the closet. Remove what you need. Put everything back. Then notice where the system slows you down.
Reach
Can you reach frequent-use items without moving several other things?
Identify
Can you tell where each category belongs without thinking about it?
Return
Can you put items back quickly after cleaning?
Reset
Can you see when a supply is running low or a zone is becoming crowded?
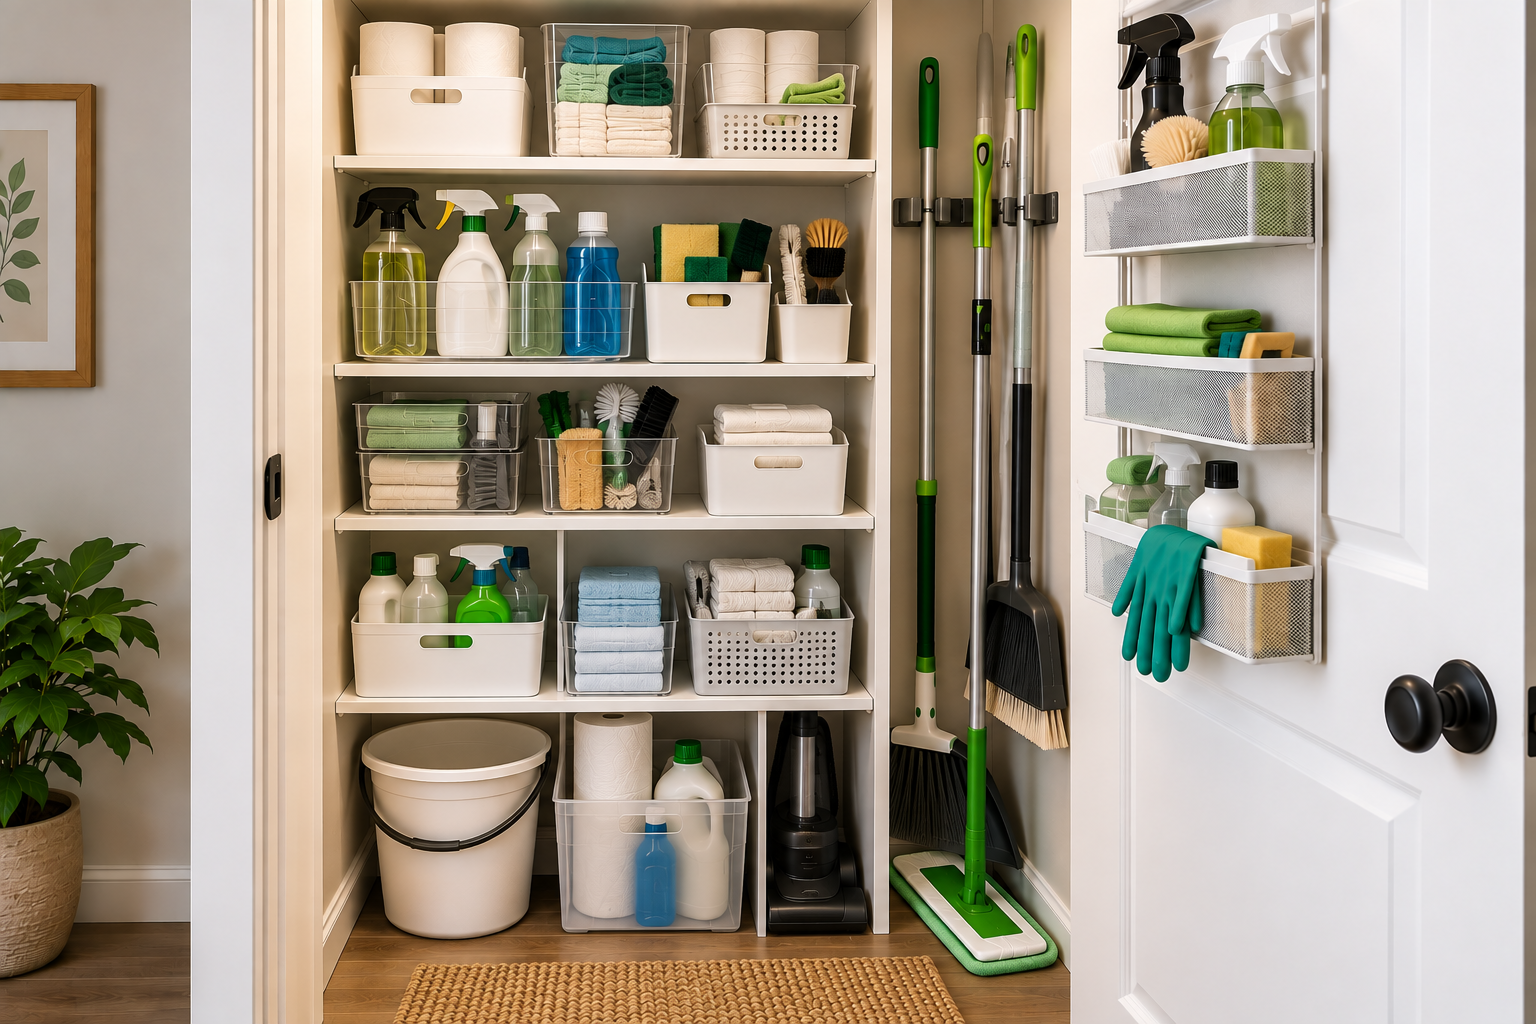
Failure Signals
Your system needs adjustment when the same problem keeps returning.
- Frequently used supplies keep getting buried.
- Long-handled tools fall into the access path.
- Backups repeatedly move into the daily-use zone.
- You have to remove several items to reach one item.
- The door cannot close comfortably after the system is loaded.
- You avoid putting items back because the assigned location is inconvenient.
- New purchases have nowhere clearly defined to go.
These are signals to change the system, not reasons to keep adding storage.
Small Cleaning Closet Reset Routine
A small reset prevents the closet from slowly returning to its old state.
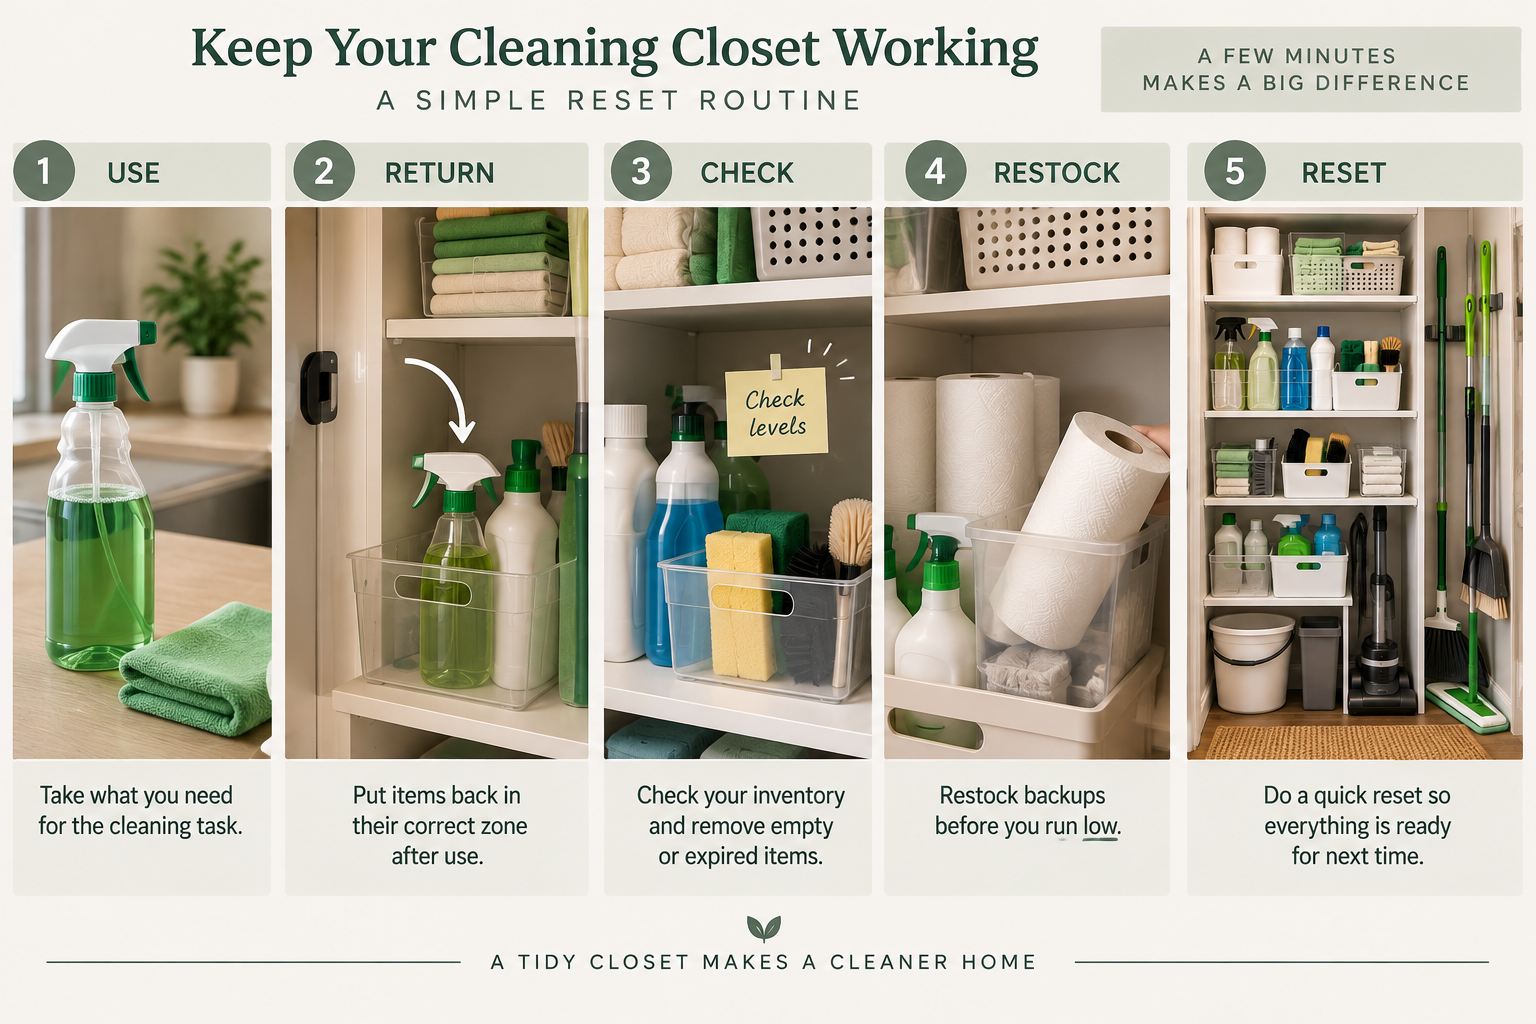
1. Return
Put each item back into its assigned zone.
2. Check
Notice empty, crowded, or misplaced areas.
3. Restock
Move an appropriate backup forward only when needed.
4. Reset
Remove anything that no longer belongs in the system.
The reset should be simple enough that you actually do it. If maintaining the closet requires a long reorganization session, the underlying system may be too complicated.
Common Questions About Small Cleaning Closets
How do I organize a small cleaning closet?
Start by editing the contents, then measure the usable shelves, floor, vertical clearance, and door space. Separate daily supplies from backups, create zones for small tools and long-handled tools, and choose storage only where a specific access problem remains. Test the arrangement during a normal cleaning routine.
How should I organize brooms and mops in a small closet?
Give long-handled tools a defined vertical zone where the available height and clearance allow it. Keep them out of the main retrieval path for smaller supplies, and store tools in a way that supports appropriate drying when required.
Should cleaning supplies and backups be stored together?
They can share the same closet, but separating active supplies from backups usually makes a small space easier to use. Keep frequent-use items in the easiest access zone and place backups in a separate, appropriate area.
How do I organize a deep cleaning closet?
Treat the closet as access layers. Keep frequent-use items in the easiest operating area and use deeper or higher areas for less-used items when they can still be retrieved safely. Avoid creating a second row that forces you to unload the front row.
Can I use the back of the cleaning closet door for storage?
Yes, when the door has suitable clearance and the added storage does not interfere with closing the door, shelf access, or removal of larger items. Measure first and consider the mounting method, depth, and weight.
Do I need special organizers for a small cleaning closet?
Not necessarily. Start with editing, measurement, grouping, and zoning. Add an organizer only when a specific problem remains and the organizer clearly improves access or use of the available space.
How do I keep a small cleaning closet organized?
Give each category a defined home and use a short reset routine. Return supplies to their zones, check for crowding, restock appropriately, and remove items that no longer belong.
Where should cleaning products go in a small closet?
Store them according to their labels and applicable household safety requirements. Access should not override storage requirements, and products should remain appropriately contained and labeled.
How can I make a small cleaning closet easier to use?
Reduce unnecessary contents, separate daily supplies from backups, give long tools their own zone, and place frequent-use items where they are easiest to reach. Then test the arrangement during actual cleaning and adjust the points where access breaks down.
What is the biggest mistake when organizing a small cleaning closet?
Adding storage before understanding the problem. A new container cannot fix overcrowding, poor access, unsuitable placement, or a lack of defined zones. Measure and organize the system first.
Related Guides
The Bottom Line
A small cleaning closet does not need to hold everything, and it does not need a large collection of organizers. It needs a clear system.
AUDIT → EDIT → MEASURE → SEPARATE → ZONE → MATCH → TEST → RESET
Start with what actually belongs there. Measure the usable space. Separate everyday supplies from backups. Give long tools and small tools appropriate zones. Add storage only when a specific problem remains. Then test the closet during real cleaning.
When every category has a logical home and the system is easy to reset, even a small cleaning closet can remain practical without becoming crowded.