
The easiest way to organize brooms, mops, and cleaning tools is to stop storing them as one loose group. First gather and reduce what you actually use. Then group tools by type and frequency of use, choose a storage zone, measure the available space, and install a storage method that keeps long handles vertical and easy to reach. Wet mops should have a separate drying path before they return to storage.
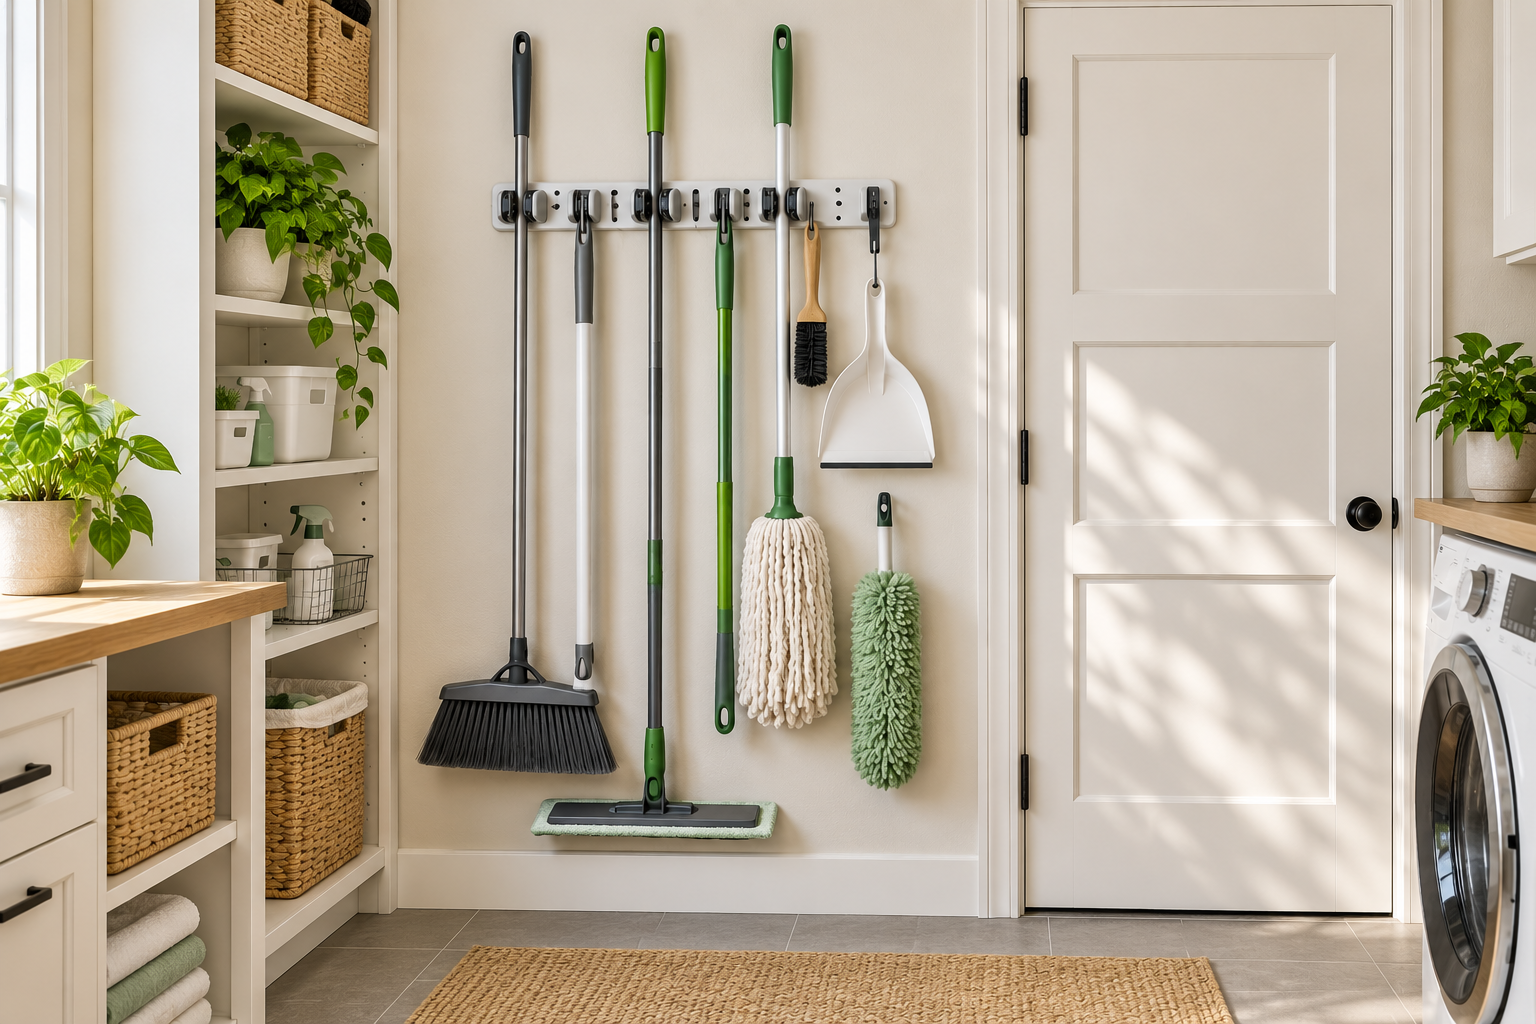
Brooms, mops, dusters, and cleaning tools are awkward because they are long, irregularly shaped, and often used at different times. If they are simply leaned together, the pile quickly becomes difficult to reach and easy to knock over.
The solution is not necessarily a larger closet. A better system gives each type of tool a defined place and uses vertical space whenever possible.
This guide walks through that process step by step, including what to do when you have very little storage space.
System at a Glance
Gather the tools first, remove what you do not need, group what remains, measure the available space, choose the right zone and storage method, install it securely, and create a simple reset routine.
Why Brooms and Mops Become So Hard to Store
Long-handled tools create a different storage problem from ordinary cleaning supplies. They need height, clearance, and enough space to remove one tool without disturbing everything around it.
A broom may need to be pulled straight out. A mop may need extra space while wet. A dustpan or small brush may be used frequently but needs much less space.
When all of these tools share one corner, the least convenient tool often ends up in front. That makes the whole group harder to use.
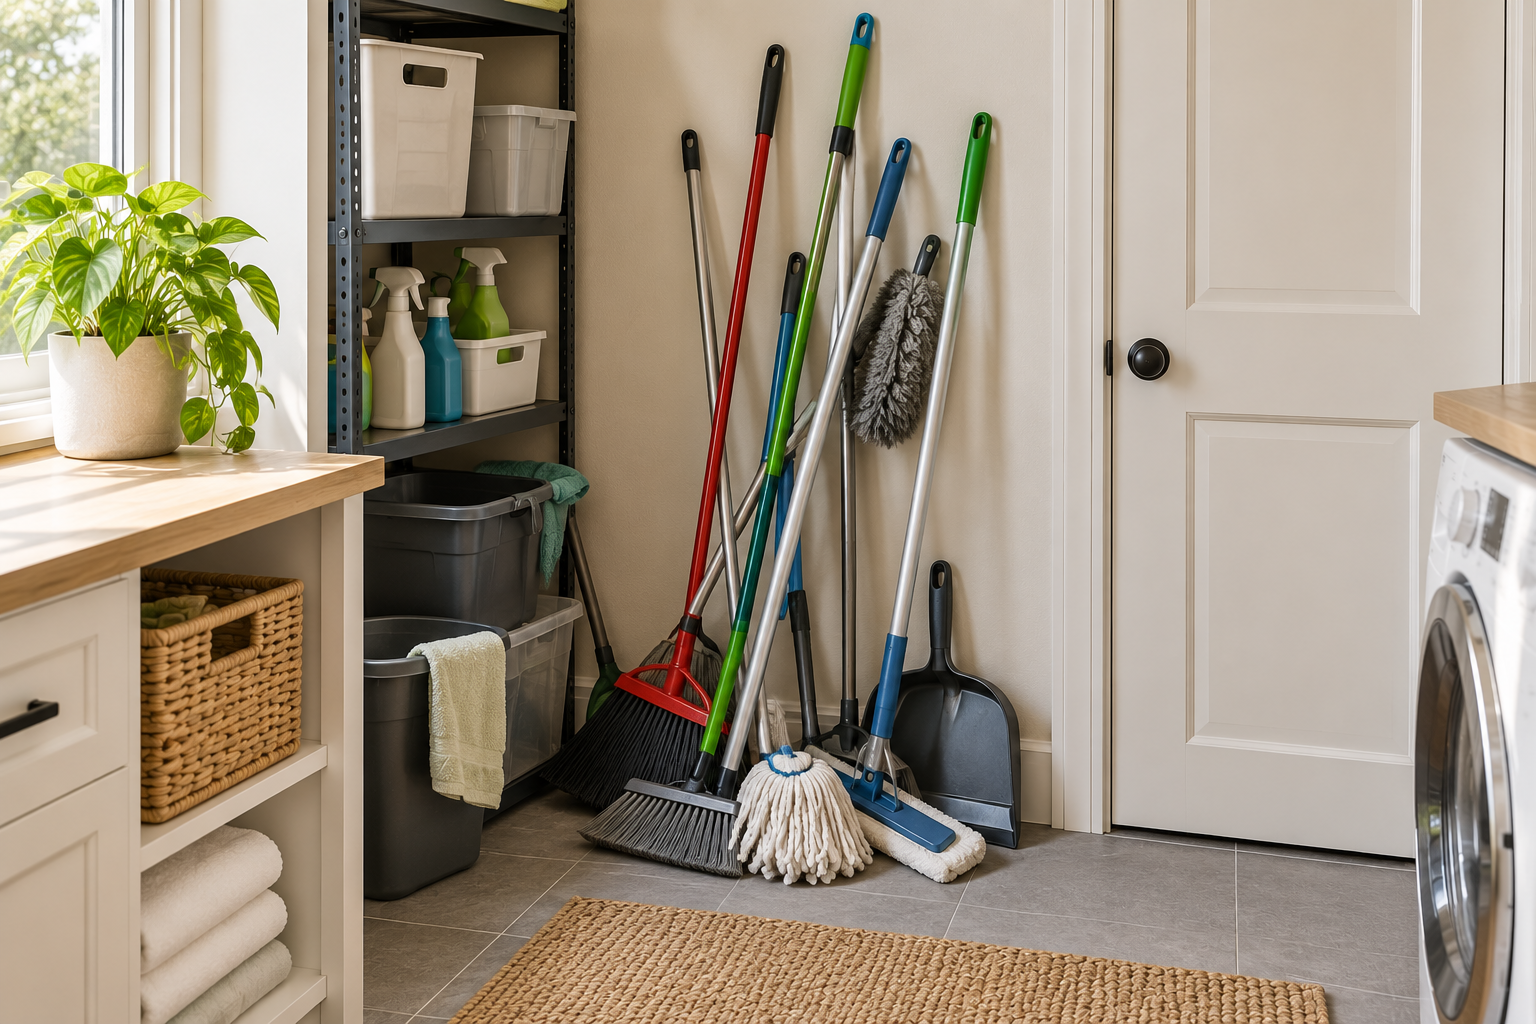
The real problem is usually access
Before buying another organizer, look at how the tools are being used. If you have to move three other tools to reach the mop, the storage system is creating unnecessary friction.
Design storage around the next action
Good cleaning-tool storage should make the next action obvious: reach, remove, use, dry when necessary, and return.
1. Gather All Your Cleaning Tools
Start by taking every cleaning tool out of its current storage areas. Check closets, laundry areas, utility rooms, kitchen corners, bathrooms, and other places where cleaning tools have collected.
Put everything together temporarily. This makes duplicates and rarely used tools much easier to spot.
What to gather
- Brooms
- Dust mops
- Wet mops
- Dusters
- Vacuum attachments and long cleaning tools
- Dustpans
- Hand brushes
- Scrub brushes
- Specialty cleaning tools
2. Reduce Duplicate and Unused Tools
Once everything is visible, decide what actually earns its storage space.
You may find multiple brooms that perform the same job, old dusters that are no longer useful, or specialty tools that have not been used in years.
Keep a tool if you use it regularly, it performs a specific job well, or replacing it would be inconvenient. The goal is not to own as few tools as possible. The goal is to avoid building a storage system around tools you rarely use.
3. Group Cleaning Tools by Type and Use
After reducing the collection, create practical groups. Grouping makes the eventual storage layout much easier to design.
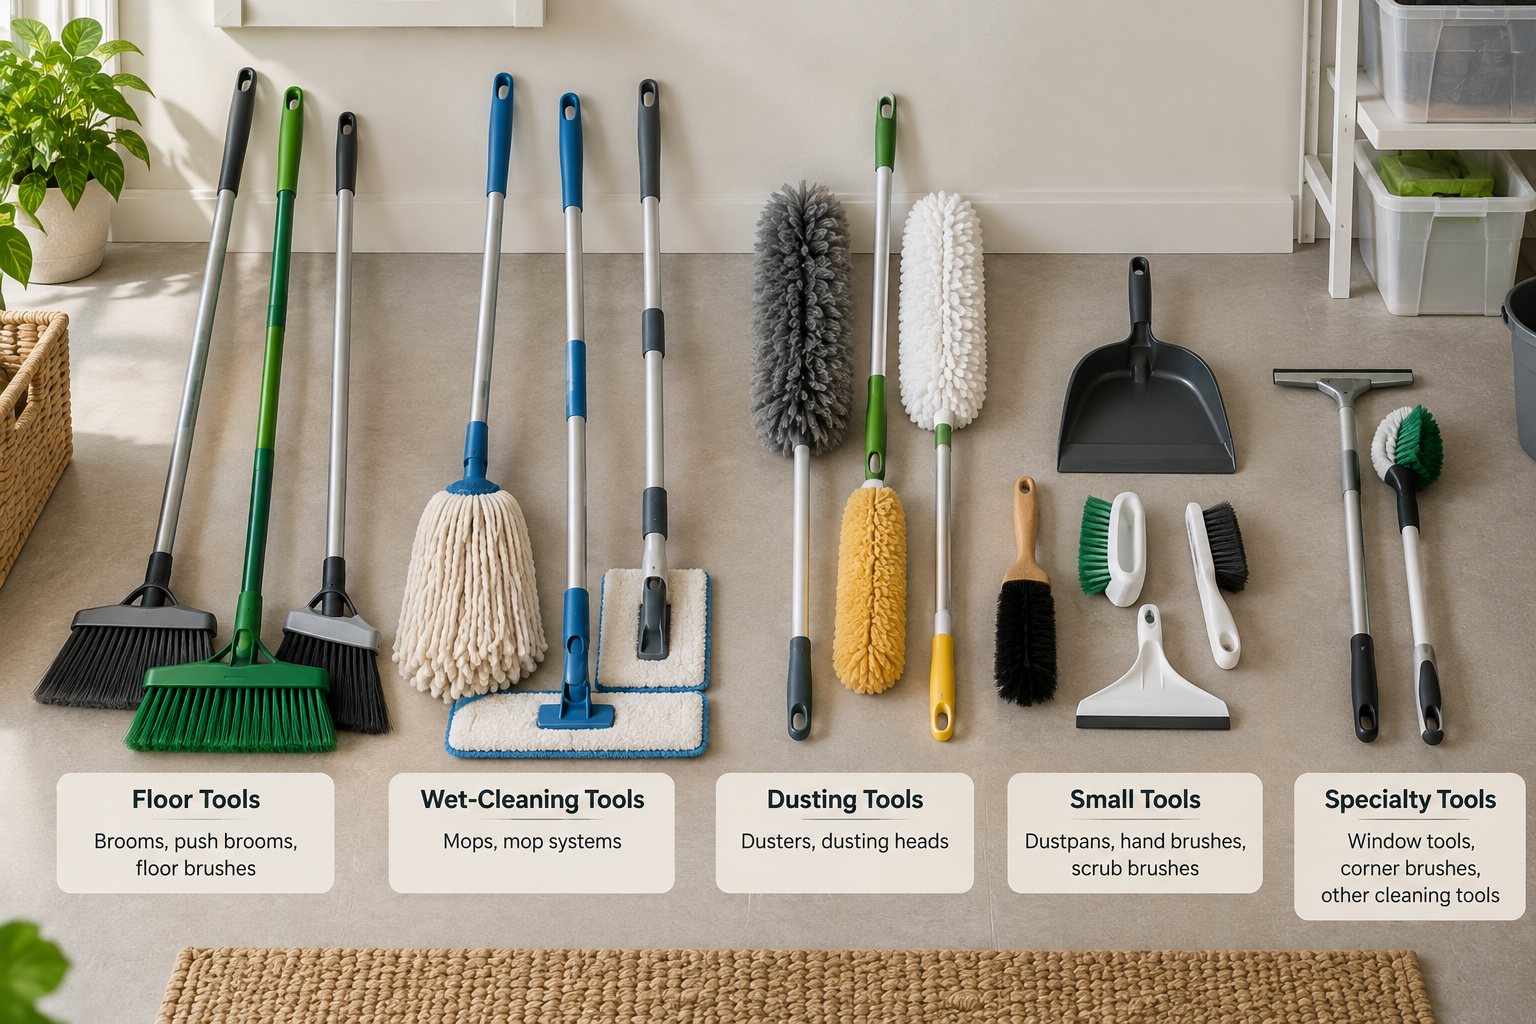
| Group | Examples | Storage priority |
|---|---|---|
| Floor tools | Brooms, dust mops, floor sweepers | Easy access |
| Wet-cleaning tools | Mops and related tools | Drying path first |
| Dusting tools | Dusters and extendable dusting tools | Vertical storage works well |
| Small tools | Dustpans, brushes, scrubbers | Hooks, bins, or small compartments |
| Specialty tools | Occasional-use cleaning tools | Can use less accessible space |
The most frequently used tools should generally receive the easiest access. Rarely used specialty tools can use less convenient space.
4. Choose the Right Storage Zone
You do not have to store every cleaning tool in one place. In a small home, distributing tools can create a better system.
Start by looking at where cleaning actually happens.
- A utility closet can hold the main collection.
- A laundry area can hold frequently used floor-cleaning tools.
- A cabinet can hold smaller cleaning tools.
- A suitable door or wall can provide vertical storage.
- A nearby zone can hold tools used repeatedly in one area.
Use this simple decision
If a tool is used frequently, store it where you can reach it without moving other tools.
If it is used occasionally, it can go in a less accessible part of the storage zone.
If it needs to dry, give it a temporary drying position before returning it to storage.
If your home does not have a dedicated cleaning closet, see how to organize cleaning supplies in a small space for a broader approach to distributing cleaning storage.
5. Measure Before Buying a Storage Organizer
Measure the actual storage zone before choosing a broom or mop holder. This prevents a common mistake: buying an organizer that fits the tools but not the space.
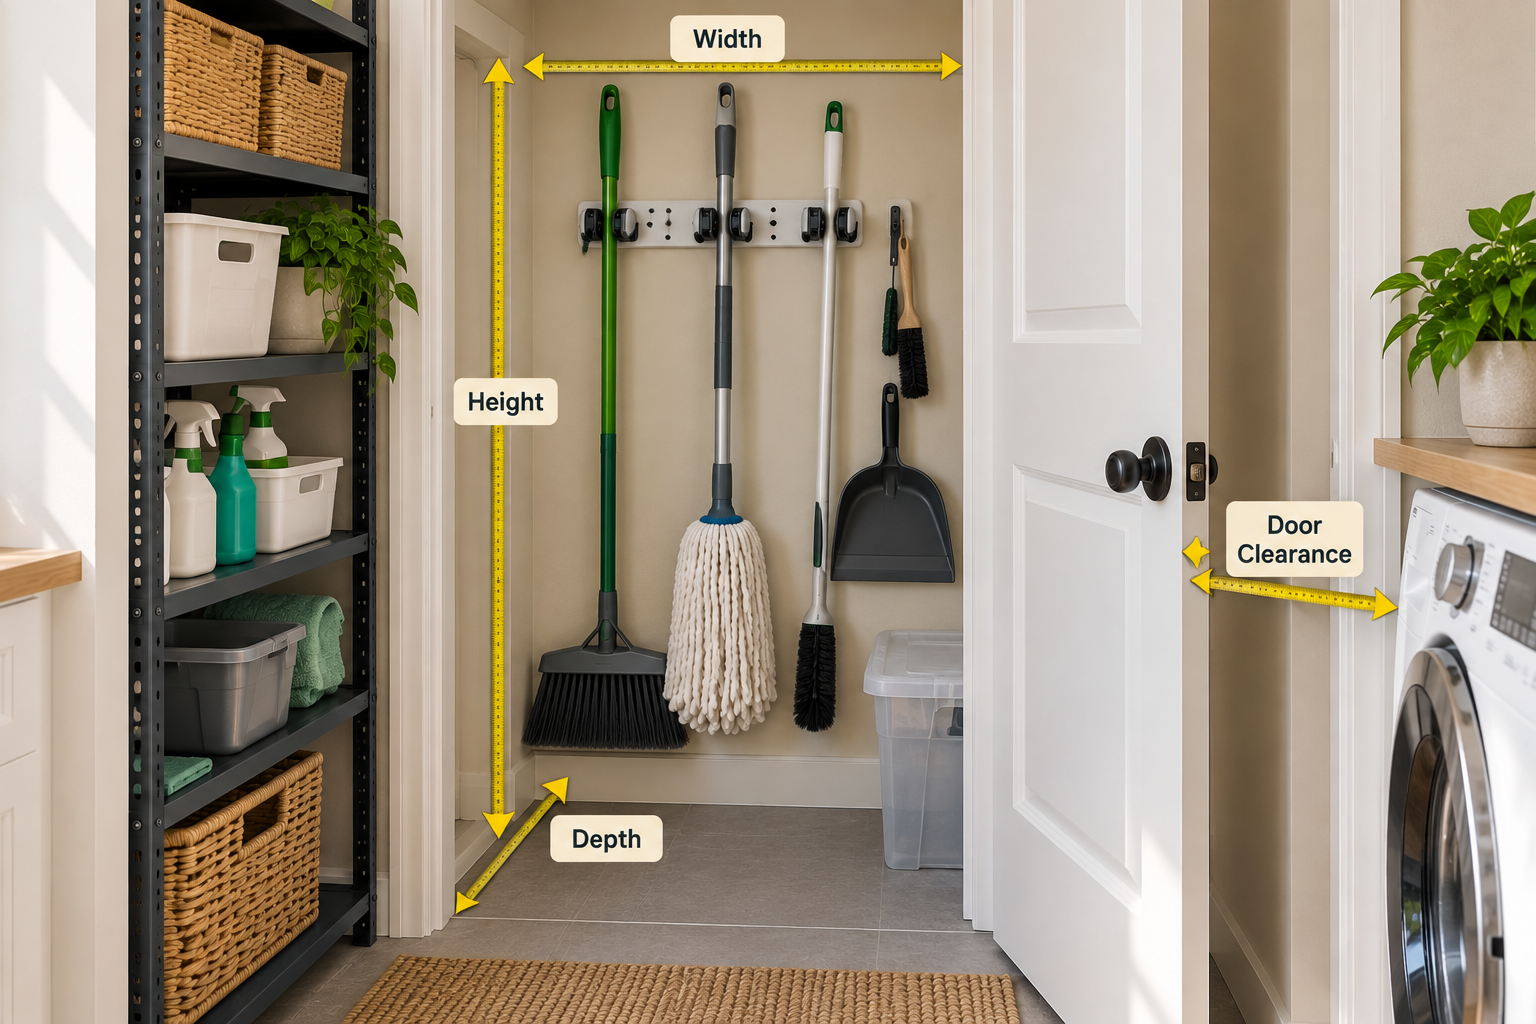
Measure these four things
- Width: How much wall or cabinet width is available?
- Height: Can long handles stand or hang without hitting shelves or ceilings?
- Depth: Will the stored tools interfere with nearby items?
- Clearance: Can the door open and can you remove each tool easily?
Also measure the handles of unusual tools if you are considering a clip-style holder. Product-specific organizers can have handle-size and weight limitations.
6. Choose the Right Storage Method
Once the space is measured, choose the storage method based on the zone rather than choosing an organizer first.
Wall-Mounted Holders
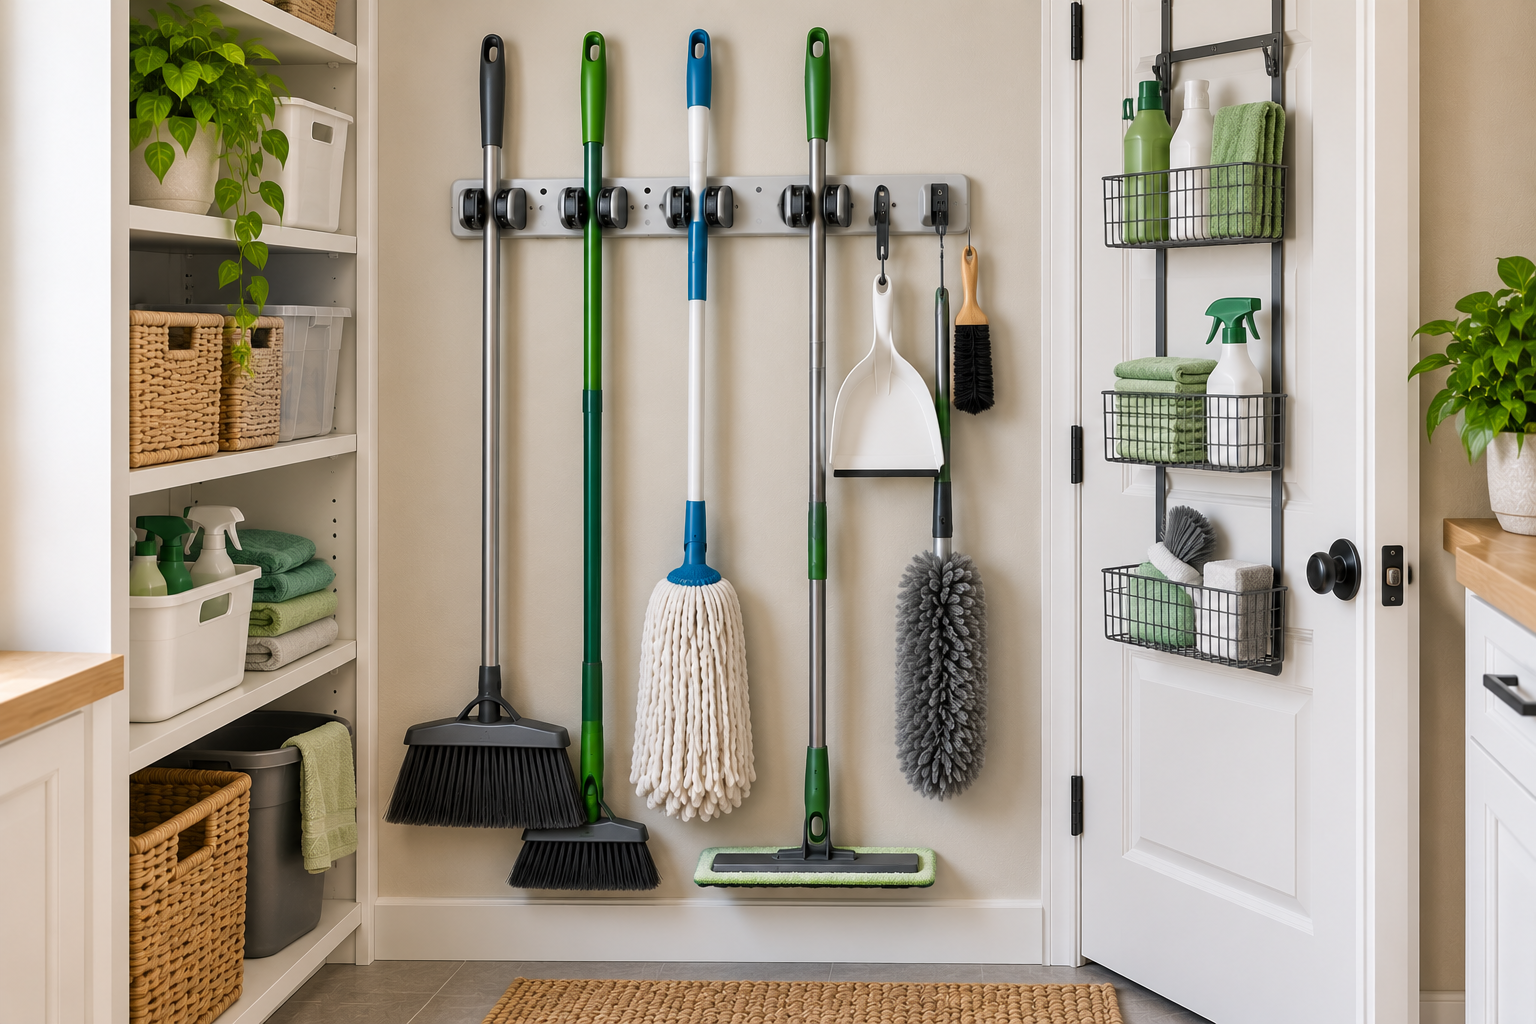
Wall-mounted holders are useful when floor space is limited. They can keep several long-handled tools upright or suspended and make the collection easier to see.
Hooks
Hooks work well for tools with suitable hanging points or compatible handles. They are also useful for dustpans and smaller tools.
Closet or Cabinet Storage
A closet or cabinet can work well when it already has enough vertical clearance. The key is preventing the tools from becoming one loose bundle.
Door Storage
The inside of a suitable door can turn unused vertical space into cleaning-tool storage. Check the door clearance before installing anything.
Freestanding Storage
A freestanding holder can be useful when drilling or wall installation is not practical. Make sure the unit is stable and does not obstruct a walkway.
Before you buy
- Check the available width, height, and depth.
- Check whether the mounting surface is suitable.
- Check handle compatibility.
- Check the manufacturer’s weight limit.
- Consider whether the tool can be removed without disturbing others.
- Consider where a wet mop will dry.
Command Broom and Mop Gripper
A compact option for storing compatible broom and mop handles vertically. This type of individual gripper can work well when you want each frequently used tool to have its own position.
Check the Command broom and mop storage option on AmazonAmazon Basics Wall-Mount Broom and Mop Holder
A larger wall-mounted approach can make sense when several long-handled tools need to share one organized zone. Check the current product specifications and mounting requirements before installation.
Check the Amazon Basics broom and mop holder on Amazon7. Keep Frequently Used Tools Easy to Reach
Storage should reflect frequency of use.
If you sweep every day, the broom should not be buried behind a rarely used specialty tool. If the mop is used several times a week, it should have an obvious position.
Keep the tools you reach for most often in the easiest positions. Use higher, deeper, or less convenient areas for occasional-use tools.
8. Give Wet Mops a Drying Path
A wet mop should not immediately disappear into a closed storage space. It needs time and airflow to dry before long-term storage.
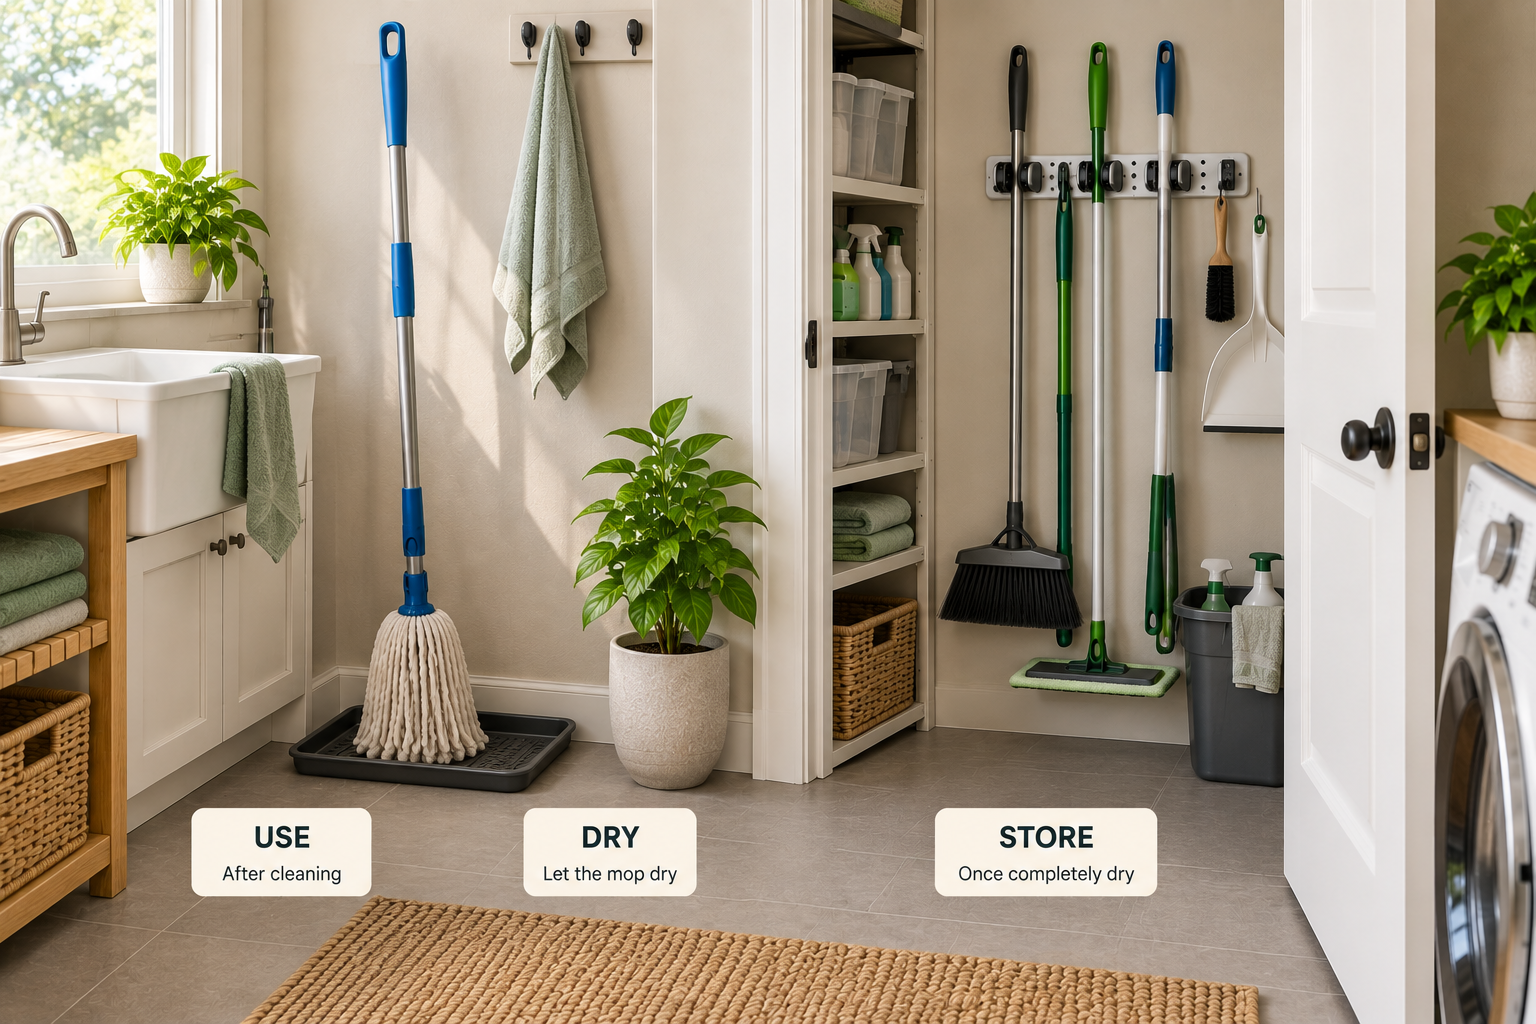
Give the mop a suitable place to dry where it will not block a walkway or damage a surface. Once it is completely dry, return it to its normal storage position.
This small distinction makes the storage system more practical because the space serves both the cleaning process and the final storage position.
9. Organize Dustpans, Brushes, and Smaller Tools
Smaller cleaning tools often become the second layer of clutter around brooms and mops. They should have their own small zone rather than hanging randomly from the same area.
- Hang a dustpan beside the tools it works with.
- Keep frequently used brushes at an easy-to-reach height.
- Use a small container for loose specialty tools.
- Group tools that are used together.
The goal is to make each tool easy to identify and return. You should not need to search through a pile to find a small brush.
10. What to Do When You Have Almost No Space
Very small spaces require you to use vertical surfaces and distribute storage intelligently.
Start with the tools you use most often. Give those tools the easiest available positions.
Then look for overlooked vertical space inside a suitable closet, cabinet, utility area, or door.
Choose the solution based on the constraint
If floor space is the problem: Move long-handled tools upward rather than outward. Wall-mounted holders, hooks, or suitable door storage can reduce the amount of floor area occupied by the collection.
If wall space is limited: Use the existing closet or cabinet more deliberately. Group tools by frequency and keep occasional-use items out of the prime access zone.
If you have no dedicated cleaning area: Distribute tools according to where they are actually used. A single oversized storage zone is not always necessary.
For a broader small-space cleaning strategy, see how to organize a small cleaning closet .
11. Common Broom and Mop Storage Mistakes
Keeping everything in one loose pile
This creates unnecessary friction. One tool often has to be moved to reach another.
Buying an organizer before measuring
The organizer may fit the tools but fail to fit the wall, cabinet, door, or clearance around it.
Ignoring wet-tool drying
A mop needs a drying stage. Returning it immediately to a closed storage area defeats the purpose of an organized system.
Giving every tool equal access priority
Frequently used tools should be easier to reach than specialty tools.
Using a storage system that cannot support the tools
Always follow the specific manufacturer’s mounting instructions, handle requirements, and weight limits. Do not assume that every holder works with every broom or mop.
12. Maintain the Cleaning-Tool Zone
A good storage system should be easy to reset.
After cleaning, return dry tools to their assigned positions. Put dustpans and brushes back with the tools they support. Keep the most frequently used tools in their easiest positions.
Use
Remove the tool you need and use it for the cleaning task.
Clean & Dry
Clean or rinse the tool when necessary and let wet tools dry properly before storage.
Return
Return each tool to its assigned position and clear anything that has started collecting on the floor.
If the same tool repeatedly gets left in the wrong place, treat that as useful information. Its storage position may be inconvenient. Move it closer to where it is actually used.
Cleaning Tool Storage Safety
Cleaning tools should be stored so they do not create a trip hazard or interfere with normal movement through the home.
- Secure wall-mounted organizers according to the manufacturer’s instructions.
- Follow product-specific weight and handle-size limits.
- Do not place tools where they can fall into a walkway.
- Keep wet tools positioned so dripping water does not damage nearby surfaces.
- Keep cleaning chemicals stored separately and safely when applicable.
- Check mounted organizers periodically for looseness or damage.
Quick Answers
What is the best way to store brooms and mops?
Store them vertically or on a suitable wall-mounted system whenever possible. Group frequently used tools together and make sure wet mops have a drying path before they return to storage.
How do I organize brooms and mops in a small space?
Use vertical space, measure the available wall or closet area, and give each long-handled tool a defined position. Keep frequently used tools easiest to reach and use less accessible space for occasional tools.
Should brooms and mops be stored together?
They can share a storage zone if the system keeps them separated and accessible. Wet mops should have a drying stage before they return to the main storage position.
How do you store cleaning tools without a cleaning closet?
Distribute tools into practical zones such as a laundry area, suitable cabinet, utility space, or vertical wall or door storage. Store each tool near where it is most often used when that makes the system easier to maintain.
Should a wet mop be stored immediately after use?
No. Give the mop an appropriate place to dry first, then return it to its normal storage position once it is completely dry.
Related Guides
Final Thought
Broom and mop storage becomes much easier when you stop treating every cleaning tool as one collection.
Gather everything first. Reduce what you do not need. Group the remaining tools by type and use. Then measure the space before choosing a storage method.
The final system should make the next action obvious: reach, use, dry when necessary, and return.
When each tool has a clear position and frequently used tools are easy to reach, even a small cleaning area can stay orderly without requiring a large closet.