
A small laundry room does not need more storage everywhere. It needs the right storage in the right places. When the washer and dryer already consume most of the room, adding shelves, baskets, carts, and bins without a plan can make the space harder to use. The better approach is to organize the room around the way laundry actually moves through it.
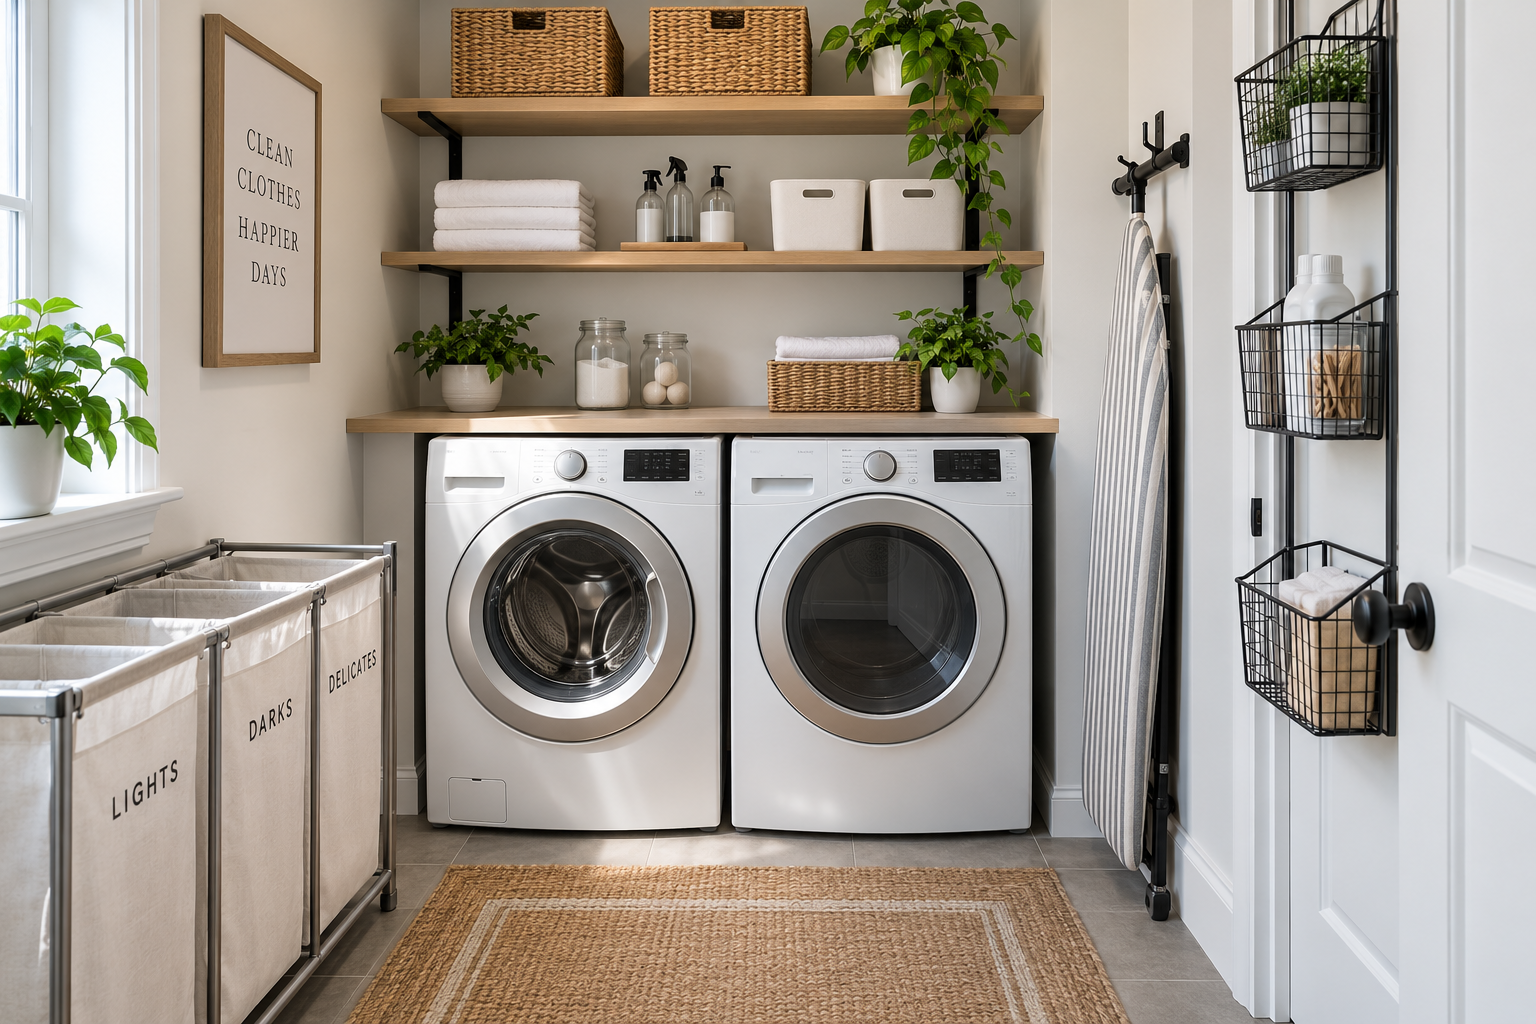
Think about the basic laundry sequence: Sort → Wash → Dry → Fold or Hang → Move → Put Away.
Then give the supplies, tools, and transition points along that path a practical home.
AUDIT → MEASURE → MAP → ZONE → MATCH → TEST → RESET
You do not need to use every wall, buy a matching set of containers, or turn the laundry room into a storage closet. You need a system that makes the room easier to use.
1. Start With a Laundry-Room Audit
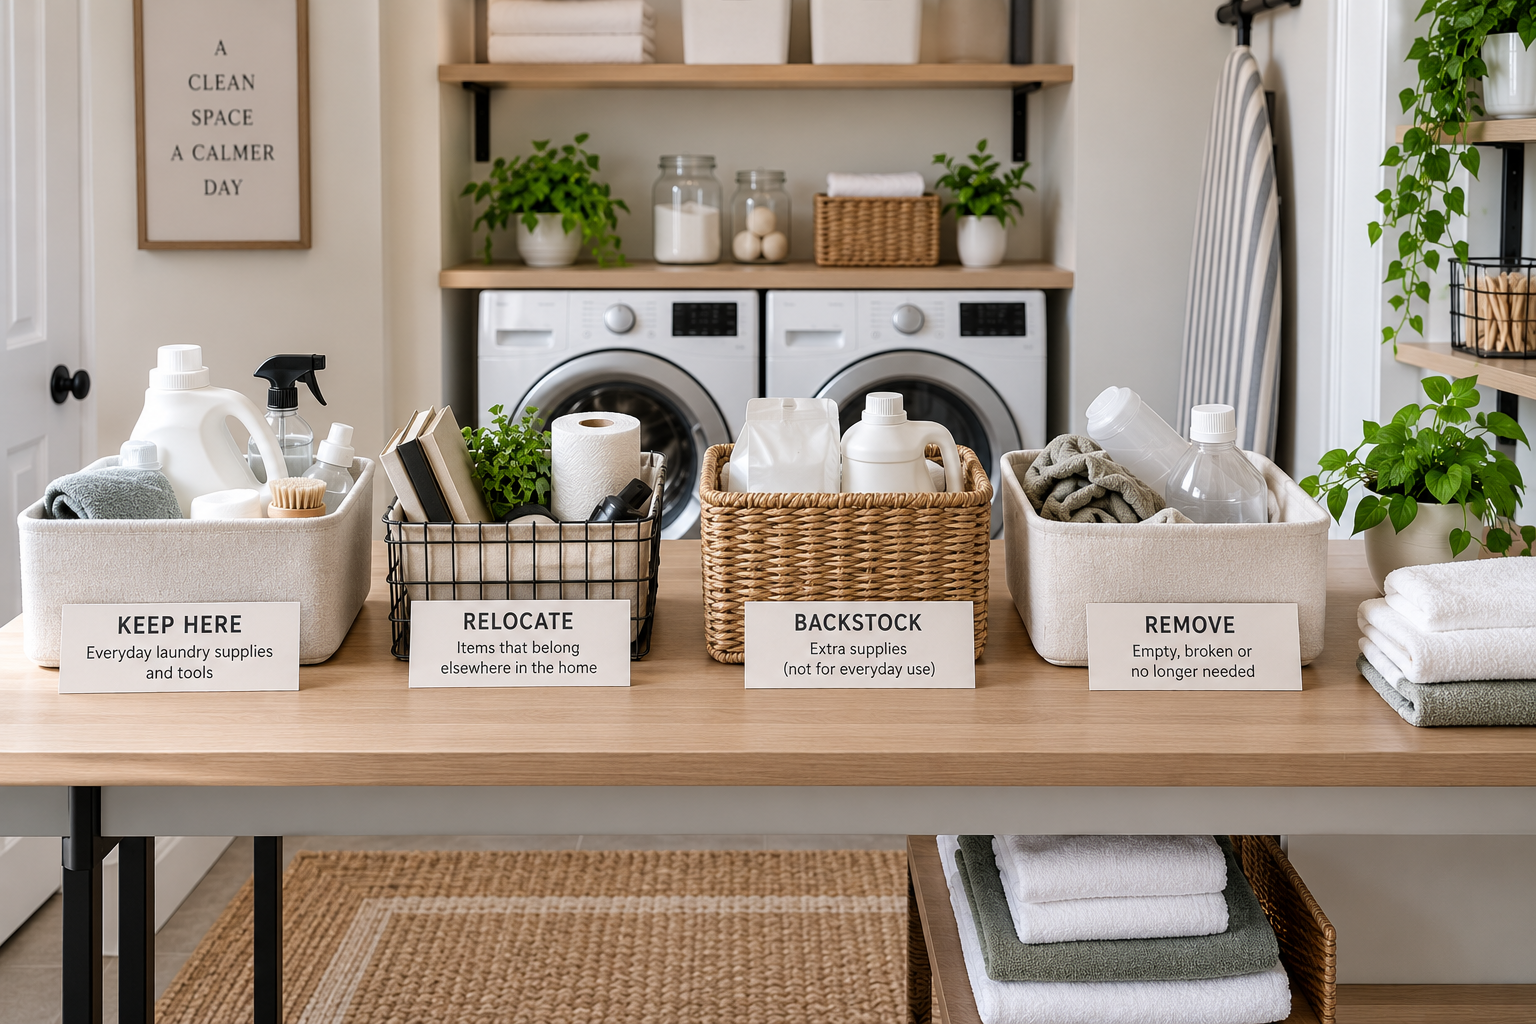
Before buying anything, remove the items currently sitting on shelves, machines, floors, counters, and random corners.
Keep Here
Items that genuinely support your laundry routine.
Relocate
Items that belong somewhere else in the home.
Back-stock
Extra supplies that are useful but do not need prime storage space.
Remove
Empty containers, broken tools, unnecessary duplicates, and items with no useful role.
Then ask:
Does this item support the laundry workflow, or is the laundry room simply storing it because there was nowhere else to put it?
This matters even more in a small room because every occupied surface competes with something else.
Our rule: Do not organize the clutter before deciding what deserves the space.
2. Measure the Space Before Buying Storage
A small laundry room should be measured as a working space, not just as a rectangle.
- Wall width
- Usable wall height
- Shelf depth
- Floor width
- Floor depth
- Gaps beside appliances
- Door width
- Door swing
- Available door surface
- Space above the appliances
- Relevant outlets, plumbing, and appliance connections
- Dryer venting and other installation-related areas
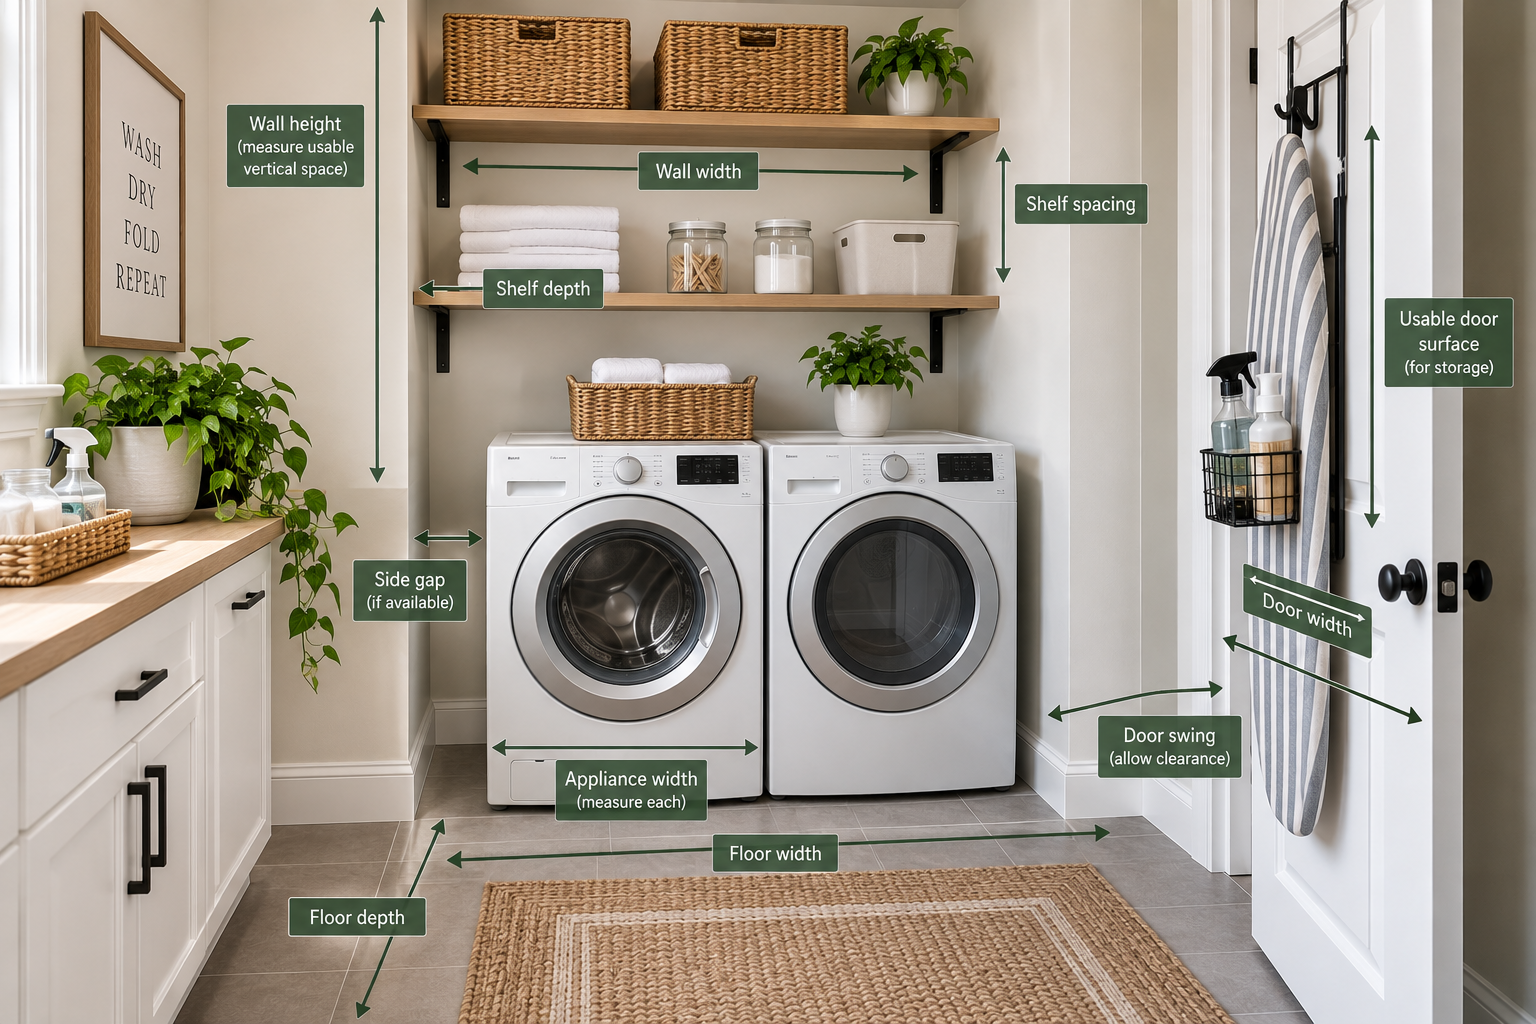
Also measure the appliances themselves.
Washer and dryer dimensions, installation requirements, and required clearances can vary by model and configuration. The manufacturer’s installation instructions should take priority over a generic clearance number.
Never use organization storage to consume space required for appliance access, ventilation, connections, servicing, or normal door movement.
3. Map the Laundry Workflow
This is where a small laundry room becomes easier to organize. Before deciding where anything should go, map what actually happens in the space.
Laundry Arrives
Where do dirty clothes enter the room?
Laundry Is Sorted
Does sorting happen here or somewhere else?
Washing
Where are the supplies used for a normal load?
Drying
Where do items go when they cannot go into the dryer?
Folding or Hanging
Is there a useful surface or hanging location?
Clean-Laundry Transition
Where does clean clothing go before leaving the room?
Put Away
Where does the laundry ultimately go?
Where does the laundry process currently create a pile?
That pile is often more important than the lack of storage.
If clean clothes repeatedly land on the washer because there is nowhere else to place them, the problem may not be that you need more shelves. You may simply be missing a useful transition zone.
4. Create Zones Based on the Workflow
Once you understand the movement of laundry, create zones. You do not need six separate pieces of furniture. A zone can be a shelf section, basket, drawer, hook, or clearly defined area.
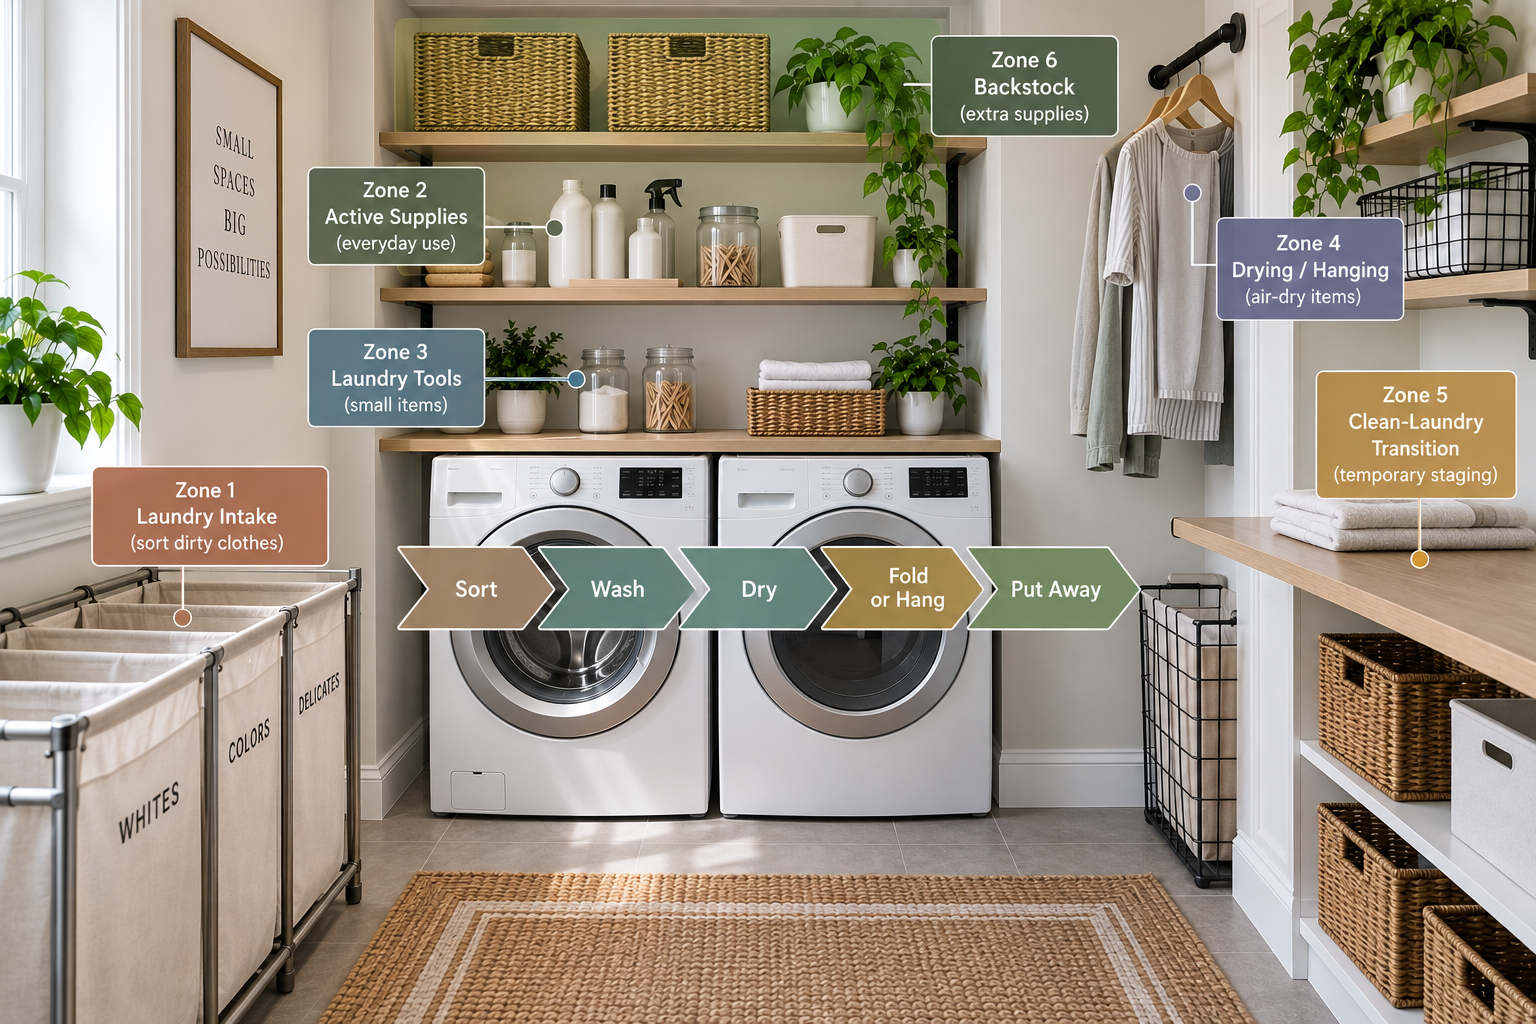
Zone 1 — Laundry Intake
This is where dirty laundry arrives.
Depending on your household, this could be a hamper, sorting basket, collapsible basket, or simply a defined floor location. The important part is that dirty laundry has a predictable destination.
Zone 2 — Active Laundry Supplies
Keep products used most frequently within easy reach.
Frequency matters more than making every laundry product look like it belongs together. Supplies used during most loads deserve easier access than occasional products.
Zone 3 — Laundry Tools
This zone can hold smaller tools such as laundry bags, garment-care tools, drying accessories, lint-removal tools, and small cleaning tools used specifically in the laundry area.
Zone 4 — Drying and Hanging
If some clothes need to air dry, give that process a defined location.
Depending on the room, this might be a suitable rod, wall-mounted drying equipment, a fold-down solution, or another space-appropriate option. The important point is that the drying area should not interfere with normal movement.
Zone 5 — Clean-Laundry Transition
This zone is frequently overlooked.
If clean clothes have nowhere to go, they tend to become a pile. You may need only a temporary basket or small surface.
Clean clothes should have somewhere to go next. A temporary transition zone can prevent the washer, dryer, or floor from becoming the default staging area.
Zone 6 — Back-stock
Extra detergent or other supplies do not necessarily need prime real estate.
Store back-stock separately from the products you use every load. This keeps the active zone easier to see and reach.
5. Match Storage to the Actual Constraint
Only after the room has been audited, measured, and zoned should you choose organizers.
Identify the problem first. Choose the organizer second.
| Problem | Space to consider | Possible direction |
|---|---|---|
| Limited floor space | Wall or upper space | Appropriate wall storage |
| Unused wall | Vertical surface | Shelves or suitable wall storage |
| Narrow gap | Side clearance | Slim storage, if access remains unobstructed |
| Unused door surface | Door | Door-compatible storage |
| No folding surface | Suitable wall or temporary area | Fold-down or temporary solution |
| Too many visible supplies | Suitable contained storage | Contain only what benefits from containment |
Do not automatically put every laundry item into a bin. The organizer should solve a specific problem.
6. Use Vertical Space Without Creating New Problems
Vertical storage can be valuable in a small laundry room because walls and suitable areas above appliances can provide storage without consuming additional floor footprint.
But vertical space is useful only if it remains usable.
Items used every load should not be placed where they require awkward reaching. Reserve higher storage for suitable items that are used less frequently and can be safely stored there.
Remember: The highest shelf does not automatically deserve the most important supplies.
7. Make the Most of Different Small Laundry Layouts
Side-by-Side Machines
Potential organization areas include the wall above the machines, suitable side gaps, nearby shelves, door space, and a defined folding or transition area.
Keep appliance doors, connections, and required working space unobstructed.
Stacked Washer and Dryer
Stacked machines create more vertical opportunity but can make upper storage harder to reach.
Keep frequently used supplies in accessible areas and reserve higher locations for suitable, less frequently used items.
Laundry Closet
A laundry closet needs particularly careful planning. The usable organization areas may include the door surface, side walls, upper wall space, and narrow adjacent areas.
Treat the closet as both a storage area and an appliance-working space. Follow the installation and clearance requirements for your specific washer and dryer rather than relying on a universal measurement.
Laundry Nook or Apartment Setup
If laundry occupies a small corner rather than a dedicated room, prioritize the parts of the workflow that actually happen there.
- Active laundry supplies
- Laundry intake
- Drying needs
- Clean-laundry transition
- Occasional supplies
You do not need to recreate a full laundry room. You need the smallest system that supports your actual routine.
8. Organize Laundry Supplies Safely
Laundry organization should never sacrifice safe storage.
Keep laundry products in their original containers and follow their product labels.
If children are in the home, laundry products should be stored securely and out of their sight and reach. Laundry packets in particular should remain in their original containers rather than being transferred into decorative containers.
The goal is not to make every bottle look uniform. The goal is to keep supplies organized, accessible to the right person, and stored safely.
9. Run the Laundry Retrieval Test
Now test the system using a normal laundry task.
For example, imagine starting a regular load of laundry and follow the entire process through the storage system.
SEE
Can you identify the supplies you need?
REACH
Can you reach them without moving unrelated items?
REMOVE
Can you take them out without disturbing the zone?
USE
Can you use them normally?
RETURN
Can you put everything back without rebuilding the area?
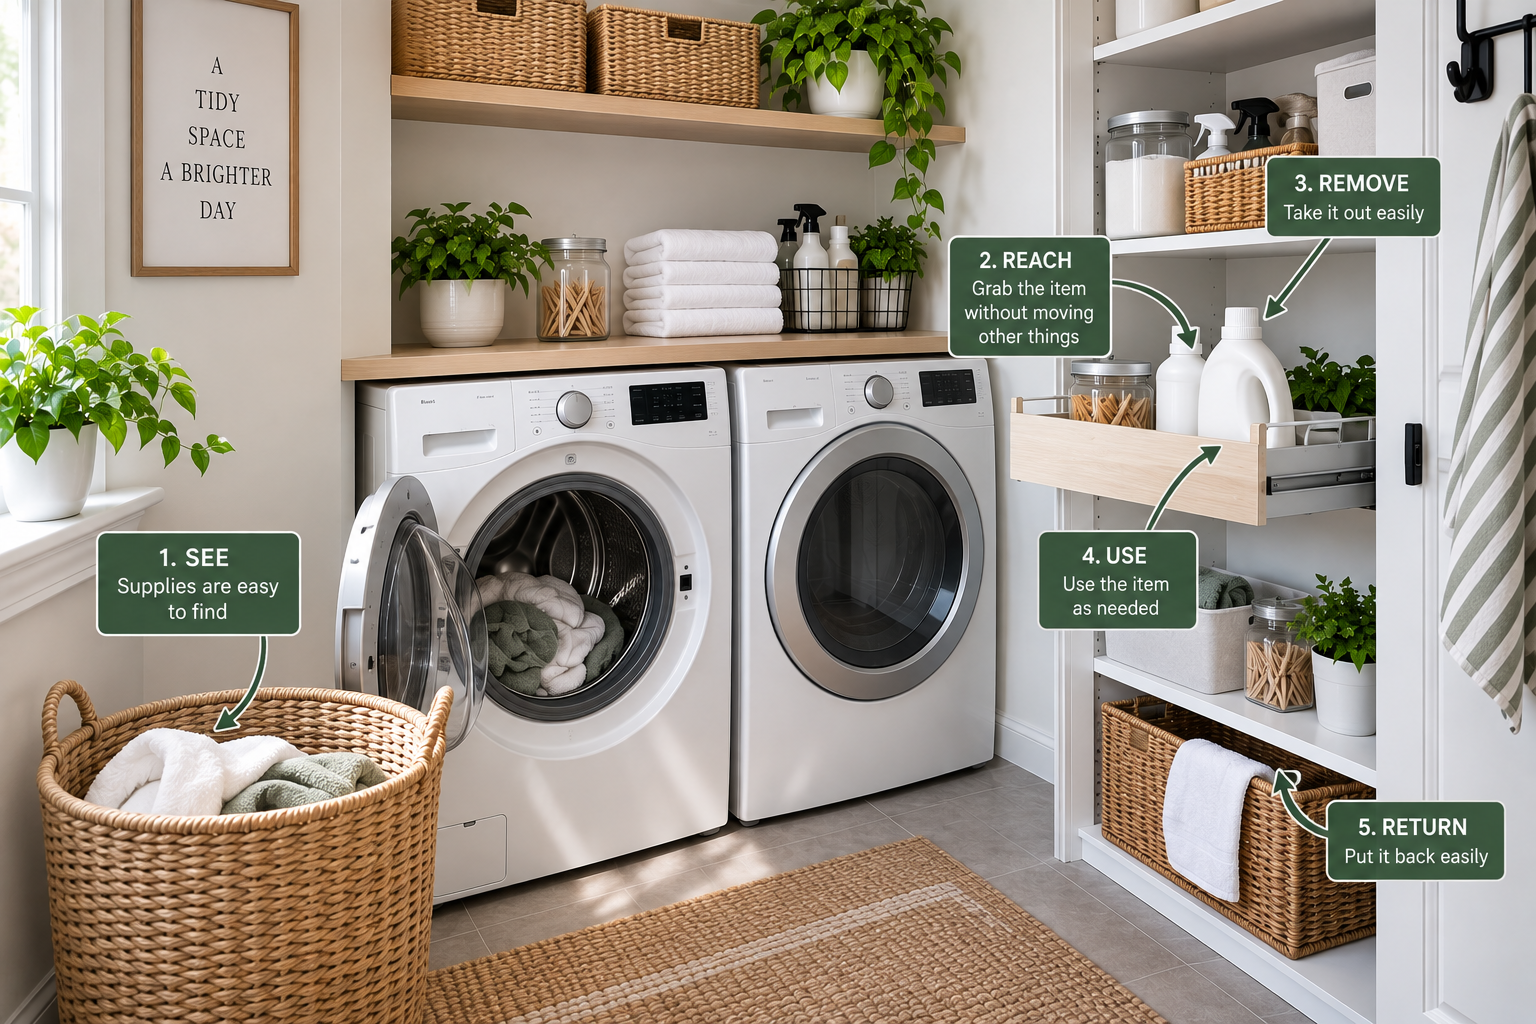
SEE → REACH → REMOVE → USE → RETURN
If the answer is no at any point, the organization system needs adjustment.
The purpose of organization is not to create a photograph-ready room. It is to reduce the effort required to use the room.
10. Fix the Biggest Friction Point First
You do not need to reorganize the entire room every time something feels inconvenient. Find the biggest recurring problem first.
| What keeps happening? | Possible diagnosis |
|---|---|
| Detergent bottles are always in the way. | Active supplies may not have a defined zone. |
| Clean clothes keep piling up. | There may be no clean-laundry transition point. |
| Baskets block the doorway. | The intake zone may be consuming critical floor space. |
| Small laundry tools disappear. | Tools may not have a defined home. |
| Shelves are full but the room still feels cluttered. | Storage may be holding items that do not belong in the room. |
This is the difference between adding storage and solving storage friction.
11. Reset the System
A small laundry room stays organized when the reset is easy.
- Return active supplies after use.
- Remove empty containers.
- Return laundry tools to their homes.
- Move clean laundry onward.
- Reposition temporary baskets when appropriate.
- Keep the main working surfaces clear.
- Review back-stock when it starts taking over active storage.
You should not need a complicated maintenance routine. If the system requires constant effort to maintain, revisit the zones.
12. The Complete Small Laundry Room System
A useful small laundry room system can be reduced to seven decisions:
AUDIT
Remove what does not belong.
MEASURE
Understand usable space and appliance constraints.
MAP
Follow the actual laundry workflow.
ZONE
Give important workflow steps a practical home.
MATCH
Choose storage based on the specific constraint.
TEST
Run a normal laundry task through the system.
RESET
Make returning everything easier than leaving it out.
If you are organizing several small areas of your home, you can also explore our small-space organization guides for related systems.
Frequently Asked Questions
How do you organize a very small laundry room?
Start by removing items that do not belong, measuring the usable space, mapping your laundry workflow, and creating zones for the supplies and tasks you actually perform. Then choose storage based on the specific space constraint rather than buying organizers first.
How do you organize a laundry closet?
Treat the closet as both a storage space and an appliance-working space. Use suitable vertical and door areas where possible, keep frequently used supplies accessible, and follow the manufacturer’s installation and clearance requirements for the washer and dryer.
How do you organize a small laundry room without cabinets?
Use usable walls, door surfaces, suitable shelves, baskets, hooks, or other storage that fits the room’s actual geometry. Start by deciding what needs to be stored and measuring the available space before choosing an organizer.
Where should laundry detergent and supplies go?
Keep frequently used supplies in an accessible zone while storing less frequently used back-stock separately. Laundry products should remain in their original containers and be stored safely according to the product label, especially where children may have access.
How do you use vertical space in a small laundry room?
Use appropriate wall or upper storage to move suitable items off the floor, but keep frequently used items within comfortable reach. Do not use storage in a way that interferes with appliance operation, ventilation, connections, or required clearances.
How do you organize a laundry room with stacked machines?
Use the vertical space around the machines while keeping the appliance working area clear. Place frequently used supplies where they are easy to reach and reserve higher areas for suitable, less frequently used items.
What should you measure before buying laundry-room storage?
Measure available width, height, depth, floor area, appliance dimensions, door swing, gaps, and relevant connections. Also account for the appliance manufacturer’s required clearances and installation requirements.
A small laundry room does not need to hold everything. It needs to support the work you actually do there.
Start with what belongs, measure what you have, map the workflow, create practical zones, and choose storage only after you understand the problem. Then test the system through a normal load of laundry.
If something keeps getting in the way, change the system—not simply the container.